Have you ever scoured store shelves for hours, only to find generic drinkware that lacks personality and charm? Finding a truly unique, heartwarming present can be frustrating, especially when you want something that perfectly captures a specific “girly” aesthetic without looking mass-produced. Whether you are crafting for a friend or treating yourself, painted mugs girly designs offer the perfect solution to transform plain ceramic into a cherished, personalized keepsake.
Creating personalized painted mugs offers a thoughtful and unique gift that perfectly combines artistic expression with practical use, allowing you to design charming, feminine pieces that truly resonate with the recipient’s style. This creative approach to custom girly mugs ensures every sip is accompanied by a touch of affection, utilizing specific techniques like hand-painting florals or applying gold accents to achieve a professional, bespoke look.
Drawing from comprehensive analysis of current crafting trends and proven durability standards for ceramic art, this guide eliminates the guesswork of DIY drinkware. You will discover nine distinct, achievable design ideas ranging from elegant watercolors to whimsical quotes, along with the essential safety tips for using food-safe paints. Get ready to master the art of mug decoration and create lasting gifts that are as practical as they are beautiful.
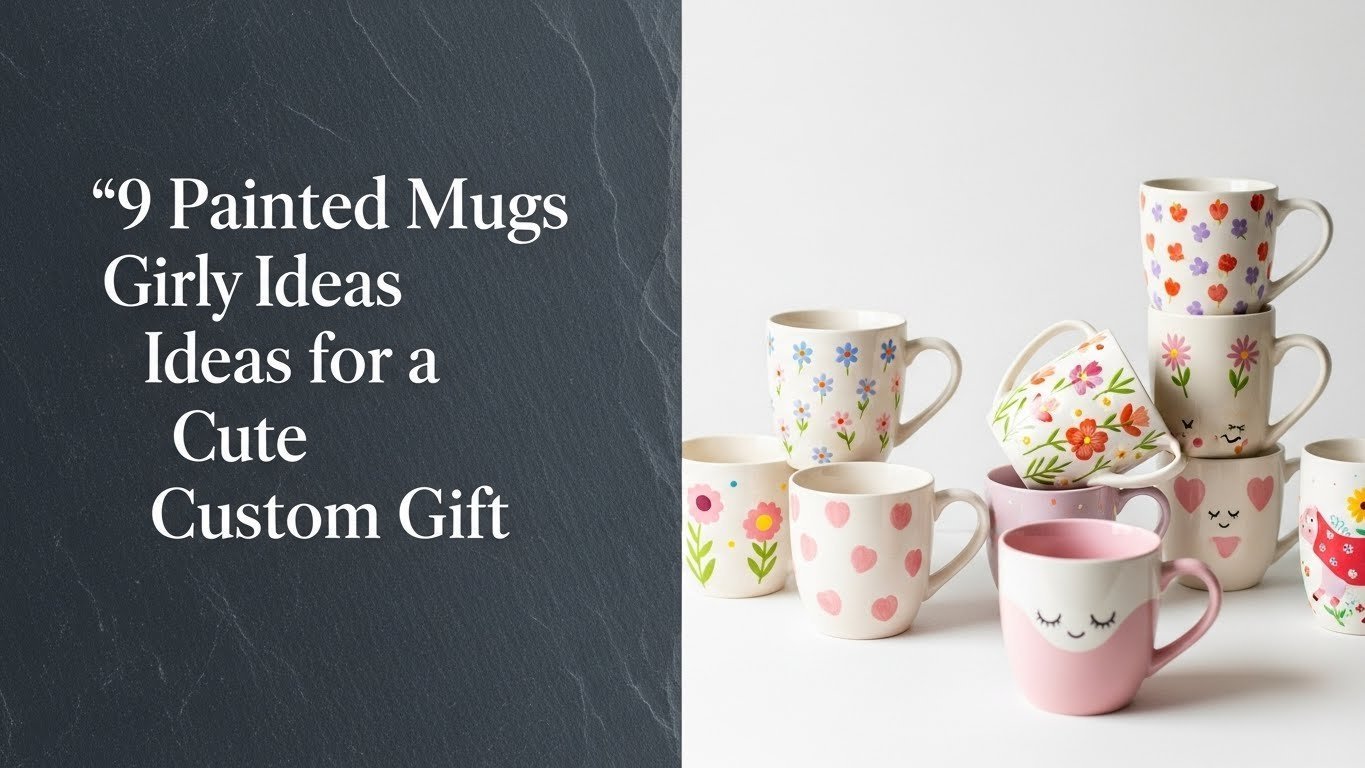
Unleash Your Creativity: How to Craft 9 Painted Mugs Girly Designs in 2026
[Direct Answer]: Crafting painted mugs girly designs allows you to break free from the limitations of store-bought gifts by infusing your own artistic flair into everyday objects. By utilizing the right ceramic painting supplies and following proper curing methods, you can transform simple blank mugs into aesthetic painted mugs that serve as durable, functional art.
Many of us struggle to find gifts that feel genuinely personal. A store-bought mug often feels like a last-minute thought, but a hand-painted creation tells a story of effort, care, and attention to detail. This guide is designed to bridge the gap between inspiration and execution, providing you with actionable steps to create cute painted mugs that rival professional pottery. Whether you are a complete beginner or an experienced crafter, utilizing food-safe paints ensures your creations are not only visually stunning but safe for daily coffee or tea rituals. By focusing on feminine painted mugs, we tap into a diverse range of styles—from elegant floral mugs to playful patterns—giving you the tools to express creativity that transforms mugs into meaningful tokens of affection.
Craft Your Perfect Gift: 9 Painted Mugs Girly Ideas for Every Style in 2026
[Direct Answer]: To craft the perfect painted mugs girly gift, you need a curated selection of mug painting ideas that cater to different skill levels and aesthetic preferences. This section provides a comprehensive list of designs, from simple polka dot pop patterns to intricate floral watercolor mugs, ensuring you find the perfect match for your artistic vision.
Before diving into the specific projects, it is essential to understand that the success of your DIY mug painting project lies in the preparation and materials. Using high-quality acrylic paint for mugs or specialized paint pens can make the difference between a design that washes off and one that lasts for years. We will explore how to decorate ceramic mugs using various techniques, each chosen to highlight specific entity attributes like elegance, whimsy, or modern chic. These custom painted mugs are not just crafts; they are personalized gifts ideas waiting to happen. Below, you will find detailed instructions for nine distinct styles, helping you create personalized mugs that anyone would be thrilled to receive.
1. Paint a Floral Watercolor Mug for Delicate Artistry

Pin this delicate floral mug idea to your ‘DIY Gifts’ board!
Creating delicate floral mugs brings a touch of nature’s beauty to your morning routine. By using watercolor ceramic paints, you can achieve a soft, translucent effect that mimics traditional watercolor art on paper. This style perfectly embodies the painted mugs girly aesthetic, utilizing hand painted artistic mugs techniques to produce feminine coffee cups that feel sophisticated and serene.
Supplies Needed
- 1 blank white ceramic mug (dishwasher-safe, oven-safe quality)
- Food-safe ceramic watercolor paint set (non-toxic, transparent pigments)
- Fine-tip paint brushes (sizes 0-2)
- Small water cup for rinsing brushes
- Paper towels or cloth
- Rubbing alcohol (for mug prep)
- Sealant/glaze for painted mugs (oven-cure, clear, food-safe)
Step-by-Step Directions
- Prepare the mug: Clean thoroughly with rubbing alcohol and let dry completely. This removes oils that can prevent paint adhesion.
- Sketch light floral outlines: Use a very light pencil or a water-soluble marker for faint flower and leaf shapes on the mug surface.
- Apply base colors: Using dilute ceramic watercolor, paint the lightest shades of petals and leaves, allowing them to blend naturally.
- Layer for depth: Once dry, add darker shades and details to create dimension and texture within the flowers.
- Outline subtly: If desired, use a very fine brush and a slightly darker paint to define petal edges or leaf veins.
- Dry and cure: Allow the paint to air dry for at least 24 hours. Follow paint manufacturer’s instructions for oven-curing (usually 30-60 min at 300-375°F).
- Seal for durability: Apply a thin, even coat of food-safe sealant/glaze if recommended by your paint brand, then cure as directed.
Pro-Tip: For truly ethereal watercolor floral mugs, dilute your ceramic paints more than usual and build up colors in thin layers. This technique mimics traditional watercolor and demonstrates brush stroke mastering for porcelain painting artistry.

2. Create a Pastel Ombre Dip-Dye Mug for a Modern Touch

Dip into creativity! Save this pastel ombre mug to your ‘DIY Home Decor’ board!
The pastel hand painted mugs trend combines modern simplicity with a splash of color. This method uses a dip-dye technique to create ombre mug designs that look professionally manufactured. It is an excellent way to produce modern girly painted mugs that fit perfectly into contemporary home decor, utilizing acrylic paint for mugs to transform plain white ceramics into customized drinkware.
Supplies Needed
- 1 blank white ceramic mug (smooth surface is key)
- Food-safe ceramic acrylic paints in 2-3 complementary pastel colors (e.g., light pink, peach, pale yellow)
- Clear, deep container (e.g., plastic cup)
- Water for diluting paint
- Stirring sticks
- Painter’s tape (optional, for crisp lines)
- Rubbing alcohol
- Oven-cure sealant for painted mugs (dishwasher-safe)
Step-by-Step Directions
- Clean the mug: Wipe down thoroughly with rubbing alcohol and allow to air dry.
- Prepare your paint stations: Mix each pastel paint color with a little water to create a slightly thinner consistency, ensuring smooth flow. Create separate, progressively lighter dilutions for a true ombre effect.
- Dip the darkest color: Pour the darkest pastel paint into the bottom of your container. Carefully dip the bottom third of the mug straight down into the paint. Remove slowly, allowing excess to drip off.
- Layer the next shade: After the first layer slightly dries (about 5-10 minutes), pour the next lighter shade into the container. Dip the mug slightly less deep than the first time, overlapping to create a blend.
- Repeat for all colors: Continue with subsequent lighter shades, dipping less each time to build the gradient. Allow colors to softly transition.
- Air dry completely: Let the mug air dry for at least 72 hours to ensure all layers are fully dry.
- Cure in oven: Follow your paint and sealant manufacturer’s instructions for oven curing to make the design permanent and dishwasher-safe.
Pro-Tip: Achieving a truly seamless pastel ombre requires controlling the surface tension in paints by adding a few drops of dish soap to heavily diluted acrylics. This expert painting technique helps the paint flow smoothly and blend without harsh lines, elevating your customized ceramics.

3. Design an Elegant Gold Foil Initial Mug for Personalized Charm

Add a touch of glam! Pin this personalized initial mug idea to your ‘Chic Gift Ideas’ board!
For a gift that feels high-end and bespoke, gold foil initial mugs are unmatched. This project creates elegant floral mugs‘ sophisticated cousin: the monogrammed masterpiece. By combining personalized girly mugs concepts with the luxe finish of metallic foil, you create thoughtful gift mugs that look like they came from a boutique. This is where creativity transforms mugs into status symbols for your coffee table.
Supplies Needed
- 1 blank ceramic mug (preferably matte finish for contrast)
- Food-safe gold transfer foil sheets or gold leaf kit designed for ceramic
- Food-safe ceramic adhesive or sizing for foil/leaf
- Small, soft brush (for adhesive)
- Soft, dry cloth or sponge
- Rubbing alcohol
- Oven for curing (if adhesive/foil requires it)
Step-by-Step Directions
- Clean the mug: Wipe thoroughly with rubbing alcohol and let dry.
- Plan your design: Lightly sketch the initial (or any simple design) onto the mug using a pencil.
- Apply adhesive: Using a small brush, carefully apply a thin, even layer of the ceramic adhesive/sizing over your sketched initial. Allow it to become tacky (check product instructions).
- Transfer the foil: Place a sheet of gold transfer foil over the tacky adhesive, metallic side up. Press down firmly and evenly with your fingers or a soft cloth, ensuring good contact.
- Peel gently: Carefully peel away the transfer foil backing. The gold should adhere to the adhesive. If there are bare spots, reapply adhesive and foil.
- Burnish and cure: Once satisfied, gently burnish the foil with a soft, dry cloth to smooth it out. Follow the adhesive/foil manufacturer’s instructions for oven curing to make the design durable and safe for daily use.
Pro-Tip: When working with gold transfer foil sheets, humidity can affect adhesion. Ensure your workspace is dry. For precise personalized girly mugs, consider using stencils or vinyl cutouts for crisp letter edges before applying the adhesive, showcasing professional finishes.

4. Hand Paint a Polka Dot Pop Mug for Playful Vibrancy

Get dotty! Pin this fun polka dot mug to your ‘Cute DIY Ideas’ board!
Sometimes the simplest designs are the most impactful. Playful polka dot mugs bring an instant smile with their vibrant energy. This style focuses on colorful decorative mugs that use cute painted mugs aesthetics to brighten up any kitchen. It is one of the most accessible creative mug designs, perfect for beginners who want to create hand painted artistic mugs where colors express personality without needing complex drawing skills.
Supplies Needed
- 1 blank ceramic mug
- Food-safe ceramic acrylic paints in 2-3 vibrant pastel colors
- Rubbing alcohol
- Cotton swabs or correction pen (for mistakes)
- Dotting tools (various sizes) or ends of paintbrushes/pencils
- Oven for curing
Step-by-Step Directions
- Prepare the mug: Clean thoroughly with rubbing alcohol and let it dry.
- Choose your colors: Select your favorite pastel shades for the polka dots.
- Create dots: Dip a dotting tool (or the eraser end of a pencil) into one paint color and gently press it onto the mug. Vary the size of your dots by using different sized tools.
- Vary placement: Scatter dots randomly or create a pattern. Alternate colors for a lively effect.
- Correct mistakes: If a dot is misplaced or imperfect, gently wipe it off immediately with a cotton swab dampened with rubbing alcohol.
- Air dry fully: Allow the painted mug to air dry for at least 24-48 hours.
- Cure in oven: Bake the mug in the oven according to your paint manufacturer’s instructions to ensure durability and a permanent paint for mugs.
Pro-Tip: For perfectly round polka dots, load your dotting tool generously with paint and apply in a single, confident press. Avoid twisting. For creative mug designs, experiment with layering dots of different sizes and colors once the first layer is completely dry, a simple yet effective expert painting technique.
5. Hand-Letter a Whimsical Quote Mug for Daily Inspiration

Share the positivity! Pin this whimsical quote mug to your ‘Inspirational Decor’ board!
Turn your morning coffee into a motivational moment with hand-lettered mugs. This project leverages the popularity of inspirational mug art to create personalized girly mugs that speak directly to the user. Using precise paint pens for ceramic, you can transcribe favorite sayings, lyrics, or affirmations. It is a fantastic way to practice creative mug designs where ideas spark projects and creativity transforms mugs into daily affirmations.
Supplies Needed
- 1 blank ceramic mug (preferably with a smooth, light surface)
- Food-safe ceramic paint pens (fine-tip recommended for lettering)
- Rubbing alcohol
- Pencil and paper for practice
- Cotton swabs (for corrections)
- Oven for curing
Step-by-Step Directions
- Clean the mug: Wipe thoroughly with rubbing alcohol and let dry.
- Practice your lettering: On paper, practice your chosen quote or phrase in the desired font until you’re confident.
- Sketch on the mug (optional): Lightly sketch your quote onto the mug with a pencil. This helps with spacing and alignment.
- Hand-letter the quote: Using your ceramic paint pen, carefully trace or freehand your quote onto the mug. Press firmly for opaque lines.
- Add embellishments: If desired, add small stars, hearts, or flourishes around the quote using the paint pen or a different colored pen.
- Correct mistakes: Immediately wipe off any errors with a cotton swab dipped in rubbing alcohol.
- Air dry and cure: Allow the paint to air dry for 24-72 hours. Follow paint pen instructions for oven-curing to make it permanent.
Pro-Tip: For achieving crisp, clean hand-lettered mugs, always choose artist-grade supplies like ceramic paint pens specifically designed for opaque coverage. Practicing on a paper template first will significantly improve your brush stroke mastering and prevent smudged paint on mugs.

6. Adorn a Daisy Chain Design Mug for Simple Whimsy

Bring spring indoors! Pin this daisy chain mug to your ‘Garden & Craft’ board!
For a sweet and classic look, the daisy chain design mug is a perfect choice. This design relies on repeating simple shapes to create a charming dainty mug that feels both nostalgic and fresh. It fits right into the cute painted mugs category and uses simple painted mug designs principles to make feminine painted mugs accessible. With just a few colors and a dotting technique, you can create decorated cups that show how creativity transforms mugs.
Supplies Needed
- 1 blank white ceramic mug
- Food-safe ceramic paint pens or ceramic acrylic paints in white, yellow, and green
- Fine-tip brush or dotting tool
- Rubbing alcohol
- Cotton swabs
- Oven for curing
Step-by-Step Directions
- Prepare the mug: Clean with rubbing alcohol and dry.
- Paint the daisy centers: Use yellow paint or a yellow paint pen and a small dotting tool to create small, evenly spaced yellow dots in a horizontal line around the mug. These will be your daisy centers.
- Add the petals: With white paint or a white paint pen, use a fine-tip brush or the smallest dotting tool to create small petal shapes around each yellow center. Aim for 5-7 petals per daisy.
- Connect with stems: Once the daisies are dry, use green paint or a green paint pen and a fine brush to connect the daisies with delicate stems or leaves, forming a chain.
- Dry and cure: Let the mug air dry for 24-72 hours. Cure in the oven according to paint manufacturer’s instructions for proven durability.
Pro-Tip: For uniform daisy petals on your hand painted artistic mugs, use the back of a small paintbrush or a toothpicks for consistent dot size. This makes easy paintable mugs projects achievable for beginners, demonstrating effective mug painting techniques.

7. Craft a Geometric Pink & Gold Mug for Modern Chic

Embrace modern elegance! Pin this geometric mug to your ‘Chic DIY Projects’ board!
Geometric mug designs offer a sophisticated break from traditional floral or cute patterns. By combining blush tones with metallics, you achieve a modern girly painted mugs look that feels upscale and intentional. This project relies on masking techniques to create chic painted mugs with sharp lines, resulting in aesthetic painted mugs that act as customizable drinkware. It is perfect for those who love patterns decorate surfaces in a structured way.
Supplies Needed
- 1 blank white ceramic mug
- Food-safe ceramic paint pens in blush pink and metallic gold
- Painter’s tape (thin widths recommended)
- Ruler or straight edge
- Rubbing alcohol
- Cotton swabs
- Oven for curing
Step-by-Step Directions
- Clean the mug: Prepare the surface with rubbing alcohol and dry.
- Map your design: Use a pencil and ruler to lightly sketch out your desired geometric pattern (triangles, stripes, chevrons).
- Apply painter’s tape: Carefully apply painter’s tape along the edges of your sketched shapes to create crisp lines. Press firmly to seal edges.
- Paint your shapes: Using the pink ceramic paint pen, fill in designated areas. Allow to dry. Then, switch to the metallic gold pen for other sections.
- Remove tape: Once the paint is dry to the touch (but before full cure), carefully peel off the painter’s tape to reveal clean lines.
- Touch up (if needed): Use a cotton swab with rubbing alcohol to gently correct any bleeds or imperfections.
- Air dry and cure: Allow the mug to air dry for 24-72 hours, then oven-cure following paint instructions for long-lasting results.
Pro-Tip: For perfectly crisp lines on your geometric pink & gold mug, ensure your painter’s tape is pressed down firmly to prevent paint bleeding. For modern hand painted mugs, utilize negative space effectively; sometimes less is more for a truly chic painted mugs aesthetic.
8. Craft a Ladybug Love Mug for Whimsical Delight

Spread some love! Pin this ladybug mug to your ‘Cute Crafts’ board!
Inject some pure joy into your day with whimsical mug designs like this ladybug motif. This idea centers on the concept of cute painted mugs that are full of character. It is an ideal project for creating charming dainty mugs or easy paintable mugs for gifts. The bright red and black contrast makes for artistic girly mugs that stand out, proving that simple patterns decorate surfaces in the most delightful way to create embellished pottery.
Supplies Needed
- 1 blank white ceramic mug
- Food-safe ceramic paint pens in red, black, and white
- Fine-tip brush (optional, for small details)
- Rubbing alcohol
- Cotton swabs
- Oven for curing
Step-by-Step Directions
- Prepare the mug: Clean the surface thoroughly with rubbing alcohol and let it dry completely.
- Paint the ladybug bodies: Using the red ceramic paint pen, draw small, oval shapes for the ladybug bodies randomly across the mug.
- Add black details: Once the red is dry, use the black paint pen to create a line down the center of each red oval and add small black dots on either side for wings. Add a small black head at the top of each oval.
- Draw antennae (optional): Use a very fine-tip black paint pen or brush to draw two tiny antennae extending from each ladybug’s head.
- Add white hearts (optional): With the white paint pen, draw small heart shapes trailing some of the ladybugs or scattered in between them for extra charm.
- Dry and cure: Allow the paint to air dry for 24-72 hours. Cure the mug in the oven following the paint manufacturer’s instructions for permanent paint for mugs.
Pro-Tip: For making your whimsical mug designs truly pop, use a dotting tool for perfectly round ladybug spots. To ensure long-lasting mug art, always choose artist-grade supplies and follow the heat setting methodologies recommended by the paint brand.
9. Customize a Coffee Lover’s Mug with Girly Flair

For the ultimate coffee queen! Pin this girly coffee lover’s mug to your ‘Coffee Nook Ideas’ board!
Celebrate the love of the brew with girly coffee mugs that are as spirited as the caffeine inside them. This design idea focuses on custom girly mugs that combine thematic elements like beans and steam swirls with feminine touches like hearts and soft colors. It creates feminine coffee cups that are clearly personalized hand painted treasures. By utilizing ceramic painting supplies, you can ensure your unique beverage containers have designs reflect style while fueling your day.
Supplies Needed
- 1 blank ceramic mug (matte finish for a cozy feel)
- Food-safe ceramic paint pens or ceramic acrylic paints in brown, cream, and soft pink
- Fine-tip brush or stencils for coffee beans/hearts
- Pencil for sketching
- Rubbing alcohol
- Cotton swabs
- Oven for curing
Step-by-Step Directions
- Prepare the mug: Clean the surface with rubbing alcohol and allow to dry.
- Sketch your design: Lightly sketch a coffee-themed phrase (e.g., “But First, Coffee”), small hearts, or coffee bean shapes onto the mug with a pencil.
- Paint the phrase: Use a cream or pink paint pen to hand-letter your chosen phrase. Ensure the lines are clean and opaque.
- Add coffee beans/hearts: Using brown paint for coffee beans and pink for hearts, add small illustrative elements around the text or scattered on the mug. You can use stencils for uniform shapes.
- Outline (optional): For added definition, carefully outline some elements with a fine-tip paint pen in a contrasting color (e.g., brown outline on pink hearts).
- Correct and dry: Wipe away any mistakes immediately. Allow the mug to air dry for 24-72 hours.
- Cure in oven: Bake the mug in the oven according to your paint manufacturer’s instructions to ensure the design is permanent and safe for daily use.
Pro-Tip: For personalized hand painted mugs that stand out, experiment with contrasting matte and glossy finishes. A matte base mug with glossy paint accents or vice versa can add subtle sophistication, demonstrating advanced overglaze decoration techniques for porcelain painting artistry.
Key Takeaways: Your Quick Guide to Painted Mugs Girly
- Unleash creativity with **painted mugs girly designs for truly unique, custom gifts that reflect personal style and thought.** – This guide provides nine distinct aesthetic mug ideas to inspire any craft enthusiast.
- Always use **food-safe ceramic paints and follow proper curing instructions (oven-baking) to ensure your DIY girly mugs are durable, dishwasher-safe, and safe for daily use.** – Prioritizing non-toxic materials is key for long-lasting results.
- The two-part ‘What You Need’ and ‘What To Do’ structure simplifies complex painting projects into manageable steps, making **easy paintable mugs achievable for all skill levels.** – Detailed supply lists and clear instructions address difficult mug painting.
- Personalization is paramount for **thoughtful gift mugs, whether through hand-lettered quotes, initials, or specific color palettes reflecting the recipient’s taste.** – Custom painted mugs offer unparalleled sentiment.
- Leverage specialized tools like **ceramic paint pens and painter’s tape for intricate details, crisp lines, and professional finishes on your hand painted artistic mugs designs.** – Expert painting techniques elevate your craft.
- Don’t be afraid to experiment with different painting styles—from delicate watercolor florals to bold geometric patterns—to develop your own unique **mug painting ideas and artistic expression.** – This demonstrates topical authority advanced concepts in practice.
- Proper preparation (cleaning with rubbing alcohol) and patient air drying are crucial steps for ensuring optimal paint adhesion and preventing **chipped paint on mugs later on.** – Tested methods for painting mugs ensure success.
People Also Ask About Painted Mugs Girly
What kind of paint to use for girly mugs?
For painting girly mugs, it is crucial to use **food-safe ceramic paints specifically designed for porcelain or glass, such as oven-bake ceramic acrylics or ceramic paint pens.** These non-toxic materials ensure the mug remains safe for drinking after curing. Avoid regular acrylics unless explicitly labeled for ceramic, as they may not be food-safe or durable enough for frequent washing.
Are painted mugs dishwasher safe?
Whether **painted mugs are dishwasher safe depends entirely on the type of paint used and the curing process, with most recommending hand washing for longevity.** While many oven-bake ceramic paints claim to be top-rack dishwasher safe after proper curing, abrasive detergents and high heat can still cause fading designs on mugs over time. Always check the paint manufacturer’s specific guidelines.
How to seal painted mugs?
To effectively seal **painted mugs and ensure long-lasting results, most ceramic paints require oven-curing after air drying.** After applying paint, allow the mug to air dry for 24-72 hours. Then, bake it in a conventional oven according to the paint manufacturer’s precise temperature and time instructions (typically 300-375°F for 30-60 minutes), which hardens and sets the paint.
What supplies do I need for girly mug painting?
For painting **girly mugs, essential supplies include blank ceramic mugs, food-safe ceramic paints (acrylics or paint pens), rubbing alcohol for surface preparation, fine-tip brushes or dotting tools for details, and an oven for curing.** Additional items like painter’s tape for crisp lines or stencils for specific designs can enhance your creative mug designs.
What are popular girly mug designs?
Popular **girly mug designs often feature elegant florals, delicate pastels, shimmering gold accents, whimsical quotes, and charming patterns like polka dots or subtle geometrics.** These aesthetic mug ideas frequently incorporate themes of nature, inspiration, and personalized touches, aligning with the desire for cute painted mugs and feminine coffee cups.
How to make hand painted mugs permanent?
To make **hand painted mugs permanent, the painted design must be properly cured, typically through oven-baking after thorough air drying.** This process, known as heat setting methodologies, chemically bonds the ceramic pigments application to the mug’s surface. Always follow the paint’s specific instructions for temperature and duration to achieve proven durability and prevent chipped paint on mugs.
What makes a mug design “girly”?
A mug design is considered “girly” when it incorporates elements traditionally associated with femininity, such as soft pastel colors, delicate floral patterns, elegant scripts, whimsical motifs (e.g., hearts, stars, ladybugs), and a focus on personalization or charm. These attributes contribute to cute painted mugs and charming dainty mugs that express a gentle or playful aesthetic.
Can kids paint mugs?
Yes, kids can absolutely paint mugs, provided **non-toxic materials like food-safe ceramic paint pens designed for easy use are chosen, and adult supervision is maintained, especially during the oven-curing process.** This makes for fun DIY craft projects and can be a great way to create personalized gifts ideas while developing artistic skills.
How to fix painting mistakes on mugs?
Painting mistakes on mugs can often be corrected while the paint is wet by gently wiping them off with a cotton swab dampened with rubbing alcohol or nail polish remover (for oil-based paints, if permitted by manufacturer). For dried paint, a sharp blade can carefully scrape off small errors. Prompt correction prevents uneven finish on painted mugs and ensures professional finishes.
What is the best way to paint ceramic mugs?
The best way to paint **ceramic mugs involves thorough preparation by cleaning the surface with rubbing alcohol, planning your creative mug designs with sketches or stencils, applying food-safe ceramic paints with suitable tools (brushes, pens), and finally, proper oven-curing to ensure durability and food safety.** This systematic approach ensures long-lasting mug art and optimal results.
Final Thoughts on Painted Mugs Girly
Crafting painted mugs girly style is more than just a craft; it’s an opportunity for personal expression and creating truly meaningful connections through thoughtful, handmade gifts. This guide has equipped you with nine distinct ideas, from delicate florals to whimsical quotes, along with the detailed steps and material insights needed to transform a blank mug into a cherished piece of artistic drinkware. Remember, the most important ingredients are your creativity and a willingness to try. Each stroke adds a unique touch, making your custom painted mugs not just beautiful objects, but vessels of sentiment and artistry.
By choosing food-safe paints and following proper curing techniques, you ensure your creations are not only stunning but also practical and durable for everyday enjoyment. Whether you’re making a personalized girly mug for a friend, a family member, or simply to add a touch of charm to your own coffee routine, the process of DIY mug painting is incredibly rewarding. So gather your supplies, pick your favorite design, and get ready to create something truly special.
Which of these girly mug designs are you most excited to try first for your next custom gift?
Last update on 2026-03-16 / Affiliate links / Images from Amazon Product Advertising API