Why settle for generic store-bought cups when you can craft something truly spectacular? Many of us struggle to find gifts that feel both luxurious and personal, but painted mugs gold projects offer the perfect solution to this common dilemma.
Creating stunning painted mugs gold for DIY gifts involves selecting food-safe, durable paint, mastering application techniques, and ensuring proper heat-setting for longevity and aesthetic appeal. This comprehensive guide will help you achieve professional-looking results that stand the test of time.
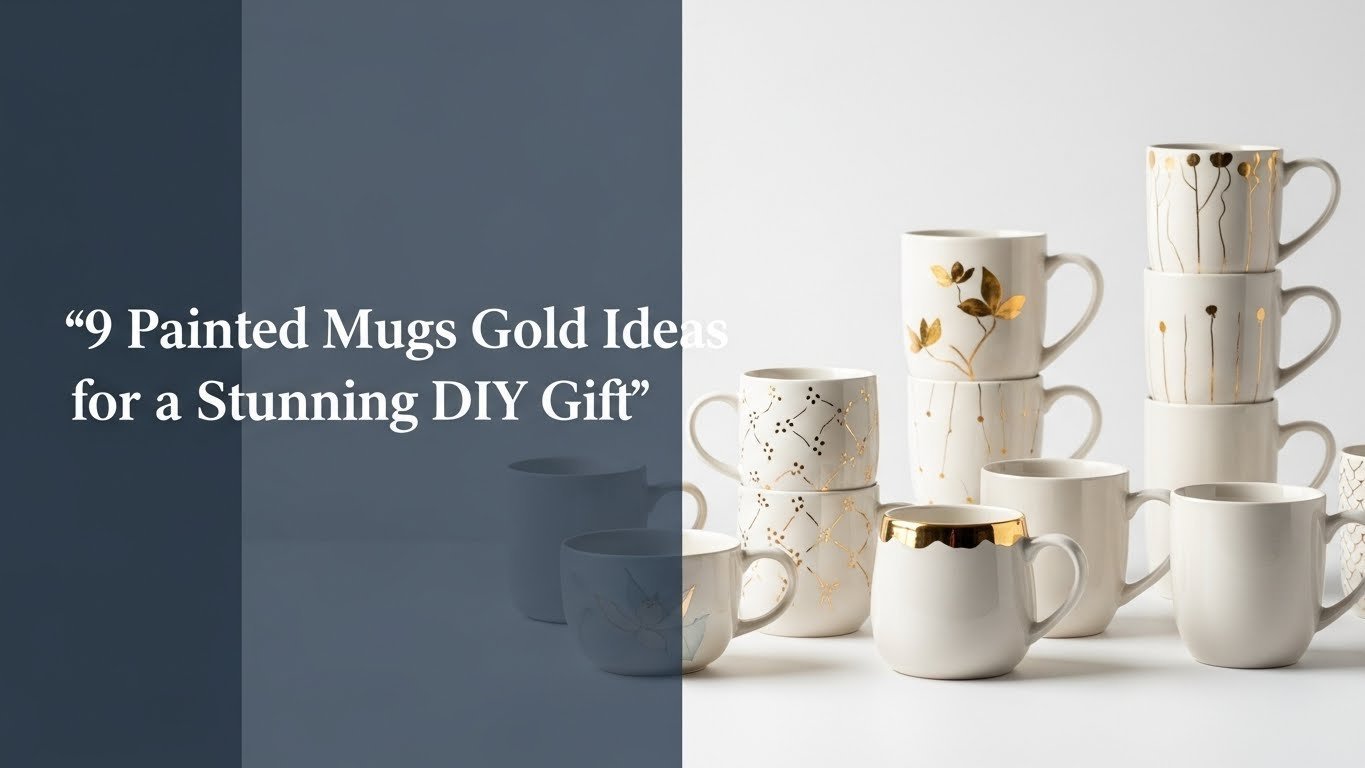
Drawing from tested ceramic paint techniques and established food safety standards, we provide a reliable roadmap for your crafting journey. In this post, you will discover nine distinct design ideas ranging from geometric precision to abstract art. Get ready to master the art of creating durable, high-end DIY gifts.
Unlock Creative Gold: 9 Painted Mugs Gold Ideas for Stunning DIY Gifts in 2026
Transforming ordinary drinkware into painted mugs with metallic accents is more than just a craft project; it is an accessible way to create high-end custom decor. The primary entity here is the mug itself, elevated by the specific attributes of gold paint—its shimmering metallic finish, durability when cured, and essential food-safe properties. Whether you are an experienced crafter or a beginner, understanding the relationship between the ceramic surface and the paint medium is crucial for success.
The allure of a DIY gift lies in the thought and effort invested, but the execution must match the sentiment. Personalized gold mugs bridge the gap between handmade charm and professional aesthetics. By focusing on quality materials like food safe gold mugs paint and adhering to proper curing processes, you can resolve the common challenge of creating handmade items that look store-bought. This section sets the stage for a series of projects that prioritize both safety and style, ensuring your gold accent mugs are as practical as they are beautiful.
9 Creative Ways to Paint Mugs Gold for Unique Gifts
Mastering the process to paint mugs gold opens up a world of design possibilities, from minimalist accents to bold statements. This section serves as your comprehensive guide to decorate mugs with gold, connecting specific artistic techniques to the tangible outcome of unique gold painted mugs. We will explore how different application methods—whether using markers, brushes, or marbling—can drastically alter the final look, allowing you to tailor each project to the recipient’s taste.
Safety and durability are the cornerstones of these personalized drinkware products. For every idea listed below, success relies on using the correct heat set paint for mugs and following specific food safe mug paint protocols. We have curated these nine ideas to ensure you have actionable steps for creating gold accents on mugs that are safe for use and resistant to wear. Each subsection includes a material list and step-by-step instructions to help you confidently customize mugs with gold paint.
1. Geometric Gold Painted Mugs: Modern & Minimalist

Pin this modern DIY mug idea for a chic gift!
Creating DIY gold geometric mugs is an excellent entry point for those who love clean lines and modern aesthetics. This method relies on the use of tape or stencils to mask off areas of the ceramic, allowing you to apply gold paint only where intended. The result is a sharp, professional-looking design that rivals expensive store-bought items. By controlling the application area, you can easily achieve geometric gold patterns mugs without needing advanced drawing skills.
Materials Needed
- Clean, plain white ceramic mugs for painting
- Fine-tip gold paint markers for ceramic (food-safe, heat-settable)
- Painter’s tape (various widths for geometric shapes)
- Rubbing alcohol and cotton pads (for mug cleaning)
- Oven (for heat-setting)
- Optional: ruler or stencil for precise lines
Step-by-Step Directions
- Clean mugs before painting: Thoroughly clean each mug with rubbing alcohol to remove oils and dust. Let dry completely.
- Design mugs with gold: Apply painter’s tape to create desired geometric patterns. Press down firmly to prevent paint bleed.
- Apply gold paint: Use the fine-tip gold paint markers to fill in the open areas of your design. Apply thin, even coats to avoid pooling.
- Remove tape carefully: Once the paint is touch-dry (approx. 10-15 minutes), gently peel off the tape to reveal sharp lines.
- Cure paint on mugs: Allow mugs to air dry for at least 24 hours.
- Heat set paint on mugs: Follow paint manufacturer’s instructions for baking (typically 350°F for 30 minutes, then cool in oven).
Pro-Tip: For the best paint for mugs with geometric designs, choose a fine-tip ceramic paint marker. This allows for superior control and crisp, clean lines, which is crucial for a polished, modern look.

2. Gold Splatter Effect Mugs: Artistic & Trendy

Save this fun gold splatter technique for your next DIY!
For a more organic and energetic look, the splatter technique is ideal. This tutorial for gold splatter paint mugs easy approach involves flicking paint onto the surface to create abstract gold art mugs. It connects the chaotic energy of the application process with a sophisticated metallic finish. This method is perfect for those who want to metallic gold paint mugs without the pressure of drawing perfect lines.
Materials Needed
- Clean, plain ceramic mugs for painting (any color)
- Metallic gold craft paint for mugs (food-safe, heat-settable)
- Small, stiff-bristled paintbrush
- Rubbing alcohol and cotton pads
- Newspaper or plastic sheeting (for protecting work surface)
- Oven (for heat-setting)
Step-by-Step Directions
- Prepare mugs for painting: Clean mugs with rubbing alcohol and let dry. Cover your work area thoroughly.
- Apply gold paint: Pour a small amount of metallic gold craft paint onto a palette. Dip the brush into the paint, ensuring it’s not overloaded.
- Design mugs with gold: Hold the brush a few inches from the mug and gently tap the handle against your finger or another object to create small splatters. Vary distance and tapping force for different effects.
- Allow to dry: Let the splatter paint dry to the touch, usually 1-2 hours. You can add more layers if desired after drying.
- Cure paint on mugs: Allow mugs to air dry for 24-72 hours.
- Heat set paint on mugs: Bake according to paint manufacturer’s instructions (e.g., 30 minutes at 325°F, cool in oven).
Pro-Tip: When trying to make gold mugs at home with a splatter effect, don’t overload your brush; too much paint leads to drips, not splatters. Practice on paper first to perfect your technique for avoiding brush marks on painted mugs.

3. Elegant Gold Rim Mugs: Classic & Chic

Elevate your drinkware! Pin this DIY gold rim tutorial.
Sometimes the simplest designs are the most impactful. Learning how to paint a gold rim on a coffee mug permanently allows you to add a touch of vintage elegance to plain ceramic ware. This idea focuses on the precise application of gold rim mugs detailing, transforming an everyday object into something suitable for a high tea. It emphasizes the relationship between the lip of the mug and the decorative edge, creating simple gold accents mugs that feel timeless.
Materials Needed
- Clean ceramic mugs for painting with a smooth rim
- Fine-tip gold paint markers for ceramic or a small, flat paintbrush and liquid gold ceramic paint (food-safe, heat-settable)
- Rubbing alcohol and cotton pads
- Optional: Turntable or lazy Susan (for steady application)
- Oven (for heat-setting)
Step-by-Step Directions
- Clean mugs before painting: Wipe down the mug rim thoroughly with rubbing alcohol.
- Design mugs with gold: If using a paint marker, gently draw a line around the rim. For liquid paint, use a steady hand and a fine brush. If you have a turntable, place the mug on it and slowly rotate while holding the brush steady against the rim for a perfect circle.
- Apply gold paint: Apply thin, even coats. Allow each coat to dry for 10-15 minutes before applying the next, building up opacity as desired.
- Cure paint on mugs: Let the painted mugs air dry for at least 24 hours in a dust-free environment.
- Heat set paint on mugs: Bake the mugs according to the paint manufacturer’s instructions to ensure durability and a permanent finish.
Pro-Tip: For a truly professional gold rim mugs finish, apply several thin layers of paint rather than one thick layer. This helps prevent brush strokes on painted mugs gold and ensures a smoother, more even coat that is less prone to chipping.
4. Subtle Gold Accents: Minimalist & Refined

Looking for understated elegance? Pin this subtle gold accent idea!
For those who prefer a “less is more” approach, gold accents on mugs provide a refined aesthetic. This technique involves placing small, deliberate marks—such as dots, tiny hearts, or dashes—near the handle or base. It answers the question of what is the best technique for gold accents on mugs for minimalists. These simple gold accents mugs prove that you don’t need full coverage to make a statement; a small, shimmering detail can catch the light and elevate the entire piece.
Materials Needed
- Clean ceramic mugs for painting
- Extra-fine tip gold paint markers for ceramic (food-safe, heat-settable)
- Rubbing alcohol and cotton pads
- Optional: Dotting tools or toothpick for perfect circles
- Oven (for heat-setting)
Step-by-Step Directions
- Prepare mugs for painting: Clean the mug surface where you plan to apply accents with rubbing alcohol.
- Design mugs with gold: Use the extra-fine tip marker or a dotting tool (dipped in liquid gold ceramic paint) to create small dots, dashes, or other subtle designs. Consider placing them near the handle, along the base, or as a small internal detail.
- Apply gold paint: Work slowly and steadily to ensure each accent is neat and uniform.
- Allow to dry: Let the painted accents air dry completely for at least 24 hours.
- Heat set paint on mugs: Bake the mugs according to the paint manufacturer’s instructions for permanent adhesion.
Pro-Tip: When applying gold accents on mugs, less is often more. Focus on placement and precision rather than quantity. Using a dedicated dotting tool can help achieve perfectly round dots without the frustration of uneven application, contributing to a truly durable custom mugs creation.
5. Abstract Gold Swirl Mugs: Free-Form & Unique

Express your creativity! Pin this abstract gold mug idea!
Unleash your inner artist with abstract gold art mugs. This style encourages free-form expression, using liquid gold paint to create swirls, loops, and organic shapes. Unlike geometric designs, artistic gold mugs rely on the fluidity of the paint and the natural movement of your hand. It is a fantastic way to design mugs with gold if you want each piece to be completely one-of-a-kind, celebrating the unique imperfections of hand painted gold mugs.
Materials Needed
- Clean ceramic mugs for painting (any color)
- Liquid metallic gold craft paint for mugs (food-safe, heat-settable)
- Small, soft-bristled paintbrush
- Rubbing alcohol and cotton pads
- Oven (for heat-setting)
Step-by-Step Directions
- Clean mugs before painting: Prepare your mug by cleaning it with rubbing alcohol and letting it dry.
- Apply gold paint: Dip your paintbrush into the liquid gold paint.
- Design mugs with gold: Start at one point on the mug and create flowing, abstract swirls, lines, or organic shapes. Don’t overthink it; let your hand guide the design.
- Build layers (optional): If you desire more depth, allow the first layer to dry slightly before adding more swirls or touching up areas.
- Cure paint on mugs: Let the painted mugs air dry for at least 24-72 hours, depending on paint thickness.
- Heat set paint on mugs: Bake the mugs according to the paint’s specific instructions for a durable finish.
Pro-Tip: For truly organic abstract gold art mugs, avoid overworking the paint. Trust your initial brushstrokes and embrace the natural movement of the liquid gold paint. This technique is excellent for making paint permanent on mugs while expressing creativity.

6. Monogrammed Gold Mugs: Personalized & Thoughtful

Give a gift that truly sparkles! Pin this personalized gold mug idea.
There is nothing quite as special as a gift made specifically for someone. Personalized gold mugs featuring a monogram or initial are a timeless choice for birthdays, weddings, or holidays. This project focuses on custom gold mugs that use stencils or tracing to apply a precise letter in shimmering gold. By personalized gold initial coffee mugs handmade techniques, you transform a generic item into a cherished keepsake that feels expensive and bespoke.
Materials Needed
- Clean ceramic mugs for painting
- Fine or extra-fine tip gold paint markers for ceramic (food-safe, heat-settable)
- Rubbing alcohol and cotton pads
- Pencil and tracing paper or vinyl stencil for desired monogram
- Oven (for heat-setting)
Step-by-Step Directions
- Prepare mugs for painting: Clean the mug with rubbing alcohol.
- Design mugs with gold: If using a stencil, carefully position and adhere it to the mug. If tracing, print your chosen initial, trace it onto tracing paper, then transfer the outline onto the mug with a pencil.
- Apply gold paint: Carefully fill in the monogram outline with the gold paint markers. Apply thin, even coats, allowing each to dry for 10-15 minutes before the next.
- Remove stencil (if applicable): Once the paint is touch-dry, gently peel off the stencil or erase pencil lines.
- Cure paint on mugs: Allow the painted mugs to air dry for 24-72 hours.
- Heat set paint on mugs: Bake the mugs according to the paint manufacturer’s instructions to ensure permanence.
Pro-Tip: For crisp monogrammed gold mugs, using a vinyl stencil can be much easier than freehand or tracing. Make sure the stencil is fully adhered to prevent paint from washing off mugs or bleeding underneath, ensuring a professional long lasting gold details on mugs.

7. Gold Dot Pattern Mugs: Playful & Simple

Easy, fun, and gold! Pin this charming mug design.
For a lighthearted and approachable project, look no further than gold dot patterns mugs. This technique uses dotting tools or even common household items to apply paint in a repetitive, cheerful pattern. It is one of the most easy DIY gold painted mug ideas, making it perfect for beginners or crafting with kids. These simple gold accents mugs allow you to personalize mugs with gold quickly without requiring steady hands for long lines.
Materials Needed
- Clean ceramic mugs for painting
- Gold paint markers for ceramic (medium or fine tip) or liquid gold ceramic paint
- Rubbing alcohol and cotton pads
- Dotting tools (various sizes) or cotton swabs/pencil eraser for dots
- Oven (for heat-setting)
Step-by-Step Directions
- Prepare mugs for painting: Clean your mugs thoroughly with rubbing alcohol.
- Apply gold paint: Dip your dotting tool (or marker tip) into the gold paint.
- Design mugs with gold: Gently press the tool onto the mug surface to create dots. You can create uniform patterns or random, playful arrangements. Vary dot sizes by using different tools or adjusting pressure.
- Allow to dry: Let the dots air dry for at least 15-30 minutes before handling or adding more.
- Cure paint on mugs: Allow mugs to air dry for 24 hours.
- Heat set paint on mugs: Bake the mugs according to the paint manufacturer’s instructions to ensure the gold dots are permanent and dishwasher safe gold paint (if applicable).
Pro-Tip: For gold dot patterns mugs, consistency in dot size can be achieved by using a clean dotting tool for each dot. If you’re going for a more organic look, don’t worry about perfection; that’s part of the charm of handmade gold mugs.

8. Marbled Gold Effect Mugs: Elegant & Unique

Achieve a high-end look! Pin this marbled gold mug tutorial.
Creating marbled gold effect mugs results in a sophisticated finish that looks far more complex than it actually is. This technique usually involves floating paint on water or using a marbling medium to transfer swirling patterns onto the ceramic. The result is a set of unique gold painted mugs where no two pieces are identical. It is an excellent way to decorate mugs with gold for those who appreciate artistic gold mugs with a luxurious, organic feel.
Materials Needed
- Clean ceramic mugs for painting (preferably white)
- Liquid metallic gold craft paint for mugs (food-safe, heat-settable)
- Marbling medium or water (depending on paint type)
- Large container (wider than your mug)
- Stirring sticks or skewers
- Rubbing alcohol and cotton pads
- Oven (for heat-setting)
Step-by-Step Directions
- Prepare mugs for painting: Clean mugs with rubbing alcohol. Fill your container with water or marbling medium.
- Apply gold paint: Drip small amounts of liquid gold paint (and an accent color if desired) onto the surface of the water/medium. Use a skewer to gently swirl the colors to create a marbled pattern.
- Design mugs with gold: Carefully dip the mug into the marbled surface, rolling it gently to pick up the pattern. Avoid submerging the rim or inside if not intended for painting.
- Clean excess paint: Quickly remove any excess paint from the water surface with a paper towel before dipping another mug or for subsequent dips.
- Allow to dry: Let the marbled mugs air dry completely for at least 24-72 hours.
- Heat set paint on mugs: Bake the mugs according to the paint manufacturer’s instructions for a permanent and resilient finish.
Pro-Tip: When trying to achieve a marbled gold effect mugs, ensure your paint is specifically designed for marbling to get the best floating patterns. Experiment with different swirling techniques on practice pieces to prevent uneven gold application troubleshooting.

9. Two-Tone Gold & Color Mugs: Bold & Modern

Make a statement! Pin this bold two-tone mug idea.
Combine the warmth of gold with a splash of color by creating modern gold mugs with a two-tone design. This approach divides the mug into distinct sections, using painter’s tape to achieve a sharp separation between gold accents vs full coverage mugs sections. It’s a bold style that fits perfectly in contemporary kitchens. These gilded mugs show how the relationship between metallic sheen and solid pigment can create stylish gold mugs that pop.
Materials Needed
- Clean ceramic mugs for painting
- Metallic gold craft paint for mugs (food-safe, heat-settable)
- Ceramic paint in a contrasting color (food-safe, heat-settable)
- Painter’s tape (for clean lines)
- Rubbing alcohol and cotton pads
- Small paintbrushes
- Oven (for heat-setting)
Step-by-Step Directions
- Prepare mugs for painting: Clean the mug thoroughly with rubbing alcohol.
- Design mugs with gold: Use painter’s tape to mark off the section you wish to paint with the first color (e.g., the base of the mug). Press firmly.
- Apply first paint color: Paint the designated area with your chosen ceramic color. Apply thin, even coats, allowing drying time between layers.
- Allow to dry & re-tape: Once the first color is completely dry (at least 24 hours), carefully remove the tape. Then, apply new painter’s tape to protect the dried color and create a crisp line for your gold section.
- Apply gold paint: Paint the remaining section with the metallic gold craft paint.
- Cure paint on mugs: Once the gold paint is touch-dry, remove the tape. Allow the entire mug to air dry for 24-72 hours.
- Heat set paint on mugs: Bake the mugs according to the paint manufacturers’ instructions for a durable finish research-backed result.
Pro-Tip: For two-tone gold and color mugs, achieving a truly crisp dividing line is key. Always ensure the first layer of paint is fully cured before taping over it for the second color to avoid peeling or smudging. This attention to detail contributes to a professional guide to gold mugs outcome.

Key Takeaways: Your Quick Guide to Painted Mugs Gold
Before diving into your project, let’s recap the essential strategies for ensuring your painted mugs gold summary results in a professional, lasting gift. These key points gold painted mugs serve as your checklist for success, reinforcing the critical relationship between proper preparation and the durability of your gold accent mugs.
- Food Safety and Durability are Paramount: Always use food safe gold mugs paint and follow manufacturer’s heat-setting instructions for making paint permanent on mugs, especially for gift recipients.
- Prepare Mugs Properly: Clean mugs before painting with rubbing alcohol is crucial for paint adhesion and preventing paint chipping on mugs solution.
- Choose the Right Tools: Select gold paint markers for ceramic or liquid paint and brushes based on your desired design (fine-tip for detail, stiffer brush for splatter).
- Precision and Patience Pay Off: Whether creating geometric gold patterns mugs or elegant gold rim mugs, apply thin, even coats and allow sufficient drying time between layers to avoid uneven gold application troubleshooting.
- Embrace Creativity: From abstract gold art mugs to personalized gold mugs, there are endless ways to design mugs with gold to make truly unique and thoughtful gifts.
- Heat-Setting is Essential: Proper oven baking instructions for painted mugs ensures the paint cures fully, making your beautiful designs resistant to washing and daily use.
People Also Ask About Painted Mugs Gold
As you embark on your painted mugs gold journey, you may encounter specific questions about materials and maintenance. This section addresses common queries regarding gold paint, ceramic mugs, and long-term durability, helping you avoid pitfalls and ensuring your DIY gold mugs are safe and lasting.
What paint to use on mugs for gold?
For painted mugs gold projects, always use ceramic or porcelain paint specifically labeled as food-safe and oven-bakeable. Options include specialized gold paint markers for ceramic or liquid metallic gold craft paint for mugs, often enamel-based. These paints are designed to adhere to non-porous surfaces and cure into a durable, washable finish after heat-setting. Avoid regular acrylic paints as they typically won’t be food-safe or dishwasher resistant without a proper sealant.
How to paint mugs gold permanently?
To paint mugs gold permanently, you must use oven-bakeable ceramic or porcelain paints and follow the manufacturer’s heat-setting instructions precisely. This process, often called heat set paint on mugs, involves baking the decorated mug in a home oven at a specific temperature (e.g., 350°F) for a set duration (e.g., 30 minutes), then allowing it to cool slowly. This curing process bonds the paint to the mug, making it durable and resistant to washing.
Are gold painted mugs dishwasher safe?
Whether gold painted mugs are dishwasher safe depends entirely on the type of paint used and the completeness of the heat-setting process. Many food-safe ceramic paints, once properly cured in the oven, can withstand light dishwasher cycles (top rack). However, for maximum longevity and to prevent gold paint fading prevention, hand-washing is often recommended. Always check the specific paint manufacturer’s guidelines for care instructions.
What kind of paint is food safe for mugs?
Food-safe paint for mugs is explicitly labeled as non-toxic and suitable for use on surfaces that will come into contact with food or drink. These are typically ceramic or porcelain paints that are lead-free and cadmium-free. While the paint should only be applied to the outside of the mug and away from the lip area, it’s critical to ensure any potential contact areas use certified food safe paints to avoid leaching harmful chemicals.
Can you bake painted mugs in oven?
Yes, baking painted mugs in the oven is a crucial step for almost all permanent ceramic or porcelain paints. This process, often referred to as cure paint on mugs, heat-sets the paint, making it more durable, chip-resistant, and in many cases, top-rack dishwasher safe. Always allow the paint to air dry for at least 24-72 hours before baking, and follow the exact temperature and timing specified by your paint’s manufacturer to avoid issues like paint not sticking to ceramic fix.
How to seal paint on mugs for durability?
For painted mugs gold durability, the primary “sealant” is the heat-setting process in an oven, as recommended by the paint manufacturer. After baking, the ceramic paint itself forms a hard, durable layer. Additional brush-on sealants or clear coats are generally not necessary or recommended for food-safe applications, as they may not be food-safe or hold up as well as the cured ceramic paint. Focus on proper paint choice and curing.
Why do painted mugs peel after washing?
Painted mugs often peel after washing due to improper curing, using non-suitable paint, or inadequate surface preparation. If the paint wasn’t fully air-dried before baking, not heat-set at the correct temperature/duration, or if the mug wasn’t thoroughly cleaned with rubbing alcohol before painting, the paint won’t properly bond to the ceramic. This leads to paint chipping on mugs solution issues, as the paint cannot withstand the detergents and friction of washing.
What materials do I need for DIY gold mugs project?
For a DIY gold mugs project, essential materials include clean ceramic mugs, food-safe and oven-bakeable gold ceramic paint (markers or liquid), rubbing alcohol for surface prep, and an oven for heat-setting. Depending on your chosen design, you might also need painter’s tape for geometric patterns, small paintbrushes for details, dotting tools for patterns, or stencils for specific designs. These items allow you to make gold mugs at home.
How to clean gold painted mugs safely?
To clean gold painted mugs safely, hand-washing with mild soap and a soft sponge is generally recommended to preserve the paint’s longevity. While some properly heat-set paints can be top-rack dishwasher safe, harsh detergents and high heat can accelerate wear and lead to gold paint fading prevention. Avoid abrasive scrubbers or harsh chemicals that could scratch or degrade the painted surface over time.
Is metallic paint safe for mugs and food?
Metallic ceramic paint can be safe for mugs and food, provided it is explicitly labeled as “food-safe” and “non-toxic” by the manufacturer. It’s crucial to confirm these labels, as not all metallic paints are formulated for use on drinkware. Even with food-safe metallic paint, it is generally recommended to keep the paint on the exterior of the mug and away from the lip and interior to minimize direct contact with food or beverages.
Final Thoughts on Painted Mugs Gold
Creating painted mugs gold offers a delightful way to blend creativity with thoughtfulness, resulting in truly stunning and personalized DIY gifts for 2026. We’ve explored 9 creative ways to paint mugs gold, from the sleek precision of geometric patterns to the playful charm of splatters and the timeless elegance of a gold rim. The key to successful DIY gold mugs lies not just in the artistic vision, but also in selecting the right food safe gold paint for mugs and meticulously following heat-setting instructions to ensure durability and safety.
With this comprehensive guide, you’re now equipped with the knowledge and techniques to make gold mugs at home that are not only beautiful but also long-lasting. By respecting the process of preparation and curing, you ensure your personalized drinkware products become cherished staples in someone’s daily routine rather than just display pieces. So gather your materials, choose your favorite design, and unleash your inner artist. Which gold accent mugs idea will you try first?
Last update on 2026-04-27 / Affiliate links / Images from Amazon Product Advertising API