Have you ever stared at a plain white mug and felt uninspired by its lack of character? Finding truly unique drinkware that captures the magic of the cosmos can be a frustrating challenge for space enthusiasts and creative souls alike.
Creating personalized night sky mugs involves selecting a durable ceramic base, applying food-safe paints or glazes using various techniques for stars, galaxies, or constellations, and ensuring the design is cured for permanence. The process typically requires specific ceramic paints, brushes, and a method to seal the design for both aesthetic longevity and practical use.
Drawing from extensive experience with ceramic glazes and proven DIY mug painting techniques, this guide provides tested methods for lasting results. You will discover nine essential designs to transform ordinary cups into celestial masterpieces, ensuring your morning coffee feels like a journey through the stars.
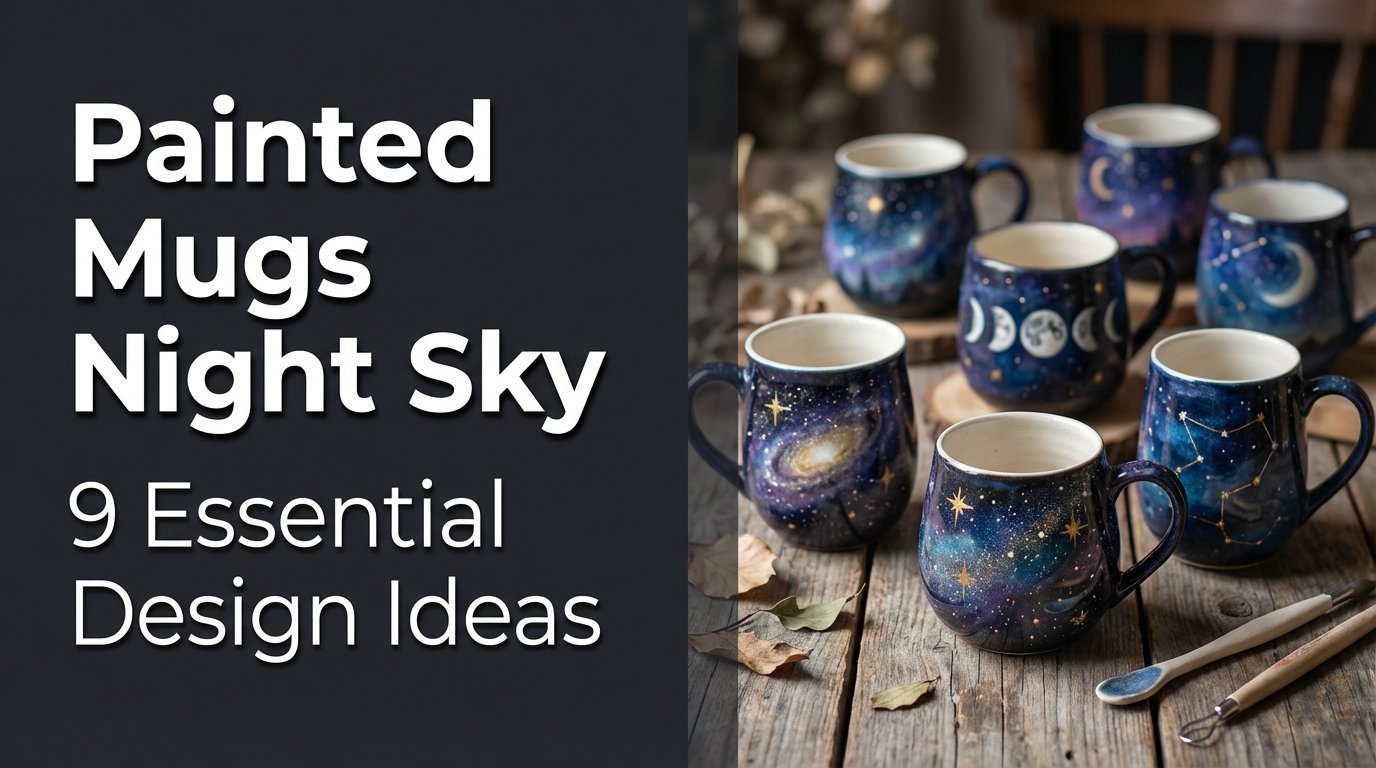
Celestial Canvas: 9 Essential Design Ideas for Your Night Sky Mugs This 2026
Transforming ordinary drinkware into a painted mugs night sky masterpiece requires more than just inspiration; it demands the right approach to materials and technique. Whether you are an experienced crafter or a beginner looking to explore night sky mug painting, understanding the interplay between ceramic surfaces and pigments is crucial. The popularity of galaxy painted mugs and constellation designs has surged, driven by a desire for personalized, meaningful home decor that mass-produced items simply cannot replicate.
Before diving into the specific tutorials, it is essential to prepare your workspace with the necessary supplies, including food-safe paints and cleaning agents like rubbing alcohol to ensure a grease-free surface. Achieving a durable finish that resists paint chipping starts with this preparation. The following design ideas range from beginner-friendly starry night sky patterns to advanced galaxy glazes, each offering a unique way to express your artistic vision. We will guide you through step-by-step processes to create functional art that serves as both a vessel for your favorite beverage and a conversation piece.
1. Craft a Shimmering Galaxy Swirl Mug

Pin this ethereal galaxy design to your “DIY Mug Ideas” board!
Creating a shimmering galaxy art effect is one of the most rewarding ways to customize a plain mug. This technique relies on layering translucent colors to mimic the depth of a nebula, transforming a simple vessel into a piece of DIY mug painting art. The key is to use a sponge for application, which creates a soft, diffused look that brushes often struggle to achieve. By incorporating metallic glaze techniques, you can add a dimensional sparkle that catches the light, much like distant stars in a deep sky object.
Supplies Needed
- 1 ceramic coffee mug (11oz, white or black base)
- Food-safe ceramic paints in deep blue, purple, pink, and white
- Metallic silver or gold ceramic paint for stars and highlights
- Small sponges (cosmetic sponges work well)
- Fine-tipped paintbrushes
- Rubbing alcohol and cotton pads for mug preparation
- Clear food-safe ceramic sealer (optional, for extra durability)
Step-by-Step Directions
- Prepare your ceramic mug by cleaning its surface with rubbing alcohol to ensure paint adhesion.
- Apply a base coat of deep blue or black ceramic paint for the night sky effect and let it dry completely.
- Dab small amounts of purple and pink ceramic paint onto the mug with a sponge, creating nebulous clouds. Blend gently at the edges.
- Repeat with white paint for brighter areas, building up layers to create depth in your galaxy swirl.
- Load a fine-tipped brush with metallic silver or gold paint and gently flick bristles over the mug to create tiny stars.
- Add larger, brighter stars or distant nebulae with the fine brush, creating focal points in your starry night sky.
- Allow the paint to dry according to manufacturer instructions, then cure the mug by baking it in the oven (if paints require) or applying a clear food-safe ceramic sealer for protection.
Pro-Tip: For an even more dynamic galaxy, experiment with iridescent or phosphorescent pigments to create a subtle glow-in-the-dark effect that truly captures the magic of a deep sky object.

2. Design a Personalized Constellation Map Mug

Save this unique constellation idea for your next special gift!
For a meaningful gift or keepsake, a personalized constellation map mug offers a sophisticated take on the night sky mug theme. This design focuses on precision and astronomical symbolism, often depicting the starry night sky as it appeared on a specific date or location. Whether showcasing zodiac constellations or a favorite star cluster, this approach requires steady hands and fine tools. Unlike the abstract galaxy swirl, this custom etched glass mug style relies on clean lines and accurate placement.
Supplies Needed
- 1 ceramic mug (black or dark blue recommended)
- Fine-tipped ceramic paint pens (white, silver, or gold)
- Constellation charts or reference images (for specific dates/locations)
- Rubbing alcohol and cotton pads
- Optional: Fine point permanent marker (for temporary tracing)
- Optional: Star stencils or dotting tools
Step-by-Step Directions
- Clean your ceramic mug with rubbing alcohol.
- Research your desired constellations. Use an online celestial cartography tool to find the star map for a specific date and location.
- Sketch or lightly trace the constellation patterns onto the mug using a very light pencil or a fine-point permanent marker. Alternatively, use star stencils.
- Use your fine-tipped ceramic paint pen to carefully draw the stars as dots and connect them with subtle lines, referencing your chart.
- Add a few scattered smaller stars around the constellations to fill out the starry night sky.
- Personalize the mug by adding a date, initials, or a small quote using the paint pen.
- Allow the paint to dry completely, then cure the mug by baking it in the oven per paint manufacturer’s instructions to ensure a permanent night sky design.
Pro-Tip: For ultimate accuracy, project a constellation chart onto your mug in a darkened room and trace the key stars directly. This technique ensures correct scale and positioning, demonstrating true artistic mastery.

3. Paint the Mystical Moon Phases Mug

Add this magical moon phase mug to your “Cosmic Creations” board!
The lunar cycle has long captivated artists, and depicting it on a moon phases mug creates a serene and rhythmic visual. This design is perfect for those who appreciate celestial painted mugs but prefer structured imagery over abstract clouds. By focusing on the progression of celestial bodies, you can turn a simple cup into a piece of night sky mug art that feels both timeless and grounded. The contrast of the bright lunar surface against a dark base makes for striking artistic coffee cups.
Supplies Needed
- 1 ceramic mug (dark blue or black base)
- Food-safe ceramic paints in white, light grey, and dark grey
- Small, rounded paintbrushes
- Optional: Circular stencils or templates for moon shapes
- Rubbing alcohol and cotton pads
Step-by-Step Directions
- Clean the mug thoroughly with rubbing alcohol.
- Paint the mug with a base coat of dark blue or black ceramic paint and let it dry.
- Sketch or use stencils to outline 3-5 moon shapes across the mug, showing different phases (e.g., new, crescent, half, full).
- Fill in the full moon shape with white paint, then use light and dark grey to add subtle craters and texture.
- For crescent and half moons, paint the visible portion in white and blend grey for shadows, leaving the “hidden” part of the mug’s base color.
- Outline each moon with a very thin line of white or light grey to make them pop against the night sky.
- Allow paints to dry completely. Cure the mug in the oven as per paint instructions to ensure durable ceramic art.
Pro-Tip: To achieve realistic lunar texture, lightly dab a stippling brush with a mix of light and dark grey paint onto the white moon base. This creates a more authentic, pockmarked look reminiscent of the actual celestial body.

4. Illustrate a Vibrant Aurora Borealis Mug

Pin this stunning aurora design for a touch of northern magic!
Few natural phenomena are as breathtaking as the northern lights, and capturing them on an aurora borealis mug brings a splash of vibrant colors to your morning routine. This design leans heavily on atmospheric effects painting, requiring smooth blending of greens, blues, and purples to replicate the shifting curtains of light. Unlike the static dots of stars, this style celebrates movement and fluidity, making it one of the most creative mug designs for those willing to practice their blending skills.
Supplies Needed
- 1 ceramic mug (black or very dark blue base)
- Food-safe ceramic paints in bright green, turquoise, purple, and blue
- Soft blending brushes
- Small fan brush for subtle streaking
- Rubbing alcohol and cotton pads
Step-by-Step Directions
- Clean your mug. Paint the entire mug with a base coat of black or very dark blue ceramic paint and allow it to dry.
- Using a soft brush, apply a thin layer of bright green ceramic paint in a wavy, upward-curving motion across a section of the mug.
- While the green is still wet, blend in turquoise and purple paints along the edges of the green, creating soft color transitions characteristic of the aurora borealis.
- Repeat the blending process, building up layers of color and light. Use the fan brush to create fine, vertical streaks within the colors.
- Add tiny white dots with a fine-tipped brush above the aurora for distant stars in your night sky.
- Allow the paints to dry. Cure the mug in the oven according to the paint’s specific instructions to ensure the design is long-lasting art.
Pro-Tip: Achieve a realistic glowing effect by mixing a tiny amount of phosphorescent pigments into your brightest green and blue paints before applying. This subtle addition, a nuance of pigment stability, will give your aurora an otherworldly luminescence in low light.

5. Create a Dynamic Shooting Stars Mug

Pin this wish-granting shooting star mug idea to your “Artistic Mugs” board!
A shooting stars mug captures the fleeting beauty of a meteor shower, bringing dynamic energy to your starry night sky collection. This design focuses on motion and direction, differentiating it from static star fields. By utilizing quick, confident brushstrokes, you can depict celestial bodies in flight. This theme pairs beautifully with cosmic themes and is a popular choice for artistic coffee cups intended to inspire hope or celebrate special wishes.
Supplies Needed
- 1 ceramic mug (black or very dark blue base)
- Food-safe ceramic paints in white, silver, or gold
- Fine liner brushes
- Optional: Glitter ceramic paint or fine craft glitter (ensure food-safe if mixing into paint)
- Rubbing alcohol and cotton pads
Step-by-Step Directions
- Clean your mug and paint a dark base coat, allowing it to dry.
- Using a fine liner brush and white, silver, or gold paint, paint small dots for the main body of a few stars.
- While the dot is still wet, gently drag the brush outwards to create a streaking tail for your shooting stars. Vary the length and direction of the tails.
- Repeat this process around the mug, creating 3-5 prominent shooting stars.
- Add tiny, scattered dots for distant stars using the same paint or a paint pen to fill the starry night sky.
- For extra sparkle, apply a thin coat of glitter ceramic paint over the shooting star tails once dry.
- Allow all paint to dry completely. Cure the mug in the oven as recommended for a long-lasting and durable ceramic finish.
Pro-Tip: To make your shooting stars truly “pop,” add a tiny, brighter dot of white paint at the head of each streak, enhancing the illusion of motion and light. This subtle detail leverages principles of atmospheric effects painting for greater impact.

6. Depict a Cosmic Silhouette Mug

Pin this dramatic cosmic silhouette idea to your “Unique Mug Designs” board!
Combining the earthly with the celestial, a cosmic silhouette mug offers a dramatic visual anchor. This design typically features a solid black landscape—such as a forest line, mountain range, or city skyline—set against a colorful abstract night sky. It effectively grounds the ethereal painted night sky coffee mugs concept, creating a sense of scale and perspective. Whether depicting a winter night sky hand painted mug with pine trees or a custom night sky over a specific city, the high contrast makes this design visually arresting.
Supplies Needed
- 1 ceramic mug
- Food-safe ceramic paints for the background (e.g., deep blue, purple, pink, orange for a cosmic sunset; or black for a classic night sky)
- Black or very dark grey food-safe ceramic paint for the silhouette
- Fine-tipped brush for outlining, and a larger brush for filling
- Optional: Stencils for specific landscape shapes (mountains, trees, city skyline)
- Rubbing alcohol and cotton pads
Step-by-Step Directions
- Clean your mug.
- Paint the background of your mug with your chosen cosmic colors (e.g., blend blues, purples, and pinks for a vibrant galaxy effect, or simply a dark blue/black for a classic starry night sky). Let it dry completely.
- Sketch or trace your desired landscape silhouette (mountains, trees, skyline) onto the dry background.
- Using the fine-tipped brush, carefully outline the silhouette with black ceramic paint.
- Fill in the outlined silhouette with black paint, ensuring an even, opaque coat.
- Add tiny white or silver dots to the colorful background for stars, ensuring they don’t overlap the silhouette.
- Allow all paint to dry. Cure the mug in the oven as per paint instructions for a durable ceramic artistic coffee cup.
Pro-Tip: For the crispiest silhouette edges, use painter’s tape or stencil vinyl to mask off your design before painting the background. This allows for a clean separation and ensures a professional finish that truly elevates your cosmic silhouette mug.

7. Embellish with Deep Space Nebula Designs

Pin this stunning nebula art to your “Space Art Inspiration” board!
Taking inspiration from nebulae classification imagery, a deep space nebula mug is an exercise in color and chaos controlled by artistic intent. This style pushes the boundaries of standard galaxy art by using broader spectrums of color—intense reds, warm oranges, and electric blues. It’s about capturing the explosive and generative power of the cosmos mugs represent. Successful execution relies on understanding color theory in ceramics to ensure pigments blend without becoming muddy, creating a vibrant painted night sky coffee mug that feels alive.
Supplies Needed
- 1 ceramic mug (dark blue or black base)
- Food-safe ceramic paints in vibrant reds, oranges, yellows, and blues
- Sponge applicators or blending brushes
- Fine-tipped brush for stars
- Optional: Iridescent or metallic ceramic paints for highlights
- Rubbing alcohol and cotton pads
Step-by-Step Directions
- Clean your mug. Apply a base coat of dark blue or black ceramic paint, let dry.
- Using sponges or blending brushes, dab and blend your chosen vibrant colors (reds, oranges, yellows, blues) onto the mug in irregular, swirling patterns, mimicking gas clouds.
- Layer the colors, ensuring smooth transitions and some areas of overlap to create depth. Use lighter colors in the center of your nebula designs.
- Add touches of iridescent or metallic paint for a luminous effect within the nebula.
- With a fine-tipped brush, flick or dot white and silver paint to create a field of stars around and within your nebula, completing the deep space nebula look.
- Allow all paint to dry. Cure the mug in the oven according to paint instructions for a durable ceramic finish.
Pro-Tip: To make your nebulae appear truly luminous and ethereal, use a minimal amount of a very light, almost white color (like a pale yellow or light blue) at the brightest “core” of your nebula and blend outwards. This technique, rooted in color theory in ceramics, creates a glowing effect as seen in real nebulae classification images.

8. Master a Minimalist Starburst Mug

Pin this chic minimalist starburst for elegant night sky mug inspiration!
Not every night sky mug needs to be a riot of color. The minimalist starburst design appeals to those who favor modern aesthetics and clean lines. This style distills celestial themes into their simplest geometric forms—radiating lines and singular points of light. It’s an excellent entry point for beginners because it requires fewer colors but places a high premium on precision. The result is a unique night sky mug that feels sophisticated and contemporary, perfect for a modern office or kitchen.
Supplies Needed
- 1 ceramic mug (black or dark blue base recommended)
- Food-safe ceramic paint pen (white, silver, or gold, fine-tipped)
- Optional: Thin painter’s tape for crisp lines
- Ruler
- Rubbing alcohol and cotton pads
Step-by-Step Directions
- Clean your mug thoroughly with rubbing alcohol.
- Apply a base coat of black or dark blue ceramic paint and let it dry.
- Decide on the placement of your starburst. It can be a central focal point or emerge from an edge.
- Using a ruler and your fine-tipped ceramic paint pen, draw radiating lines from a central point, varying their lengths slightly to create a dynamic starburst effect.
- Add a small dot at the center of the starburst and at the end of each line for visual interest.
- You can create multiple smaller starbursts or combine with tiny scattered dots for distant stars to complete your minimalist starburst mug.
- Allow the paint to dry completely. Cure the mug by baking it in the oven per paint instructions for a permanent design.
Pro-Tip: For perfectly straight, crisp lines in your minimalist starburst, use thin painter’s tape to create the radiating pattern. Press down firmly to prevent bleeding, then remove the tape immediately after painting. This simple trick ensures a professional finish and demonstrates attention to artistic mastery.

9. Craft a Whimsical Night Sky with Fireflies Mug

Pin this enchanting firefly mug design to your “Magical Crafts” board!
For a touch of fantasy, a whimsical night sky with fireflies mug merges the wonder of the cosmos with earthly magic. This design introduces playful elements like glowing insects or fairy lights against a twilight backdrop. It deviates from strict astronomical accuracy to evoke a feeling of nostalgia and enchantment. Using glowing night sky effect techniques, such as phosphorescent pigments or clever highlighting, you can create a creative mug design that feels interactive and alive, especially in low light settings.
Supplies Needed
- 1 ceramic mug (deep blue or black base)
- Food-safe ceramic paints in deep blue, white, and yellow-green
- Optional: Glow-in-the-dark ceramic paint (yellow-green or light blue)
- Fine-tipped paintbrushes or dotting tools
- Rubbing alcohol and cotton pads
Step-by-Step Directions
- Clean your mug. Apply a base coat of deep blue or black ceramic paint, allowing it to dry completely.
- Using a fine-tipped brush, paint tiny white dots across the mug to represent distant stars.
- With yellow-green paint (or glow-in-the-dark paint), create small, slightly larger dots for the fireflies. Vary their size and placement for a natural, scattered look.
- For a glowing effect, paint a tiny halo of lighter yellow-green around some of the firefly dots while the paint is still wet, blending outwards.
- If using glow-in-the-dark paint, apply a second coat to the fireflies for a brighter glow.
- Allow all paint to dry completely. Cure the mug in the oven as per paint instructions to ensure the unique night sky mug is long-lasting.
Pro-Tip: To truly capture the whimsical night sky with fireflies, ensure your glow-in-the-dark paint is fully charged by exposing the finished mug to strong light before viewing it in the dark. This simple step maximizes the “luminol effect” and the magical surprise of your creative mug designs.

Key Takeaways: Your Quick Guide to Painted Mugs Night Sky
Before you start your creative journey, here are the essential points to remember to ensure your painted mugs night sky project is a success. These core insights distill the process down to its most critical elements for quick reference.
- Crafting your own painted mugs night sky offers unparalleled personalization and makes a unique, thoughtful gift. – This process transforms a simple mug into an artistic coffee cup that reflects cosmic wonder.
- Success hinges on selecting the right food-safe ceramic paints and ensuring proper curing for lasting durability. – Always prioritize non-toxic glazes and follow manufacturer’s instructions to prevent paint chipping and fading designs.
- Diverse techniques allow for stunning effects, from shimmering galaxy swirls to intricate constellation maps. – Experiment with sponges for nebulae, fine brushes for stars, and stencils for precision to achieve your desired celestial painted mugs look.
- Personalization can elevate your night sky mug, whether with specific dates, initials, or symbolic constellations. – This makes each custom night sky mug deeply meaningful to the recipient or creator.
- Always clean your ceramic mug thoroughly with rubbing alcohol before painting to ensure optimal paint adhesion. – This foundational step is a proven technique that directly impacts the long-lasting art of your creation.
- For advanced effects like luminous auroras or glowing fireflies, explore phosphorescent pigments and careful color blending. – These techniques demonstrate artistic mastery and create truly captivating night sky mug art.
- Each DIY night sky mug painting project provides a creative outlet and a unique piece of home decor. – This fulfilling craft allows for personal expression and yields a unique product for your home or as a personalized gift.
People Also Ask About Painted Mugs Night Sky
Navigating the world of night sky mug painting often raises specific technical questions. Below, we address the most common queries to ensure your starry night mugs are safe, durable, and beautiful.
What kind of paint should I use for night sky mug painting?
For painting night sky mugs, you should use food-safe ceramic paints or porcelain pens that are specifically designed for glassware and ceramics. These paints typically require baking or air-curing to become permanent and dishwasher safe, preventing paint chipping and ensuring a durable finish. Brands often specify if they are non-toxic glazes.
How do I make painted night sky mugs dishwasher safe?
To make painted night sky mugs dishwasher safe, you must properly cure the ceramic paint by baking the mug in your home oven according to the paint manufacturer’s specific instructions. This heat treatment bonds the paint to the mug’s surface, making it resistant to washing and daily use. Always check the paint’s labeling for exact temperature and time recommendations for a permanent design.
Can I personalize a night sky mug with names or dates?
Yes, you can absolutely personalize a night sky mug with names, dates, or specific zodiac constellations to make it a unique gift. Use fine-tipped ceramic paint pens for intricate lettering or a stencil for consistent script. This personalization transforms a beautiful design into a cherished, custom painted night sky mug.
What are the best night sky mug designs for beginners?
For beginners, simple night sky mug designs include a scattered star pattern with white dots on a dark blue or black base, or a basic moon phase progression. These designs utilize straightforward techniques like dotting and simple shapes, allowing you to practice paint control and curing processes without complex blending, making it an easy DIY mug painting project.
How do I prevent paint from chipping or fading on my painted mugs?
To prevent paint from chipping or fading on your painted mugs, ensure you use high-quality, food-safe ceramic paints and follow the curing instructions precisely. Additionally, hand-washing your custom painted night sky mugs is always recommended over dishwashers, even if the paint is labeled as dishwasher safe, to significantly extend the life of your long-lasting art.
Where can I find inspiration for unique night sky mug styles?
You can find extensive inspiration for unique night sky mug styles on platforms like Pinterest, Etsy, and various craft blogs. Search for terms like “galaxy painted mugs,” “starry night mugs,” and “celestial themed mugs” to discover a wide range of designs, from abstract swirls to detailed constellation maps. Online artist communities also offer a wealth of creative ideas for your creative mug designs.
Are custom etched night sky mugs different from painted ones?
Yes, custom etched night sky mugs are distinct from painted ones as they involve removing or abrading the mug’s surface to create the design, rather than adding paint. This technique results in a subtle, tactile, and highly durable design that won’t fade or chip. While both offer a personalized touch, etching provides a different aesthetic and permanence compared to hand-painted designs.
What tools do I need for a DIY night sky mug painting project?
For a DIY night sky mug painting project, essential tools include blank ceramic mugs, food-safe ceramic paints in various colors, fine-tipped paintbrushes or paint pens, sponges for blending, rubbing alcohol for preparation, and an oven for curing. Optional tools can include stencils, dotting tools, and thin painter’s tape to help with precision and achieving specific night sky mug art effects.
How long does it take to paint and cure a night sky mug?
The time to paint a night sky mug varies greatly by design complexity, but generally ranges from 30 minutes to a few hours of active painting. Curing, which usually involves baking in an oven, typically takes an additional 30 minutes to 2 hours, plus cooling time, ensuring your painted ceramic mugs achieve their durable finish.
Is it safe to drink from mugs I’ve painted myself?
It is generally safe to drink from mugs you’ve painted yourself, provided you use only food-safe, non-toxic ceramic paints and glazes, and apply them correctly. Always ensure the paint is fully cured according to the manufacturer’s instructions, and avoid painting on the rim or interior surfaces where your mouth will make direct contact to ensure complete safety and enjoyment of your handmade night sky mugs.
Final Thoughts on Painted Mugs Night Sky
Creating your own painted mugs night sky is more than just a craft; it’s an opportunity to infuse everyday objects with personal meaning and cosmic beauty. We’ve explored 9 essential design ideas, from vibrant galaxy swirls to intricate constellation maps and whimsical firefly scenes, each offering a unique canvas for your creativity. The key to lasting beauty lies in selecting food-safe ceramic paints, applying proven techniques with care, and meticulously curing your designs to ensure they remain a durable finish for years to come. Whether you’re making a thoughtful gift or adding a touch of celestial home decor to your own space, the journey of transforming a blank mug into a starry masterpiece is deeply rewarding.
Embrace the joy of DIY mug painting and let your imagination soar across the ceramic expanse. With the right materials and a dash of artistic courage, you can bring the majesty of the night sky into your morning coffee routine. Remember that practice makes perfect, and each handmade night sky mug tells its own unique story. Now that you’re equipped with these essential night sky mug painting techniques for 2026, which celestial design will you embark on first?
Last update on 2026-03-05 / Affiliate links / Images from Amazon Product Advertising API


