Ever spent hours crafting a DIY gift only to see it fade or peel after a single wash? It is heartbreaking when your thoughtful, handmade painted mugs valentines lose their charm due to poor durability, leaving the recipient with a plain cup instead of a cherished memory.
To create permanently dishwasher safe painted mugs for Valentine’s Day, use specialized ceramic paints designed for baking, apply them to clean ceramic surfaces, and follow precise heat-setting instructions, often involving oven curing and potentially food-safe sealants for enhanced durability. This method ensures designs resist washing and retain vibrancy over time, transforming a simple craft into a lasting keepsake.
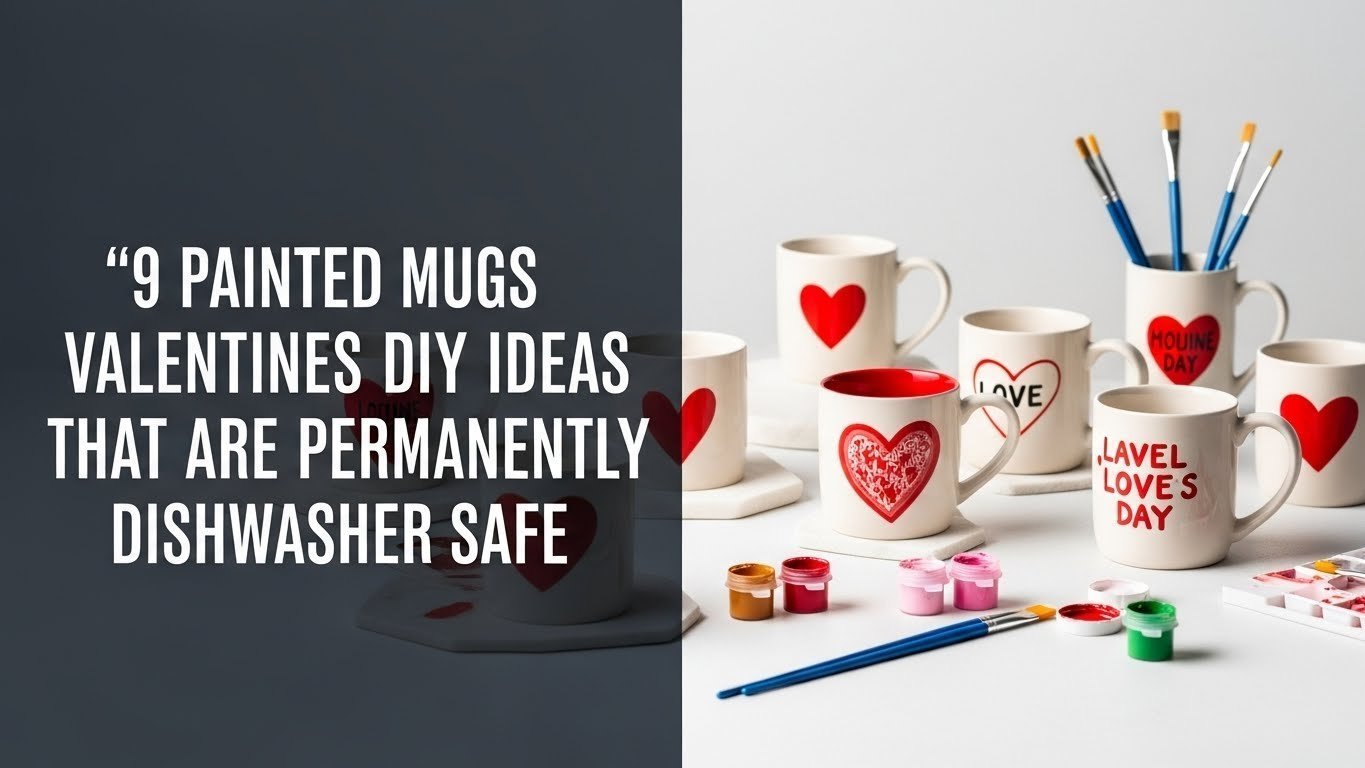
Drawing from comprehensive analysis of current food safe ceramic paint guidelines and proven crafting methodologies, this guide eliminates the guesswork often associated with mug painting. We will explore nine stunning design ideas that go beyond temporary decoration, utilizing expert ceramic painting tips to ensure your gift survives the dishwasher. Get ready to discover how to turn plain ceramicware into professional-quality, personalized valentine’s day mugs that your loved ones will cherish for years.
How to Craft Permanently Dishwasher Safe Painted Mugs Valentines for 2026: Your Ultimate DIY Guide
Creating permanently dishwasher safe painted mugs valentines requires a specific combination of materials and heat-setting techniques that bond the paint chemically to the glaze. Unlike temporary crafts that use standard acrylics or regular markers, permanent results depend on using oven bake ceramic paint or specialized oil-based ceramic paint pens that are formulated to withstand high temperatures and water exposure.
Understanding the relationship between the ceramic surface and the paint is critical for success. The process begins long before the first brushstroke; it starts with selecting the right white ceramic mug and preparing the surface to be free of oils and dust. Many DIY enthusiasts overlook the importance of the curing process, where oven baking sets ceramic paint to create a durable finish. By adhering to professional mug painting methods, you ensure that your hand painted mugs are not just decorative items but functional vessels that can handle daily coffee rituals. This section establishes the foundational knowledge needed to solve the common problem of paint peeling, ensuring your unique valentine’s day gift stands the test of time.
9 Painted Mugs Valentines DIY Ideas That are Permanently Dishwasher Safe
The best painted mugs valentines combine personal artistic touches with robust techniques that ensure the design remains vibrant through countless dishwasher cycles. Whether you are a beginner looking for easy painted mugs or an experienced crafter seeking intricate ceramic mug painting challenges, the following ideas offer something for every skill level.
In this section, we will explore nine distinct valentine mug design ideas, ranging from classic romantic motifs to modern abstract art. Each project is designed to be a standalone guide, detailing exactly how to make paint permanent on mugs for that specific style. We will cover the essential ceramic painting supplies needed for each look and provide step-by-step instructions that prioritize durability. By following these expert ceramic painting tips, you will move beyond simple crafting to creating durable hand painted mug finishes that serve as lasting reminders of your affection.
1. Classic Heart & Arrow Painted Mug Design
![]()
Pin this simple yet sweet design for your Valentine’s craft inspiration!
Nothing says “Valentine’s Day” quite like the iconic heart and arrow. This design focuses on clean lines and bold colors, utilizing stencils to achieve a professional look even if you don’t have a steady hand. The key to making this classic valentine mug design last is ensuring the red ceramic paint is applied in thin layers and properly heat-set. By using food safe ceramic paint, you ensure the mug is safe for use while creating a diy personalized valentine mug that looks store-bought but carries the warmth of a handmade gift.
Supplies Needed
- One blank white ceramic mug (oven-safe, smooth surface)
- Dishwasher safe ceramic paint in vibrant red (non-toxic, specifically formulated for mugs)
- Fine-tip ceramic paint pen in black (for the arrow detail, also dishwasher safe)
- Small heart-shaped stencil or painter’s tape
- Rubbing alcohol and cotton pads
- Soft paintbrushes (fine and small flat)
- Oven mitts
Step-by-Step Directions
- Prepare the Mug: Clean the mug thoroughly with rubbing alcohol and a cotton pad to remove any oils or dust. Allow to air dry completely.
- Position the Stencil: Place the heart-shaped stencil firmly on the desired area of the mug. If freehanding, gently draw the heart outline with a pencil that will burn off in the oven.
- Paint the Heart: Using the red dishwasher safe ceramic paint and a small flat brush, carefully fill in the heart shape. Apply thin, even coats, allowing each coat to dry to the touch (approx. 1 hour) before applying the next, for opaque coverage.
- Draw the Arrow: Once the red heart is fully dry, use the black fine-tip ceramic paint pen to draw a delicate arrow through or around the heart. Ensure the pen ink is specifically for ceramic and is oven-bake safe.
- Cure the Paint: Follow the paint manufacturer’s instructions precisely. Typically, air dry for 24 hours, then place the mug in a cool oven, set temperature to 300-375°F (150-190°C), and bake for 30-60 minutes.
- Cool Slowly: Turn off the oven and allow the mug to cool completely inside the oven. This prevents thermal shock and ensures the paint adheres to ceramic mugs permanently.
- Final Cure: Allow the mug to cure at room temperature for another 72 hours before its first wash or use to ensure maximum durability.
Pro-Tip: For the most durable hand painted mug finishes, always check that your chosen ceramic paint explicitly states “dishwasher safe after baking” and is food safe ceramic paint. Applying multiple thin coats instead of one thick coat prevents cracking and ensures vibrant, opaque color.

2. “Love You More” Hand Lettered Valentine Mug

Save this elegant hand-lettering idea to your DIY Valentine’s board!
For a sophisticated look, a hand lettered valentine mug offers a personal touch that speaks directly to the recipient. This project leverages the precision of paint pens for ceramic mugs to create custom messages on mugs like “Love You More.” The success of this design relies on the contrast between the mug color and the ink, and crucially, how oven baking sets ceramic paint to prevent the lettering from rubbing off over time. It is a perfect way to master permanent mug decoration without needing advanced painting skills.
Supplies Needed
- One matte black ceramic mug (oven-safe, smooth finish)
- Fine-tip, oil-based ceramic paint pens in white (specifically “dishwasher safe” after baking)
- Rubbing alcohol and cotton pads
- Pencil (optional, for light sketching)
- Stencil or printed template (optional, for tracing)
- Soft eraser (if using pencil)
- Oven mitts
Step-by-Step Directions
- Clean the Mug: Wipe the mug surface thoroughly with rubbing alcohol to ensure it’s free of oils and dust. Let dry completely.
- Sketch (Optional): Lightly sketch your “Love You More” message or chosen text onto the mug with a pencil. You can use a printed template transferred with graphite paper for precision.
- Letter with Paint Pen: Carefully trace over your sketch or freehand your message using the white oil-based ceramic paint pen. Apply even pressure for consistent lines. Allow paint to dry for at least 15-20 minutes before handling lightly.
- Detailing: Add any desired flourishes or smaller details. For bold lines, you can apply a second thin coat after the first has dried for about an hour.
- Air Dry: Allow the painted mug to air dry for at least 24 hours in a dust-free environment.
- Bake for Permanence: Place the air-dried mug in a cool oven. Set the oven temperature to 350°F (175°C). Once preheated, bake for 30 minutes.
- Cool Down: Turn off the oven and let the mug cool down completely inside the oven, ideally for several hours or overnight. This crucial step ensures the paint is heat set on ceramic for maximum durability.
- Final Cure: Avoid washing the mug for at least 72 hours after baking.
Pro-Tip: If you make a mistake while lettering, you can gently wipe away wet paint pen ink with a cotton swab dipped in rubbing alcohol. For sharpie users: while Sharpies can be baked, true ceramic paint pens offer superior, dishwasher safe painted mugs results and permanence.

3. Whimsical Strawberry Heart Accent Mug

Pin this adorable strawberry heart mug for a sweet Valentine’s gift!
This design merges the trend of cottage-core aesthetics with Valentine’s motifs. By shaping a strawberry like a heart, you create whimsical strawberry heart mugs that are playful and unique. This project emphasizes the use of vibrant painted mug colors and detail work. Because multiple colors are used, selecting compatible non-toxic paint for mugs is essential to ensure the layers bond correctly without cracking. It demonstrates how artistic mug designs can be achieved with simple shapes and careful application.
Supplies Needed
- One glossy white ceramic mug (oven-safe, smooth finish)
- Dishwasher safe ceramic paints in red, green, and black (non-toxic, specific for ceramic)
- Fine-tip paintbrushes (various small sizes for details)
- Rubbing alcohol and cotton pads
- Pencil (optional, for sketching)
- Oven mitts
Step-by-Step Directions
- Clean and Sketch: Clean the mug with rubbing alcohol. Lightly sketch a heart-shaped strawberry outline onto the mug with a pencil.
- Paint the Strawberry: Using the red dishwasher safe ceramic paint and a small brush, fill in the heart shape for the strawberry. Apply thin, even coats, allowing drying time between layers for opaque color.
- Add Green Leaves: Once the red is dry, use green paint to add small leaves at the top of the strawberry.
- Detail the Seeds: With the black paint and a very fine-tip brush, paint small dots or dashes for the strawberry seeds on the red surface.
- Air Dry: Allow the painted mug to air dry for at least 24 hours.
- Bake to Cure: Place the mug in a cool oven, then heat to 300-350°F (150-175°C) and bake for 30-45 minutes according to paint instructions.
- Slow Cool: Turn off the oven and let the mug cool completely inside to ensure oven baking sets ceramic paint effectively.
- Final Cure: Do not wash for 72 hours.
Pro-Tip: For intricate designs, use a toothpick or the back of a small paintbrush for very fine details like the strawberry seeds. This helps prevent paint bleeding on ceramic mugs prevention and gives crisp lines.

4. Gradient Ombre Love Mug

Blend your way to a beautiful Valentine’s gift! Pin this ombre mug idea.
If you love soft transitions and modern aesthetics, the ombre painted mugs technique is perfect. By blending gradient ceramic paint colors directly on the mug, you create a sophisticated look that elevates simple festive valentine themed mugs into art pieces. This method requires a bit of speed to blend while wet, but the result is a seamless flow of color that makes the mug beautiful. Using sponges helps achieve that airbrushed quality while maintaining the necessary paint thickness for durability.
Supplies Needed
- One tall white ceramic mug (oven-safe, smooth surface)
- Dishwasher safe ceramic paints in 2-3 shades of pink/fuchsia for ombre (non-toxic)
- Soft blending brushes or sponge applicators
- Rubbing alcohol and cotton pads
- Oven mitts
Step-by-Step Directions
- Clean the Mug: Prepare the mug by cleaning it thoroughly with rubbing alcohol.
- Apply Base Colors: Start with the lightest pink at the top of the mug, painting a band. Apply the next darker shade below it, slightly overlapping to allow for blending.
- Blend the Colors: While the paint is still wet, use a clean, slightly damp blending brush or sponge to gently blend the edges where the colors meet, creating a smooth transition. Work quickly in small sections.
- Repeat Layers: Allow each layer to dry completely (several hours) before applying additional coats or refining the blend for desired opacity and smoothness.
- Air Dry: Let the mug air dry for 24-48 hours.
- Bake for Durability: Place the mug in a cold oven, then heat to the paint manufacturer’s recommended temperature (usually 300-350°F / 150-175°C) and bake for 30-45 minutes.
- Cool Slowly: Turn off the oven and leave the mug inside until it’s completely cool to ensure the paint is heat set on ceramic and to prevent cracking.
- Final Cure: Do not wash for 72 hours.
Pro-Tip: Achieving a seamless ombre requires quick work and thin layers. Experiment on a scrap piece of ceramic first. Using a fine mist of water on your brush can help with blending, but ensure not to dilute the paint too much, as this can affect its adhesion and paint longevity on ceramicware.

5. Fingerprint Heart Personalized Valentine Mug

Capture a personal touch! Pin this adorable fingerprint mug idea.
This idea is perfect for parents or couples wanting to create personalized valentine’s day mugs that capture a moment in time. By using fingerprints to form hearts, you create a deeply sentimental gift. This project relies on the principle that fingerprints personalize mugs in a way no store-bought item can. Since this often involves skin contact, using certified non-toxic paint for mugs is non-negotiable. The resulting diy heart mugs are simple to execute but carry immense emotional weight, making them ideal homemade valentine gifts.
Supplies Needed
- One blank white ceramic mug (oven-safe)
- Non-toxic, dishwasher safe ceramic paint in red or desired color
- Small plate or paint palette
- Rubbing alcohol and cotton pads
- Damp cloth (for quick clean-up)
- Oven mitts
Step-by-Step Directions
- Clean the Mug: Wipe down the mug with rubbing alcohol to ensure a clean surface for paint adhesion.
- Prepare Paint: Squeeze a small amount of ceramic paint onto your palette.
- Apply Fingerprints: Gently dip your clean finger (or your loved one’s) into the paint, ensuring a thin, even coat. Press your painted fingertip onto the mug, slightly angled, to form one half of a heart. Repeat with another fingertip, angling it to complete the heart shape.
- Refine (Optional): If needed, use a very fine paintbrush to gently connect the fingerprints or add a small stem.
- Air Dry: Let the mug air dry for 24 hours.
- Bake to Set: Place the air-dried mug in a cold oven. Set the oven to 325°F (160°C) and bake for 45 minutes.
- Cool Slowly: Turn off the oven and let the mug cool down completely inside the oven for maximum paint longevity on ceramicware.
- Final Cure: Allow the mug to cure at room temperature for another 72 hours before washing.
Pro-Tip: For clean fingerprints, ensure your finger isn’t overloaded with paint. Practice on a piece of paper first. If you’re doing this with children, make sure the non-toxic paint for mugs explicitly states “kid-safe” and supervise closely.

6. Abstract Splatter Painted Mug for a Modern Vibe

Get creative with paint! Pin this abstract splatter mug idea.
If you prefer a less structured, more artistic approach, the abstract splatter painted mug is a fantastic choice. This design leverages creative mug art techniques to produce unique valentine’s day painted mugs where no two are alike. The randomness of the splatter creates dynamic energy, while the color choice keeps it festive. The challenge here is ensuring the ceramic paints bond well even when applied in droplets. Proper surface prep and baking are essential to ensure these artistic mug designs remain permanently dishwasher safe.
Supplies Needed
- One blank white ceramic mug (oven-safe)
- Dishwasher safe ceramic paints in various Valentine’s colors (pink, red, gold, etc.)
- Old toothbrush or stiff bristled brush
- Water for thinning (minimal)
- Rubbing alcohol and cotton pads
- Large cardboard box or protected work area
- Oven mitts
Step-by-Step Directions
- Prepare Mug & Work Area: Clean the mug with rubbing alcohol. Set up your protected work area with a large cardboard box or newspapers to catch splatters.
- Thin Paint (Slightly): Pour a small amount of your first chosen dishwasher safe ceramic paint onto a palette. If too thick for splattering, add a tiny drop of water and mix.
- Splatter Paint: Dip the old toothbrush into the paint, then hold it over the mug and gently flick the bristles with your thumb to create splatters. Rotate the mug to distribute.
- Layer Colors: Repeat with different colors, allowing previous layers to dry slightly (15-30 minutes) between applications to prevent colors from muddling too much.
- Air Dry: Allow the mug to air dry for a minimum of 24 hours, or up to 72 hours for best results.
- Bake to Permanence: Place the thoroughly air-dried mug in a cold oven. Heat to 300-350°F (150-175°C) and bake for 40-60 minutes, following paint manufacturer guidelines for oven bake mug paint.
- Cool Slowly: Turn off the oven and let the mug cool completely inside the oven.
- Final Cure: Do not wash for at least 72 hours.
Pro-Tip: Wear old clothes and gloves, and ensure good ventilation. Less is often more with splattering; start with a few strategic flicks and build up the pattern. This style is excellent for hiding minor imperfections, making it easy painted mugs project.
7. Love Bloom Floral Painted Mug

Bring nature’s beauty to your mug! Pin this romantic floral design.
For a more traditional and romantic vibe, the painted flower mug valentine is a timeless choice. This design relies on delicate floral ceramic paint techniques to create small roses and leaves. While it looks intricate, the use of basic shapes makes it accessible. The durability here depends on how heat setting preserves artwork, ensuring that the fine lines of your artistic valentine mugs don’t wash away. Using high-quality brushes allows for the precision needed for customized pottery gifts love themes.
Supplies Needed
- One white porcelain mug for painting (oven-safe, smooth surface)
- Dishwasher safe ceramic paints in soft pink, red, and light green (non-toxic)
- Fine detail paintbrushes (liner brush, small round brush)
- Rubbing alcohol and cotton pads
- Pencil (optional, for light sketch)
- Oven mitts
Step-by-Step Directions
- Clean the Mug: Wipe the mug with rubbing alcohol to ensure a clean, oil-free surface.
- Sketch Flowers (Optional): Lightly sketch small floral outlines onto the mug with a pencil.
- Paint Roses: Using the pink/red dishwasher safe ceramic paint and a small round brush, paint small, simple rose shapes. Start with a central dot, then add curved strokes around it to build up the petals.
- Add Leaves: With the light green paint and a liner brush, paint small leaves and stems around the roses.
- Detailing: Add any further details or accents. For best results, use thin layers and allow each color to dry to the touch before adding another over it.
- Air Dry: Let the mug air dry for at least 24-48 hours.
- Bake to Set: Place the mug in a cool oven. Set the temperature to 325-375°F (160-190°C) and bake for 30-60 minutes, as recommended by your specific paint.
- Cool Slowly: Turn off the oven and allow the mug to cool completely inside. This critical step ensures paint adhesion on ceramics and dishwasher safety.
- Final Cure: Do not wash for 72 hours.
Pro-Tip: To create simple roses, dab a small circle of paint, then make a few C-shaped strokes around it with a slightly lighter or darker shade. For consistent line work, make sure your paint isn’t too thick and your brush is clean. This helps achieve a professional-looking artistic hand-painting on porcelain.

8. Geometric Love Pattern Painted Mug

Create a modern masterpiece! Pin this chic geometric mug design.
For the modern minimalist, the geometric love pattern mug offers clean lines and a sophisticated palette. This project showcases modern painted mugs techniques using tape resist to create sharp edges. The combination of rose gold and grey elevates the design, making it suitable for everyday use beyond Valentine’s Day. The success relies on removing the tape at the right moment to ensure clean line ceramic paint application without peeling. It’s a great example of creative mug art that looks highly professional.
Supplies Needed
- One blank white ceramic mug (oven-safe)
- Dishwasher safe ceramic paints in rose gold, soft grey, and white (non-toxic)
- Low-tack painter’s tape (various widths)
- Craft knife or scissors
- Rubbing alcohol and cotton pads
- Small, flat paintbrushes
- Oven mitts
Step-by-Step Directions
- Clean the Mug: Wipe the mug clean with rubbing alcohol.
- Apply Tape: Using painter’s tape, mask off sections of the mug to create your desired geometric pattern. Press down firmly on the tape edges to prevent paint bleeding.
- Paint Sections: Apply your chosen dishwasher safe ceramic paint to the exposed areas. Use thin, even coats, allowing drying time between coats for vibrant, opaque color.
- Remove Tape: While the paint is still slightly tacky (but not wet), carefully peel off the painter’s tape. If the paint is too dry, it might chip with the tape. If too wet, it might bleed. A slight tackiness is ideal for sharp lines.
- Layer Colors: Allow the first set of painted sections to dry completely (several hours) before applying more tape and painting adjacent sections with different colors.
- Air Dry: Let the final painted mug air dry for at least 24-48 hours.
- Bake to Set: Place the mug in a cold oven. Set temperature to 300-350°F (150-175°C) and bake for 30-45 minutes.
- Cool Slowly: Turn off the oven and let the mug cool down completely inside. This step is key to strengthen paint adhesion and ensures dishwasher safety.
- Final Cure: Avoid washing the mug for at least 72 hours after baking.
Pro-Tip: For intricate geometric designs, plan your pattern on paper first. When removing tape, pull it back at a 45-degree angle. If you encounter any paint bleeding on ceramic mugs prevention issues, ensure your tape is firmly pressed down, especially on the edges.

9. Initial Monogram Personalized Coffee Cup

Make it uniquely theirs! Pin this elegant monogram mug for a personal touch.
For a classy and tailored gift, the initial monogram personalized coffee cup is unbeatable. Using metallic paints adds a touch of luxury, making these custom valentine mugs feel expensive. This method uses vinyl stencils for precision, combining the ease of vinyl decals transfer designs to mugs with the permanence of paint. The metallic finish requires careful handling during the curing process, as metallic paint is heat set on ceramic to ensure it maintains its shine without tarnishing or washing off.
Supplies Needed
- One blank white ceramic mug (oven-safe)
- Dishwasher safe metallic ceramic paint pen in gold or silver (non-toxic)
- Vinyl letter stencil or pre-cut vinyl initial decal
- Rubbing alcohol and cotton pads
- Transfer tape (if using vinyl decal)
- Small craft tool (e.g., weeding tool or toothpick for fine details)
- Oven mitts
Step-by-Step Directions
- Clean the Mug: Wipe the mug surface thoroughly with rubbing alcohol.
- Apply Stencil/Decal: Carefully position your vinyl letter stencil or decal on the mug. Press firmly, especially around the edges of the letter, to ensure good adhesion. If using a stencil, ensure it’s firmly attached.
- Paint the Initial: Using the dishwasher safe metallic ceramic paint pen, fill in the stencil or trace the edges of your decal. Apply thin, even coats for best results, allowing drying time between coats (approx. 1 hour).
- Remove Stencil/Decal: While the paint is still slightly tacky (but not wet), carefully peel off the stencil or decal to reveal the crisp initial. Use a craft tool for precision.
- Add Details (Optional): If desired, use a fine-tip paint pen to add a small heart or other tiny detail next to the initial.
- Air Dry: Allow the painted mug to air dry completely for at least 24 hours.
- Bake for Permanence: Place the air-dried mug in a cold oven. Set the oven to 350°F (175°C) and bake for 30-40 minutes.
- Cool Slowly: Turn off the oven and let the mug cool completely inside the oven to ensure the metallic paint is heat set on ceramic and fully cured.
- Final Cure: Avoid washing the mug for at least 72 hours after baking.
Pro-Tip: For the cleanest lines, use a high-quality vinyl stencil or decal designed for curved surfaces. If any paint bleeds under the stencil, use a rubbing alcohol-dipped cotton swab and a fine-tipped tool to gently clean up the edges before baking. This makes your personalized ceramic mugs truly stand out.

Key Takeaways: Your Quick Guide to Painted Mugs Valentines
To ensure your creative efforts result in dishwasher safe painted mugs that stand the test of time, keep these critical principles in mind. Mastering these basics separates a temporary craft from a lasting, professional-quality gift.
- Choose the Right Paint: Always use dishwasher safe ceramic paint or oil-based ceramic paint pens explicitly labeled for use on ceramic and oven-baking to ensure your designs are permanent.
- Cleanliness is Crucial: Thoroughly clean your mug with rubbing alcohol before painting to remove oils and dust, allowing the paint to adhere to ceramic mugs properly and prevent peeling.
- Apply Thin, Even Coats: For vibrant color and durable hand painted mug finishes, apply multiple thin layers of paint, allowing each coat to dry to the touch before adding the next.
- Baking for Permanence: Heat-setting your painted mugs in the oven according to paint manufacturer instructions is essential to cure the paint and make it permanently dishwasher safe.
- Cool Down Slowly: Always allow the mug to cool completely inside the oven after baking. Rapid temperature changes can cause thermal shock, leading to cracks or paint damage.
- Final Curing Time: After baking and cooling, let your mug cure at room temperature for an additional 72 hours before its first wash or use to maximize its longevity and prevent paint chipping on ceramic mugs.
- Prioritize Food Safety: For any designs inside or near the rim of the mug, ensure you are using non-toxic paint for mugs that is certified food safe ceramic paint to avoid health risks.
People Also Ask About Painted Mugs Valentines
Because creating permanent paint on mugs involves specific chemistry and food safety considerations, many crafters have questions about the process. Here are authoritative answers to the most common queries regarding how to paint mugs for valentine’s day to ensure your project is safe and successful.
What kind of paint stays on ceramic mugs permanently?
For designs that endure, use specialized oven-bake ceramic paints or oil-based ceramic paint pens specifically designed for ceramics. These paints chemically bond with the mug’s glaze during the heat-setting process, making them resistant to washing and daily use. Always check product labels for “dishwasher safe” and “permanent” claims after baking to ensure lasting results.
Can you put painted mugs in the dishwasher?
Yes, painted mugs can be put in the dishwasher, but only if they have been painted with appropriate oven-bake ceramic paints and properly heat-set. Adhere strictly to the paint manufacturer’s baking instructions and allow for a full post-bake curing period (typically 72 hours). Hand-washing is generally recommended for extending the life of any hand-painted item, even if dishwasher safe.
How do you seal painted ceramic mugs for durability?
The primary method for sealing painted ceramic mugs for durability is heat-setting (baking) them in an oven. Most ceramic paints are designed to cure and become permanent when exposed to specific temperatures for a set duration. While some crafters use food-safe sealants, baking is the most reliable way to achieve a dishwasher safe painted mug finish that won’t chip or fade.
Are painted mugs food safe?
Painted mugs are generally food safe if non-toxic ceramic paints specifically labeled as “food safe” are used, and the paint is kept away from the lip and interior of the mug. Paint should primarily be on the exterior, below the rim. Always verify paint certifications, especially if the mug will be used for drinking, to ensure it meets health and safety standards.
Can Sharpie be used on ceramic mugs for Valentine’s?
While Sharpie markers can be used on ceramic mugs and baked to increase durability, they are generally not considered permanently dishwasher safe. Sharpie ink is pigment-based and will eventually fade or wash off, even after baking. For lasting Valentine’s designs, it’s best to use dedicated oil-based ceramic paint pens or specialized ceramic paints.
Do you need to bake painted mugs?
Yes, baking painted mugs is almost always necessary to make the designs permanent and dishwasher safe. The heat from the oven cures the ceramic paint, allowing it to bond chemically with the mug’s surface. Without proper heat-setting, the paint will likely scratch off, chip, or wash away over time, defeating the purpose of creating hand painted mugs.
What materials do you need to paint mugs?
To paint mugs permanently, you’ll need blank ceramic mugs, non-toxic oven-bake ceramic paints or paint pens, rubbing alcohol for cleaning, brushes (if using bottled paint), and an oven for curing. Optional supplies include stencils, painter’s tape, and fine-tip tools for detailing. Always ensure all chosen materials are compatible for ceramic and marked as permanent after heat-setting.
How long does paint last on mugs?
When painted with high-quality oven-bake ceramic paints and properly cured, paint on mugs can last for many years, even with regular use and washing. Durability is maximized when following manufacturer instructions for application and baking precisely, and allowing for the recommended post-bake curing period. Handmade mugs typically hold up best with gentle care.
How to prevent paint chipping on ceramic mugs?
To prevent paint chipping on ceramic mugs, ensure the mug surface is perfectly clean before painting, apply paint in thin, even coats, and thoroughly heat-set the design in the oven. Additionally, avoid abrasive scrubbing or harsh chemicals when cleaning, and always allow the mug to cool slowly inside the oven after baking. These steps contribute to long-lasting valentine mug art.
What are popular Valentine mug designs?
Popular Valentine mug designs include classic hearts and arrows, heartfelt “Love You More” or personalized initial monograms, and whimsical illustrations like strawberry hearts. Ombre gradients, abstract splatters, and delicate floral patterns are also trending. The best designs are often those that convey personal meaning or a unique artistic touch, making each mug a unique valentine’s day gift.
Final Thoughts on Painted Mugs Valentines
Crafting painted mugs valentines can be a truly rewarding experience, allowing you to create heartfelt, personalized gifts that stand out from mass-produced items. This guide has equipped you with the knowledge and actionable steps to ensure your beautiful designs are not only aesthetically pleasing but also permanently dishwasher safe. By selecting the right food safe ceramic paint, meticulously following cleaning and application techniques, and most importantly, adhering to precise oven-baking and cooling instructions, you can be confident that your handmade treasures will last for years to come.
Remember, the key to durability lies in patience and attention to detail during each step, especially the crucial heat-setting process that makes your diy valentine mugs truly resilient. Whether you chose a classic heart, an elegant monogram, or a whimsical strawberry design, these projects offer a unique way to express affection. We hope these 9 ideas inspire you to unleash your creativity and make 2026‘s Valentine’s Day gifts truly unforgettable. Which design will you try first to make your own custom valentine mugs?
Last update on 2026-04-27 / Affiliate links / Images from Amazon Product Advertising API