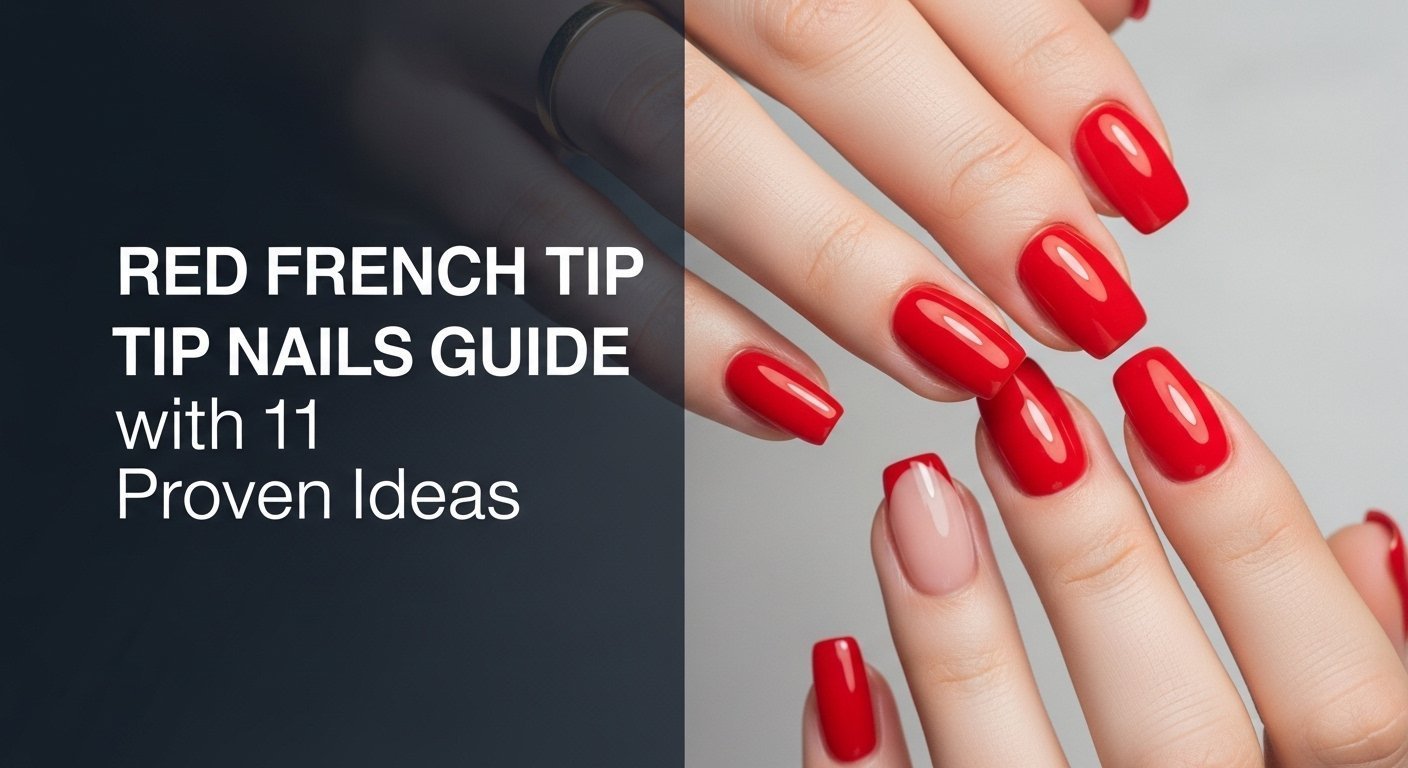
Tired of the same old nude or pink manicure? You’re searching for a style that’s sophisticated but bold, classic yet completely current, and the endless scroll of nail inspiration is starting to blur together. You want a look that makes a statement without shouting, perfectly capturing that effortless confidence.
Red French tip nails are the top manicure trend for 2026 because they perfectly blend classic elegance with modern confidence. This versatile style works on all nail shapes and can be customized for any occasion, from holiday parties to everyday wear. It’s a sophisticated and powerful update to a timeless look.
Drawing from an analysis of current trends and proven professional techniques, this guide provides everything you need to master this look. The red french tip nail is more than just a manicure; it’s an accessory. We’ll explore 11 stunning design ideas, complete with actionable steps to achieve salon-quality results at home.
Why Are Red French Tip Nails the Ultimate Manicure for 2026?
The staying power of the French manicure is undeniable, but its 2026 evolution is all about adding a confident splash of color. The modern red french tip has surged in popularity because it strikes a perfect balance. It retains the clean, polished elegance of the classic white tip but injects a dose of energy, passion, and modern sophistication. This style is incredibly versatile, suiting all skin tones and adapting to any nail shape, from a short, practical square nail to a dramatic stiletto nail. Whether you opt for a bright, candy apple red for a playful feel or a deep burgundy french style for autumnal chic, the red frenchies design is a powerful statement. It symbolizes confidence and an appreciation for timeless style that has been updated for the contemporary world, making it the go-to choice for achieving salon quality results with a personal flair.
11 Proven Red French Tip Nail Ideas for a Flawless Finish
Now that you understand the appeal of this powerful trend, let’s dive into the inspiration and practical application. This section is your ultimate gallery and tutorial guide, delivering on the promise of 11 proven red french tip nails designs. Each idea is more than just a picture; it’s a complete mini-guide designed for you to succeed. We’ll cover a range of styles, from the understated classic thin red french tips to bold and edgy looks like the v-shape red french. For each design, you’ll find detailed steps, a list of necessary tools like a liner brush or UV Lamp, and professional nail tech tips to ensure a flawless, long lasting manicure. Whether you prefer short nails or long extensions like almond or coffin shapes, you’ll find a design that fits your style and skill level.
1. Create the Perfect Classic Thin Red French Tip

Pin this timeless look to your ‘Nail Inspo’ board!
The classic red french tips design is the foundation of this trend. It’s elegant, understated, and universally flattering. This look works beautifully on almond shape nails, where the thin red line highlights nail length and complements the sophisticated curve of the nail. The key here is precision and achieving a clean, crisp ‘smile line’ against a sheer nude pink base.
Products & Tools Used
- Sheer Nude or Pink Base Coat (e.g., Essie ‘Ballet Slippers’)
- High pigment formula classic red polish (e.g., OPI ‘Big Apple Red’)
- Ultra-thin nail art liner brush (3-5mm length)
- Glossy, non-wipe top coat
- Nail polish remover and a small, clean-up brush
Application Steps
- Prep the nail bed by gently pushing back cuticles and buffing the surface.
- Apply base coat in one thin, even layer and let it dry completely.
- Pour a small amount of red polish onto a palette. Dip your liner brush and paint the french tip, creating a thin, crisp line along the free edge of the nail.
- Perfect the curve or ‘smile line’ by slowly rotating your finger as you guide the brush.
- Use your clean-up brush dipped in acetone to correct messy edges for a sharp finish.
- Once dry, seal with top coat to add shine and prevent chipping.
Pro-Tip: For an ultra-steady hand, rest your painting hand’s pinky finger on your other hand as a stabilizer. This is a professional nail tech tip for achieving perfect smile line symmetry.

2. Dazzle with Sparkly Red Glitter French Tips

Save this sparkly idea for your next holiday party!
Perfect for the holiday season or any celebration, adding glitter to your red tips instantly elevates the fun factor. This red french tip nails glitter style looks fantastic on short square nails, proving that you don’t need long nails to make a big impact. The key is to get a dense, even application of glitter on the tip and then seal it properly. Using a gel top coat creates a smooth finish over the textured glitter, which is essential for a comfortable and long lasting manicure.
Products & Tools Used
- BIAB nails or a strong builder gel base (optional, for strength)
- A highly-rated red glitter gel polish OR loose red cosmetic glitter
- A small, flat brush or sponge applicator
- Gel base and non-wipe top coat
- UV LED lamp
Application Steps
- After applying and curing your nude gel base coat, apply a thin layer of clear gel base only to the tip area where you want the French line. Do not cure.
- If using loose glitter, dip your flat brush into the glitter and gently tap it onto the uncured gel, concentrating it on the tip.
- Use a dry, clean brush to clean the smile line, creating a sharp border.
- Flash cure technique: Cure under the UV LED lamp for 10-15 seconds to set the glitter in place.
- Apply a layer of clear builder gel or a thick top coat to encapsulate the glitter and create a smooth surface.
- Fully cure, wipe the tacky layer if necessary, and finish with a final layer of glossy top coat.
Pro-Tip: To get a super saturated glitter line, use the “gravity method.” After step 2, turn your finger upside down and tap it gently. Excess glitter will fall off, leaving a dense line. This is key for that salon quality result.

3. Master the Edgy Deep V-Shape Red French Tip

Pin this edgy V-shape design to your ‘Bold Nails’ board!
For a modern, graphic take on the trend, the v-shape red french is a must-try. This sharp, geometric design is particularly striking on coffin nails, as the angled lines of the V perfectly complement the tapered square tip. The V-shape highlights nail length and creates a powerful, elongating effect. The secret to achieving those perfectly straight lines, especially for beginners, is using nail striping tape as a guide.
Products & Tools Used
- Nude base polish
- A deep red french or burgundy french style polish
- Ultra-thin nail art striping tape
- Small scissors
- Glossy top coat
Application Steps
- Apply base coat (nude) and let it dry completely. This is critical to prevent the tape from lifting the base color.
- Cut two small pieces of striping tape. Place them on the nail to form a “V” shape, with the point of the V towards your cuticle.
- Press the tape down firmly, especially along the inner edges, to prevent chipping or bleeding of the polish underneath.
- Carefully paint the french tip area above the tape with your deep red polish. Apply two thin coats if needed.
- CRITICAL STEP: Remove the tape while the red polish is still wet. Pull gently and slowly away from the center of the V.
- Let the design dry, then seal with top coat.
Pro-Tip: For extra sharp points, use tweezers to apply and remove the striping tape. This prevents oils from your fingers from affecting the tape’s adhesion and gives you more precision.

4. Embrace Understated Chic with Minimalist Microtip French

Pin this chic micro-French idea for an elegant, everyday look!
The microtip red french is the epitome of “quiet luxury” in the nail world. This incredibly subtle and chic style is perfect for those who want just a hint of color. It’s especially flattering on red french tip nails short, as the ultra-thin line adds polish without visually shortening the nail. The microtip technique enhances natural nails without overpowering them, making it a sophisticated choice for professional settings or minimalist aesthetics.
Products & Tools Used
- A strengthening clear or sheer nude base coat
- A bright red tips polish with a good quality, thin brush
- High-shine top coat
- Optional: The very tip of a nail art liner brush
Application Steps
- Start with beautifully prepped natural nails. Ensure the tips are filed smoothly and evenly.
- Apply base coat to protect the nail plate and provide a smooth canvas.
- Wipe almost all the polish off your red polish brush on the side of the bottle’s neck.
- Using just the very edge of the brush, gently swipe it along the free edge of your nail. The goal is a line that is barely 1mm thick.
- Alternatively, use the very tip of a liner brush for ultimate control.
- This look is about subtlety. Don’t worry about a deep “smile line.” A straight, thin line is the goal. Finish with a glossy top coat to make the micro-line pop.
Pro-Tip: If you’re struggling with a shaky hand, try using a nail stamper. Paint a line of red polish on the stamper head, then gently press the tip of your nail into it at a 45-degree angle. This tried and tested method creates a perfect micro-line every time.

5. Get a High-Shine Finish with Red Chrome French Tips

Save this futuristic chrome look for a night out!
For a truly show-stopping, futuristic look, red french tip nails chrome is the answer. This technique creates a liquid-metal, mirror-like finish that is absolutely mesmerizing. The process involves burnishing a special chrome red french powder over a gel base. It’s an advanced technique, but the results are well worth the effort. The magic ingredient? A non-wipe top coat, as the chrome powder requires this specific surface to adhere properly and create its signature shine.
Products & Tools Used
- Gel polish system (nude base, red gel for tip)
- Non-wipe top coat (this is essential)
- Chrome red french powder
- A small silicone tool or eyeshadow applicator
- UV LED lamp
Application Steps
- Perform a gel manicure, painting the tip of the nail with red gel polish and curing it.
- CRITICAL STEP: Apply a thin layer of non-wipe top coat over the entire nail and cure for the recommended time (usually 30-60 seconds). Do NOT over-cure.
- Dip your silicone tool into the chrome red french powder. A little goes a long way.
- Gently but firmly buff the surface of the red tip area with the applicator. The powder will magically stick only to the red polish, creating a chrome effect.
- Use a fluffy brush to dust off any excess powder.
- Seal with top coat (you can use a regular or non-wipe one for the final layer) and cure one last time to protect the chrome finish.
Pro-Tip: The key to a perfect chrome application is the cure time of the non-wipe top coat in step 2. If the powder isn’t sticking, you likely over-cured it. If it looks grainy, you under-cured. Testing shows that curing for exactly 30 seconds is the sweet spot for most lamps.

6. Wear Your Heart on Your Nails with Red Heart Accents

Pin this romantic heart design for Valentine’s Day!
Add a touch of romance to your manicure with a delicate heart accent. This red french tip nails heart design is simple, sweet, and incredibly popular. The tiny heart accent enhances the romantic theme of the red color, making it a look that is perfect for Valentine’s Day or any time you want to add a little love to your look. The easiest way to create a perfect heart is by using a dotting tool.
Products & Tools Used
- Standard supplies for a red french manicure
- A fine-tipped nail art dotting tool
- Optional: French tip stickers for a perfect guide on the other nails
Application Steps
- Complete your red french tip nails on all fingers except the accent nail (e.g., the ring finger).
- On the accent nail, after the nude base is dry, dip your dotting tool into the red polish.
- Place two dots side-by-side on the nail where you want the top curves of the heart to be.
- Clean your dotting tool or use a thin liner brush. Drag the polish from each dot downwards to meet at a single point, forming the heart shape.
- Fill in the heart if necessary.
- Once all nails are dry, seal with top coat.
Pro-Tip: Don’t have a dotting tool? The tip of a bobby pin, a toothpick, or even the head of a pin will work perfectly for creating the initial two dots. This is a great DIY beauty trend hack.

7. Go for a Modern, Velvety Matte Red French Finish

Save this chic matte look for a touch of modern sophistication!
For an unexpected and highly modern twist, try a matte red french manicure. Swapping the traditional high-gloss shine for a velvety, non-reflective finish completely changes the vibe of the manicure, making it feel contemporary and sophisticated. This is especially striking with dark cherry red french tip nails for fall. The easiest way to achieve this is with a special matte top coat, which transforms any polish into a modern masterpiece.
Products & Tools Used
- Your usual French manicure supplies
- A high-quality matte top coat (gel or regular polish)
Application Steps
- Perform your red french manicure exactly as you normally would, right up to the final step.
- Instead of a glossy top coat, you will apply a matte top coat.
- Apply one even layer over the entire nail, from cuticle to tip.
- If using a matte gel top coat, cure under UV lamp for the specified time. If using regular polish, allow it to air dry completely.
- The matte effect will appear as the top coat dries.
- Do not apply any cuticle oil on top of the nail, as this will ruin the matte effect. Apply it only around the skin.
Pro-Tip: To create a cool mixed-texture look, apply a glossy top coat over the entire nail first. Let it dry completely. Then, using a thin brush, carefully paint the matte top coat only over the red tip. The result is a glossy base with a velvety matte French line.

8. Try a Festive Christmas-Themed Red French Manicure

Pin this adorable Santa hat design for the holiday season!
The red french tip nails christmas design is a festive and playful way to get into the holiday spirit. This look combines the classic red tip with a cute accent nail designed to look like a Santa hat. This design is perfect for Christmas, combining the trendy red French with a universally recognized symbol of the season. All you need is some opaque white polish and a dotting tool to bring this jolly Santa hat nail to life.
Products & Tools Used
- Classic red polish (a candy apple red is great for this)
- Opaque white nail polish
- Nude base coat
- Dotting tool and a thin liner brush
Application Steps
- On all nails except your ring finger, create a standard classic red french tip.
- On the ring finger, paint the entire nail with the red polish and let it dry.
- Using the white polish and a liner brush, paint a white french tip on the red nail. This will be the “fur trim” of the Santa hat.
- Dip your dotting tool in the white polish and place a single dot at the very tip of the white line, off to one side, to be the “pom-pom.”
- Let everything dry completely.
- Seal with top coat on all nails for a glossy, protected finish.
Pro-Tip: For extra holiday sparkle, use a white glitter polish for the hat’s trim and pom-pom. This adds dimension and catches the light beautifully at holiday parties.

9. Get Creative with a Double French Tip Design

Save this artistic double-line look to elevate your manicure!
Ready to take your French manicure to the next level? The double french tip red design is an artistic and eye-catching variation. It involves adding a second, thinner line just below the main red tip, often in a contrasting color like white, black, or metallic gold. The second line creates a sense of depth and incorporates the negative space art trend, where the sliver of nude base between the lines becomes part of the design itself.
Products & Tools Used
- Standard red french manicure supplies
- A secondary color polish (e.g., metallic gold, crisp white, or black) with an ultra-thin liner brush.
- A steady hand!
Application Steps
- Create your standard red french tip and allow it to dry completely.
- Using your secondary color (e.g., gold) and a very thin liner brush, you will now paint the second line.
- Position the brush about 1-2mm below the smile line of your red tip.
- With a confident, single stroke, trace the curve of the red tip, leaving a small sliver of negative space (the nude base) in between.
- Clean up mistakes immediately with a small brush and acetone for the sharpest possible look.
- Once fully dry, apply your glossy top coat.
Pro-Tip: The key to a perfect double French is consistency in the space between the lines. Before painting, you can use the edge of a piece of nail striping tape as a visual guide for spacing, without actually sticking it down.

10. Go Bold with Dark Red and Black French Tips

Pin this bold and vampy look for a dramatic statement!
For a vampy, dramatic, and utterly chic look, pair dark red with a sharp black accent. This red french tip nails dark style is perfect for autumn and winter, evoking a moody and sophisticated vibe. The combination of black + red is timelessly bold. Typically, this involves a deep maroon french nails or wine colored tips base with a micro-thin black line at the very edge. The black micro-line defines the free edge and adds a dramatic touch that perfectly suits stiletto shape nails.
Products & Tools Used
- A deep red french, maroon, or bordeaux nail tips polish
- A high-pigment black nail art liner polish
- Nude base coat
- Glossy top coat
Application Steps
- After your nude base coat is dry, create a standard French tip using your dark red polish. Make the line slightly thicker than you normally would.
- Let the red polish dry completely.
- Take your black liner polish. With a steady hand, paint an ultra-thin microtip line directly on the very edge of the red tip.
- The goal is for the red to look like it’s outlined in black at the very end.
- This demands precision, so work slowly and use a stabilizing finger.
- Finish with a glossy top coat to blend the layers and add shine.
Pro-Tip: This look is stunning with a matte finish. Apply a matte top coat at the end to give the dark red and black a velvety, non-reflective finish that looks incredibly chic and modern.

11. Use Easy & Flawless Red French Tip Press-On Nails

Pin this guide to flawless press-on nails for a perfect manicure in minutes!
If you’re short on time or not confident in your painting skills, red french tip nails press on are your secret weapon. High-quality press-ons offer a quick, affordable, and damage-free alternative to salon manicures when applied and removed correctly. The key to making them look natural and last for up to two weeks is all in the preparation of your natural nail. Proper prep ensures the adhesive tabs or glue can bond securely.
Products & Tools Used
- A set of high-quality red french tip press on nails in your preferred shape
- Nail file or buffer
- Alcohol prep pad (usually included)
- Nail glue or adhesive tabs
Application Steps
- Prep the nail bed thoroughly. This is the most important step for longevity. Gently push back cuticles and lightly buff the entire surface of your natural nail to remove shine.
- Clean each nail with the alcohol prep pad to remove any dust and oils.
- Size the press-on nails for each finger and lay them out in order.
- Apply a dot of nail glue to your natural nail and a little to the back of the press-on. Or, apply the correct size adhesive tab to your natural nail.
- Glue on press-ons by aligning the press-on with your cuticle at a 45-degree angle, then press it down firmly towards the tip. Hold for 30 seconds.
- Avoid water for at least one hour after application to allow the glue to fully bond.
Pro-Tip: For a seamless, “grew-from-your-cuticle” look, file the base of the press-on nail slightly to perfectly match your cuticle shape before you glue it on. This is a manicurist secret for making press-ons look like expensive Gel-X extensions.

Key Takeaways
Here’s a quick summary of the most important points to help you achieve the perfect red french tip nails:
- Prep is Paramount: The key to any long lasting manicure, whether painted or press-on, is proper nail prep. Always start by cleaning, buffing, and dehydrating the nail plate.
- The Right Tool for the Job: For thin, classic lines, a long, thin liner brush is your best friend. For perfectly straight V-shapes, use nail striping tape. For easy micro-tips, try a nail stamper.
- Top Coats Define the Finish: Your final look is determined by your top coat. Use a high-shine glossy top coat for a classic look, or a specialty matte top coat for a modern, velvety finish.
- Gel Offers Durability: For designs with glitter or chrome powder, a gel system (including a non-wipe top coat for chrome) is essential for encapsulating the texture and creating a smooth, chip resistant tip.
- Press-Ons Are a Great Alternative: Don’t underestimate red french tip press on nails. When applied correctly over a prepped nail, they can look just like a salon manicure and last for up to two weeks.
- Clean-Up is a Professional Secret: A small brush dipped in acetone is not just for fixing big mistakes. Use it to clean the smile line and perfect the edges for that ultra-sharp, salon quality result.
People Also Ask About Red French Tip Nails
Are red french tips in style for 2026?
Yes, red french tip nails are one of the biggest nail trends of 2026. This look is a modern and sophisticated update to the classic French manicure and has been seen everywhere from high-fashion runways to viral social media posts. It’s considered chic, versatile, and suitable for any season.
How do you get a perfect line for french tips?
The best way to get a perfect line is to use a long, thin nail art liner brush and a steady hand. Rest your painting hand on your other hand for stability. Alternatively, beginners can use tools like French tip stickers, nail striping tape for V-shapes, or a silicone nail stamper for an easy, flawless line every time.
What base color goes best with red french tips?
A sheer nude pink or a milky white base are the most popular and complementary choices. A nude pink base that matches your skin’s undertone creates a very natural, “your-nails-but-better” look. A milky white base provides a slightly higher contrast that makes the red tips on nails pop even more.
How can I make my red french tips last longer and prevent chipping?
Proper nail prep and sealing the edge are crucial to prevent chipping. Always start by buffing the nail and cleaning it with alcohol. After applying your top coat, be sure to swipe the brush along the very edge of the nail tip. This “caps the free edge” and creates a seal that dramatically improves wear time.
What is a microtip french manicure?
A microtip french is a minimalist version where the tip is an extremely thin, “barely there” line. Instead of a noticeable band of color, it’s a delicate trace right at the free edge of the nail. This is a very popular style for short red french tip nails as it gives an elegant look without shortening the appearance of the nail.
Can you do red french tips on natural nails?
Absolutely, red french tips look beautiful on natural nails of any length. If you have short nails, a microtip red french is a great option. For longer natural nails, any style will work. Just be sure to use a good base coat to stop polish staining your natural nail plate.
What’s the difference between gel and acrylic for red french tips?
Gel is a polish that is cured under a UV lamp, while acrylic is a mixture of liquid and powder that air dries to form the nail. For a french manicure, gel polish is often painted over a natural nail or extension. Acrylic can be used to sculpt the entire nail, sometimes using white and pink acrylic to create the french look itself. Gel is more flexible, while acrylic is generally harder.
How do you fix a messy french tip?
The best tool is a small, angled clean-up brush dipped in 100% acetone. After you paint your tip, immediately use the damp brush to carefully carve out a sharp smile line and wipe away any polish on the skin. Working while the polish is still wet is much easier than trying to fix it once it’s dry.
What is the best red nail polish for french tips?
A classic, highly-pigmented cream-finish red is the most reliable choice. Look for a high pigment formula so you can get full coverage in one or two thin coats. Iconic shades like OPI’s ‘Big Apple Red’ or Essie’s ‘Forever Yummy’ are popular choices among professionals for their perfect color and consistency.
Are red french tips professional for work?
Yes, in most modern workplaces, red french tips are considered professional. A minimalist red micro french tip or a classic thin line on well-groomed, short-to-medium length nails is particularly chic and understated. It adds a pop of color and personality while still looking polished and put-together.
Final Thoughts on Mastering Red French Tip Nails
The red french tip nail proves that classic styles can always be reinvented. From a chic and subtle microtip red french perfect for the office to a sparkly red french ready for a holiday party, this trend offers endless versatility. As you’ve seen, achieving a salon quality result at home is entirely possible with the right tools, a little patience, and the professional techniques shared in this guide. The key to success lies in meticulous prep, a steady hand, and the perfect top coat to seal in your design.
Which red french tip nail idea will you try first?
Last update on 2026-04-01 / Affiliate links / Images from Amazon Product Advertising API