Struggling to find festive nail art that doesn’t look crowded or childish on your nails? You want a touch of holiday cheer on your fingertips, but most designs seem made for long talons, leaving your short christmas nails feeling like an afterthought. It’s frustrating when you just want a look that’s both festive and sophisticated.
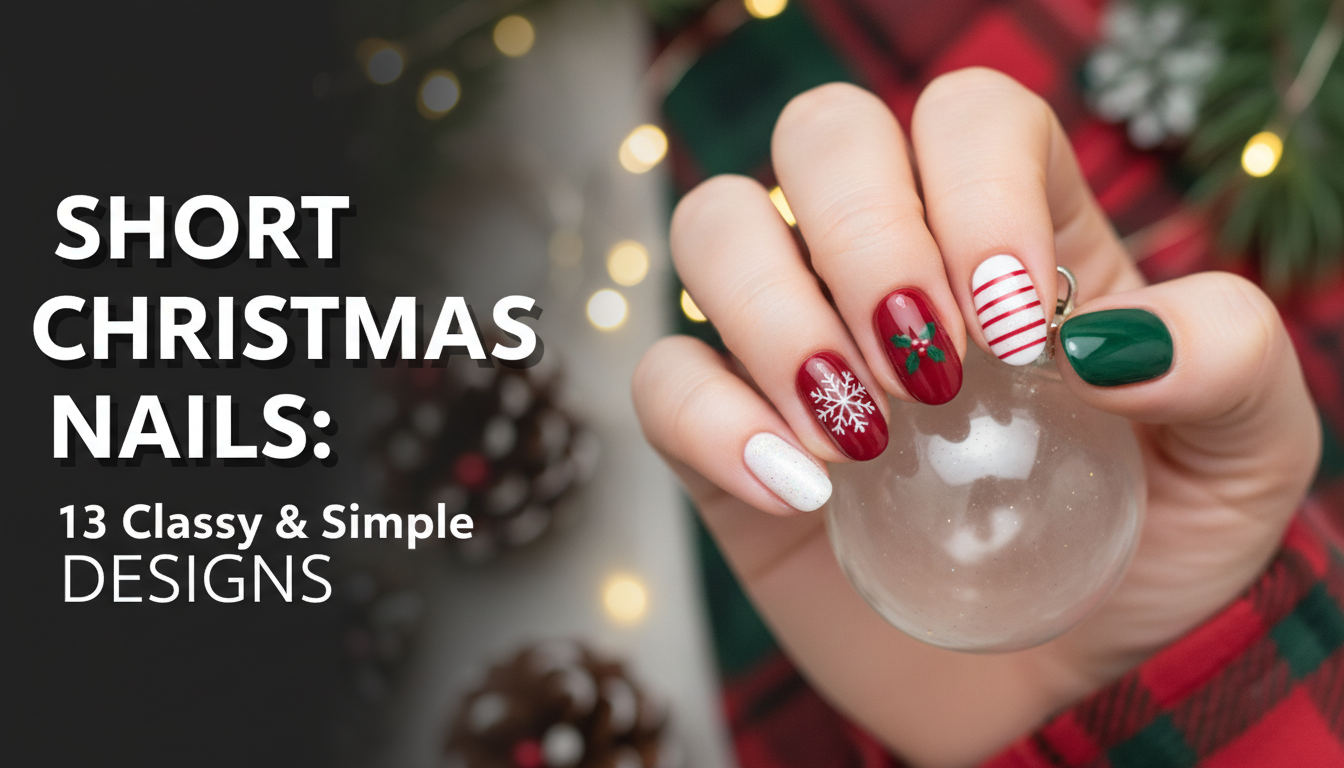
The best short Christmas nails for a classy look are minimalist designs that use negative space, delicate details, and a refined color palette. These include options like micro French tips, dainty snowflake accents, and subtle glitter gradients that create a festive feel without overwhelming the small nail canvas, ensuring an elegant and modern holiday manicure.
Leveraging tried-and-tested methods from our expert guide, we’ll show you how to achieve that perfect holiday look. This post breaks down 13 stunning, simple, and elegant designs specifically for shorter nails. You will discover actionable DIY steps for each, proving that you don’t need length to have show-stopping festive nails this 2026.
What Are The Best Short Christmas Nails For a Classy, Simple Look?
Finding the perfect festive look for a small nail bed can feel like a challenge, but the secret lies in celebrating simplicity. The most classy short christmas nails focus on precision and elegance over complexity. Think of your nail as a tiny canvas where a single, well-placed detail makes a bigger impact than a crowded scene. Designs that incorporate negative space, utilize ultra-fine lines, or focus on a single accent nail are incredibly effective. These approaches create a festive short nails look that feels intentional, modern, and chic, complementing your hands rather than overwhelming them. This guide is built on this principle, promising achievable elegance for everyone, whether you’re a DIY novice or just looking for fresh inspiration for your next salon visit.
13 Classy & Simple Short Christmas Nail Designs for 2026
Ready to find your perfect holiday manicure? This is your ultimate gallery of inspiration, delivering on the promise of 13 beautiful and achievable short christmas nail designs. Each idea is more than just a picture; it’s a complete mini-tutorial designed for success on a small nail canvas. We’ve included everything from the exact products and tools you’ll need to step-by-step application guides. Whether you love a minimalist shimmer or a cute festive character, you’ll find a DIY short christmas nail art look you can confidently create at home or show to your nail technician.
1. Design an Elegant Red Micro French Manicure

Pin this timeless look to your ‘Holiday Nails’ board!
The micro French tips manicure is the definition of classy and elegant. This design enhances the look of short natural nails by creating an illusion of length with a razor-thin line of color. It’s the perfect way to wear festive red in a subtle, sophisticated way.
Products & Tools Used
- Sheer Nude or Pink Base Coat (e.g., a BIAB (Builder in a Bottle) for strength)
- Classic Christmas Red Nail Polish (look for a highly pigmented formula)
- Ultra-Fine Liner Nail Art Brush (3-5mm length is ideal for control)
- Glossy, tack-free top coat for a salon-quality finish
- Isopropyl alcohol and lint-free wipes for surface prep
Application Steps
- Prep the nail by filing to your desired short shape, pushing back cuticles, and cleansing the nail plate with alcohol.
- Apply one to two thin coats of your sheer nude base color. Cure under a UV lamp if using gel polish.
- Paint the tip: Dip your ultra-fine liner brush in the red polish. Wipe off most of the excess. Gently drag the very tip of the brush across the free edge of your nail to create a razor-thin line.
- Clean up any mistakes with a small brush dipped in acetone before curing.
- Seal the design with a generous layer of a glossy top coat, making sure to cap the free edge to prevent chipping.
Pro-Tip: For an even easier method, paint a small amount of red polish onto a silicone nail art stamper and gently press the tip of your nail into it. This creates a perfect curve effortlessly.

2. Paint Dainty Snowflake Accent Nails

Save this cute winter nail idea for your next manicure!
A single, intricate snowflake is a beautiful way to create a winter nail art look. This design is best for an accent nail on a short nail set to avoid a cluttered appearance, making a cute yet sophisticated statement. A deep blue and silver or white combination is a classic choice for this snowflake nail art.
Products & Tools Used
- Base Color (e.g., deep blue, silver, or classic red nail polish)
- White Nail Art Polish (or a highly opaque white regular polish)
- A long, thin liner brush
- A small dotting tool
- Matte or Glossy Top Coat
Application Steps
- Apply two coats of your chosen base color to all nails and let them dry completely.
- On your accent nail, use the liner brush to paint a thin ‘X’ in the center of the nail with the white polish.
- Paint another thin line horizontally through the center of the ‘X’, creating the basic 6-pointed star shape of a snowflake.
- Use the very tip of the liner brush to add small ‘V’ shapes to the end of each of the 6 lines.
- Use the smallest dotting tool to dotting a tiny dot of white polish in the very center where the lines intersect.
- Seal with your preferred top coat once the design is fully dry.
Pro-Tip: If you’re nervous about freehand painting, use a snowflake nail sticker or decal. Apply it after your base color and before your top coat for a flawless look in seconds.

3. Create a Subtle Gold Glitter Gradient

Pin this glamorous and easy nail idea for your next holiday party!
A glitter gradient is a glamorous and surprisingly easy way to add some sparkle. This nude and glitter design creates the illusion of length on short nails by drawing the eye upwards from the cuticle, making it a perfect short natural nails christmas manicure.
Products & Tools Used
- A nude or sheer base color polish
- A fine gold or silver glitter polish
- A small piece of a disposable makeup sponge
- Peel-off liquid latex (optional, but highly recommended)
- A high-shine top coat
Application Steps
- Paint two coats of your nude base color and allow it to dry completely.
- (Optional) Apply liquid latex around your nail on the skin and cuticle to make cleanup easy.
- Apply a small amount of the glitter polish directly onto the corner of your makeup sponge.
- Gently dab the sponge onto the bottom third of your nail, near the cuticle. Use a lighter touch as you move up towards the center of the nail to create the faded effect.
- Apply a second layer of glitter with the sponge, focusing only on the very bottom of the nail to concentrate the sparkle at the base.
- Once dry, peel off the liquid latex and seal the design with one or two layers of a thick, glossy top coat to smooth out the glitter texture.
Pro-Tip: For a more encapsulated glitter look, use a gel system. After curing the glitter layer, apply a layer of builder gel before your top coat. This creates a perfectly smooth, glass-like finish.

4. Apply Minimalist Candy Cane Stripes

A modern take on a classic! Pin this candy cane stripes idea.
This minimalist take on candy cane stripes is fun and festive. The key to making this red and white design work on a small canvas is to keep the stripes thin and limit them to an accent nail. This ensures the look is modern and not overwhelming.
Products & Tools Used
- An opaque, creamy white nail polish
- A classic red nail polish
- Ultra-thin nail art striping tape
- Small scissors
- A glossy top coat
Application Steps
- Paint two coats of the white polish on all nails. Let it dry completely—at least 20-30 minutes. This is critical for the tape not to pull up the base.
- On your accent nail, press two pieces of striping tape down firmly in a diagonal pattern, leaving a small gap between them where the stripe will be.
- Paint the red polish in the gap between the tape pieces.
- Immediately and carefully, while the red polish is still wet, peel off the striping tape. Pull in the direction of the stripe.
- Repeat the process for a second stripe if desired.
- Once fully dry, apply a top coat to seal in your simple and modern design.
Pro-Tip: If you don’t have striping tape, an ultra-fine liner brush is your next best tool. To keep the line straight, rest your painting hand on a stable surface and pull the line towards you in one smooth motion instead of trying to “draw” it.

5. Master a Deep Green & Gold Foil Look

Pin this elegant and surprisingly simple green and gold design!
The combination of green and gold is incredibly elegant and perfect for the holidays. Using gold foil flakes gives you a luxurious, abstract look that is paired with a deep, solid color to create high contrast. The beauty of this short christmas nails with gold leaf design is that it requires no precision.
Products & Tools Used
- A deep forest green nail polish (gel or regular)
- Gold nail foil flakes
- A wax-tipped pen or tweezers
- A glossy or matte top coat
Application Steps
- Paint two coats of your green polish. If using regular polish, proceed to the next step while the second coat is still slightly tacky. If using gel, cure the second coat.
- If using gel, apply a thin layer of foil transfer gel or a bit of your gel base coat, and cure for only 10-15 seconds so it’s sticky.
- Using tweezers or a wax pen, gently pick up small pieces of the gold foil and adhere them to the nail. Don’t aim for perfection; a random, scattered pattern looks best.
- Gently pat the foil down with your finger or a silicone tool to ensure it’s flat against the nail.
- Seal everything in with two layers of a top coat. The first layer should be applied gently to avoid dragging the foil. The second layer will smooth everything out for a salon quality at home finish.
Pro-Tip: For a different vibe, try this with a matte top coat. The contrast between the matte green and the shiny gold foil is incredibly modern and chic.

6. Try a Cozy Sweater-Knit Accent Nail

So cozy! Pin this adorable sweater nail tutorial for a unique holiday look.
This modern textured look is perfect for cozy short winter nails. Creating a sweater-knit texture is a more advanced technique, but the result is a stunning 3D effect that’s sure to get compliments. This design requires a gel polish system to create the raised, matte effect.
Products & Tools Used
- Gel polish in a creamy, off-white color
- A matte gel top coat
- A fine liner nail art brush
- Fine, clear acrylic powder (for the powder method)
- UV/LED lamp
Application Steps
- Prep your accent nail and apply two coats of your chosen color, curing after each.
- Apply a layer of matte top coat and cure it. This gives the 3D gel something to grip onto.
- Using your liner brush and the same gel polish color, paint your sweater pattern (e.g., vertical wavy lines and dots). DO NOT CURE.
- While the design is still wet, generously sprinkle clear acrylic powder over the entire nail, making sure to cover all the wet gel.
- Tap off the excess powder and cure fully in your lamp.
- Use a soft, fluffy brush to gently dust off any remaining loose powder. Do not apply a top coat over the 3D design to preserve the matte, textured finish.
Pro-Tip: If you have 3D art gel (which has a much thicker viscosity), you can skip the acrylic powder method. Simply paint your design with the 3D gel over a cured matte top coat and cure. The design will remain raised and textured.

7. Add a Single, Dainty Reindeer Accent

Pin this cute and low key reindeer nail art idea!
For those who want just a subtle nod to the holidays, this reindeer nail design is perfect. This minimalist and whimsical art is best for an accent nail and is surprisingly easy to create. The entire design works with a dotting tool, making it accessible even for absolute beginners.
Products & Tools Used
- A nude or light-colored base polish
- Brown, black, and red nail polish
- A large and a small dotting tool
- A fine liner brush
- Glossy top coat
Application Steps
- Paint your base coat on the accent nail and let it dry.
- Using the large dotting tool dipped in brown polish, place one large dot near the tip of your nail for the head. Place a smaller brown dot right above it for the body.
- Using the fine liner brush and black polish, draw two simple, branching antler shapes coming off the top of the ‘head’ dot.
- With the smallest dotting tool and red polish, dot a tiny nose onto the ‘head’.
- Let the design dry completely before sealing with a top coat.
Pro-Tip: If you don’t have a red, you can make this a generic reindeer! Use a tiny dot of black polish for the nose instead for a more modern, monochromatic look.

8. Go Classic with a Santa Hat Design

So festive! Pin this easy Santa hat nails tutorial.
This cute and festive Santa hat nails design is a holiday staple. Using the corner of the nail as the base of the hat is a clever trick that makes it perfectly proportional for short nails. This fun red and white design can be applied as a single accent or on all your nails.
Products & Tools Used
- A nude, clear, or light pink base polish
- Opaque red and white nail polish
- A medium-sized dotting tool
- A nail art brush
- Glossy top coat
Application Steps
- Paint your base color and let it dry.
- Using a nail art brush, paint a triangle of red polish starting from one top corner of your nail and extending diagonally towards the center. Fill it in.
- Using the dotting tool and white polish, dot a row of overlapping dots along the bottom edge of the red triangle to create the fluffy trim.
- Place one slightly larger white dot at the tip of the red triangle for the pom-pom.
- Let it dry completely before sealing with a glossy top coat.
Pro-Tip: For a fun variation, do this on the tips of your nails like a French manicure, turning the entire tip into the Santa hat. This is a great press on vs salon quality design you can do at home.

9. Try a Subtle, Sparkly Star Accent

Pin this elegant and minimalist starry night idea!
For a low key holiday look that is incredibly elegant, a single sparkly star is all you need. This minimalist design is best for those with limited time who want maximum impact with minimum effort. It complements dark, moody base colors like burgundy, navy, or black beautifully.
Products & Tools Used
- A dark base color (burgundy, navy, black)
- Star-shaped nail glitter pieces OR star nail stickers
- A wax-tipped pen or tweezers
- A glossy top coat
Application Steps
- Paint two coats of your dark base color and let it dry almost completely.
- If using loose glitter, apply your top coat. While it’s wet, use a wax pen to pick up a single star glitter and gently place it on your accent nail.
- If using a sticker, simply wait for the base color to be 100% dry, then use tweezers to apply the sticker to the nail, pressing it down firmly.
- Seal the design with one to two layers of a glossy top coat, making sure the edges of the glitter or sticker are fully covered to prevent snagging.
Pro-Tip: Place the star near the cuticle or off to one side rather than dead center. This asymmetrical placement feels more modern and intentional, especially on a short nail.

10. Paint Delicate Mistletoe Details

So sweet and dainty! Pin this minimalist mistletoe accents idea.
These dainty little mistletoe accents are the essence of simple christmas nail designs for short nails. The design is broken down into simple shapes—two leaves and three berries—making it a beginner friendly project. It suits a light or nude base color perfectly, creating a fresh and natural look.
Products & Tools Used
- A white or nude base color polish
- A sage or forest green polish
- An opaque white polish
- A fine liner brush
- A very small dotting tool
Application Steps
- Paint your nails with two coats of the base color and let dry.
- On your accent nail, use the liner brush and green polish to paint two small, simple leaf shapes in a corner, near the cuticle.
- Clean your liner brush, or use the dotting tool, to place three small white dots at the base of the leaves where they meet.
- Let the tiny design dry completely.
- Apply a glossy top coat to protect your dainty artwork.
Pro-Tip: This design looks incredibly elegant with a matte top coat over the entire nail. It gives the artwork a soft, almost painted-on-pottery look.

11. Create a “Christmas Tree Branch” Accent

Pin this unique Christmas tree branch design for a touch of nature!
This natural looking Christmas tree branch offers a unique spin on holiday nails. This simple christmas nail designs concept works with the diagonal space of the nail to create movement and elegance. The “flicking” technique for the pine needles is easy to master for your short festive fingertips.
Products & Tools Used
- A nude or clear base polish
- A forest green polish
- A fine liner brush
- A small dotting tool
- Various colors for ornaments (red, gold, blue)
- Glossy top coat
Application Steps
- Paint your accent nail with the nude base and let dry.
- Using the liner brush and green polish, paint a single, slightly curved line diagonally across the nail. This is the main branch.
- Now, starting from that line, use the very tip of the brush to paint short, quick strokes flicking outwards to create the needles.
- Once the branch is dry, use the small dotting tool to place a few tiny, colorful dots along the branch to act as ornaments.
- Let the entire design dry fully before sealing with a top coat.
Pro-Tip: Add a single gold star glitter at the top of the branch for a “tree topper” to complete the whimsical look.

12. Apply a Chic “Velvet” Nail Finish

Get the look! Pin this mesmerizing velvet nail tutorial.
The velvet nail finish is a glamorous, modern trend that looks incredibly luxurious on red christmas nails. This manicure requires a special magnetic polish and a magnet wand, but the mesmerizing cat eye effect transforms a simple manicure into something truly special.
Products & Tools Used
- A black or dark base color (optional, but enhances the effect)
- A magnetic “cat eye” or “velvet” gel polish
- A nail magnet wand
- A glossy top coat
- A UV/LED lamp
Application Steps
- Paint one coat of black gel polish as your base and cure. This makes the magnetic effect pop.
- Apply a thick coat of the magnetic polish, but DO NOT CURE IT.
- Immediately, hover the magnet wand close to the wet polish for 15-30 seconds. You will see the magnetic particles shift and create the shimmering line or velvet effect.
- Once you are happy with the effect, cure the nail immediately in the lamp to lock the design in place.
- Seal with a glossy top coat and cure one final time.
Pro-Tip: The key to a strong magnetic effect is a thick second coat of the polish and holding the magnet as close as possible without touching the nail. Work one nail at a time from polish application to curing.

13. Wear a Simple, Glossy Wine Red Manicure

Pin this idea for a timeless, classy and elegant holiday look.
Never underestimate the power of a perfect, solid-color manicure. A simple set of glossy wine red tips is a timeless choice that is inherently classy and elegant. This look is a traditional favorite that suits any occasion, and the key to making it look professional on short natural nails requires perfect prep.
Products & Tools Used
- Nail file and buffer
- Cuticle pusher and remover
- Nail polish remover or alcohol for cleansing
- A high-quality base coat
- A rich, wine-red or burgundy nail polish
- A “plumping” or high-shine glossy top coat
- A small, angled brush for cleanup
Application Steps
- Prep is everything. File nails, gently push back cuticles, and lightly buff the nail surface to remove shine.
- Cleanse the nail plate thoroughly with polish remover or alcohol on a lint-free wipe to remove all oils and dust.
- Apply a thin layer of base coat and let it dry.
- Paint the color using the three-stroke method: one stroke down the center, then one down each side. Apply two thin coats, letting the first dry before applying the second.
- For a flawless edge, dip a small, angled brush in acetone and carefully trace around your cuticle line to clean up any mistakes.
- Seal with a thick, glossy top coat, making sure to “cap the tip” by running the brush along the free edge of the nail to prevent chipping.
Pro-Tip: Wait at least 1-2 minutes between each coat of polish (base, color 1, color 2, top). This cuticle flood prevention technique allows each layer to set slightly, resulting in a faster overall dry time and fewer smudges.

Key Takeaways: Your Quick Guide to Short Christmas Nails
Here are the most important takeaways for achieving beautiful short christmas nails:
- Embrace Accent Nails: You don’t need to cover every nail in art. A single, detailed accent nail (like a snowflake nail art or reindeer) on a solid color base is modern, classy, and perfect for short nails.
-
Master Your Tools: An ultra-fine liner brush and a set of dotting tools are non-negotiable for DIY short christmas nail art. They are the secret to creating dainty details like micro French tips and small characters.
-
Negative Space is Your Friend: Don’t cover the entire nail. Designs like the tree branch or mistletoe on a nude or clear base look more elegant and make the nail appear longer.
-
Texture Adds Interest: A single textured nail, like a 3D sweater-knit or a velvet nail finish, can elevate your entire manicure and is a great way to add a festive touch without complex drawing.
-
Technique Over Complexity: A perfectly executed, simple, glossy red manicure is more classy than a messy, complex design. Focus on flawless prep and application for a salon quality at home look.
-
When in Doubt, Use a Stencil or Sticker: For perfectly straight candy cane stripes or intricate snowflakes, don’t be afraid to use nail striping tape or high-quality nail stickers. They guarantee a professional result.
People Also Ask About Short Christmas Nails
What color is best for short christmas nails?
Bold, classic colors and deep, rich tones are best for short Christmas nails. A classic red and white combination, a deep wine or burgundy, forest green, or a dark navy blue make a sophisticated statement. These colors provide a great contrast for simple nail art like white snowflakes or gold foil.
How can I make my short nails look longer for Christmas?
To make short nails look longer, use nude base colors and vertical designs. A sheer nude base with a micro French tip or a glitter gradient starting from the cuticle draws the eye upward. Vertical stripes or designs that run the length of the nail also create a powerful illusion of length.
Can you have Christmas nail art on very short nails?
Yes, you can absolutely have beautiful Christmas art on very short nails. The key is to choose minimalist designs. Focus on a single accent nail, use dainty details like a tiny star or mistletoe sprig, or place designs in a corner or near the cuticle instead of trying to fill the whole nail.
Which nail shape is best for short Christmas designs?
A “soft square” or “squoval” shape is often the best for short Christmas designs. This shape provides a slightly wider canvas for art than a round or almond shape, but its soft corners prevent it from looking harsh. Ultimately, the best shape is the one that complements your hands and you find most practical.
Are red Christmas nails still in style for 2026?
Yes, red nails are a timeless classic and are always in style for Christmas. For 2026, the trend leans towards deep, rich wine and burgundy reds or classic, bright candy apple reds. You can update the look with a matte top coat or a velvet nail finish.
What are the best brands for short holiday press on nails?
Brands like Kiss Impress, Olive & June, and ManiMe are excellent for short holiday press-on nails. Kiss offers many affordable, festive designs in short lengths. Olive & June are known for their trendy yet classy designs and long-lasting wear. ManiMe provides custom-fit gel stickers that are a great damage-free alternative.
How do I paint a perfect snowflake on a short nail?
Start with intersecting lines and add details with a dotting tool. Use a fine liner brush to paint an ‘X’ and then a horizontal line through its center. Add small ‘V’ shapes to the ends of each line. A tiny dot in the center completes the look. This method ensures the snowflake is symmetrical and fits on a small canvas.
Can I get Christmas nail art on bitten nails?
Yes, you can, and it can help encourage you to stop biting. A gel manicure (BIAB is excellent for this) can provide a protective layer. Opt for full-coverage designs like a glitter polish or a dark, solid color. A good manicurist can clean up the cuticles and shape the nail to create a clean canvas.
What tools are essential for DIY short nail art?
The three most essential tools are a fine liner brush, a dotting tool set, and a small, angled cleanup brush. The liner brush is for thin lines like candy cane stripes. The dotting tool is for polka dots, berries, and character eyes. The cleanup brush dipped in acetone ensures a professional, clean cuticle line.
How do I prevent my holiday manicure from chipping?
Proper prep and sealing the tip are the two most critical steps. Always start by cleansing the nail plate to remove oils. After applying your top coat, be sure to “cap the free edge” by running the brush along the very tip of your nail. This creates a seal that dramatically improves long-lasting wear.
Final Thoughts on Your Classy Holiday Manicure
Ultimately, creating beautiful short christmas nails is not about length, but about intention and technique. As we’ve explored, a simple design executed with care—like a flawless wine red tip manicure or a dainty mistletoe accent—carries more elegance than a complicated one. The key is to embrace your nail’s natural canvas and choose designs that complement it. Whether you opt for a subtle shimmer, a modern micro French tip, or a single, cute accent nail, you now have the tools and professional tutorial tips to create a classy and festive look you’ll love to wear throughout the holiday season.
Last update on 2026-03-31 / Affiliate links / Images from Amazon Product Advertising API