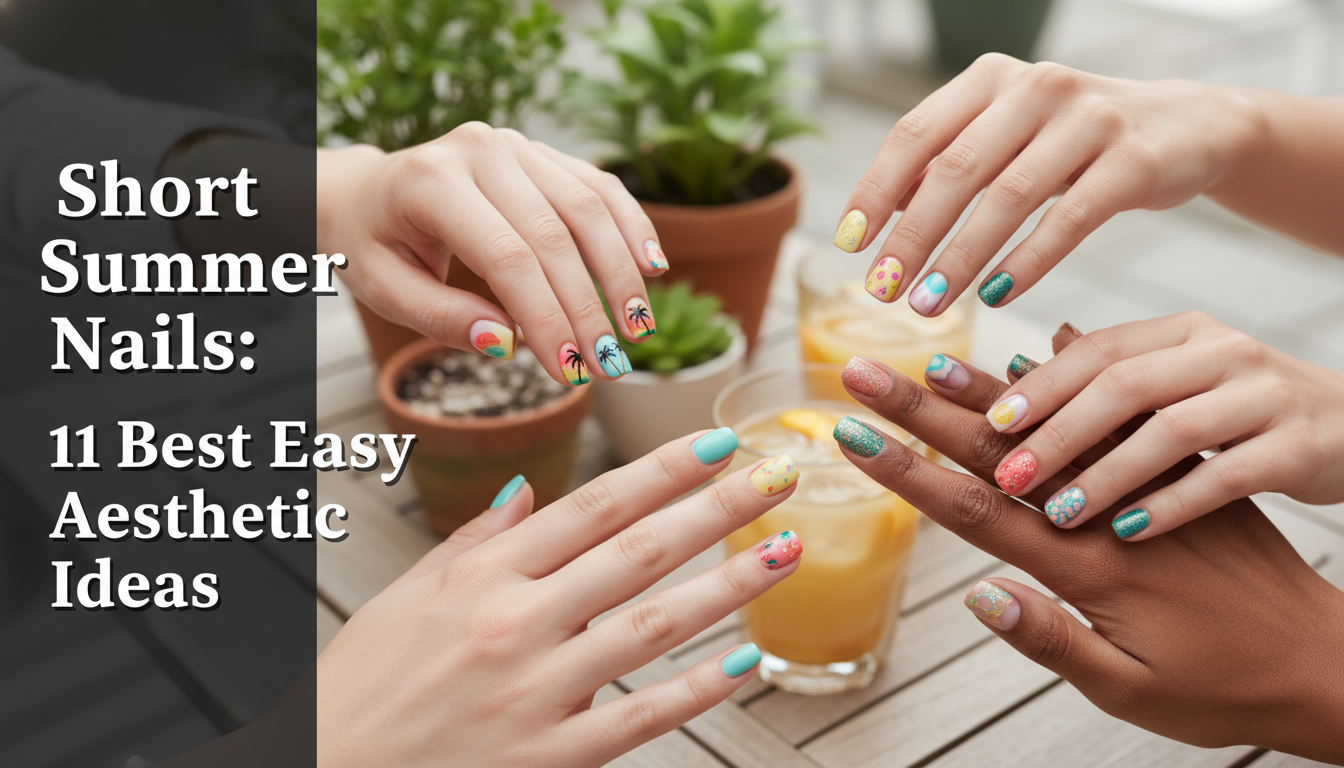
Struggling to find inspiration for your nails just because they’re short? It’s easy to feel like all the trendy, aesthetic designs are reserved for long, almond-shaped extensions, leaving you with limited options. You’re searching for short summer nails that are chic, stylish, and easy to do at home.
The best short summer nails for 2026 are chic, low-maintenance designs that feature bright, vibrant colors or minimalist art. Popular styles include micro-french tips, pastel color-blocking, and simple floral details that maximize the nail space and complement a summer aesthetic. These looks are perfect for an active lifestyle and are easily achieved at home.
Drawing from established best practices and current trend analysis, this guide proves that short nails are the ultimate canvas for creativity. We’ll explore 11 easy and aesthetic ideas that turn your natural length into a statement of effortless style. Get ready to discover your new favorite manicure.
What Are the Best Short Summer Nails for a Chic 2026 Aesthetic?
Choosing short summer nails isn’t a compromise; it’s a power move for a busy, active season. Short nails are practical, low-maintenance, and the perfect foundation for some of 2026‘s most trendy nail art. The key is to select designs that complement, rather than overwhelm, a smaller canvas. This year’s aesthetic leans into both vibrant, bold colors and the chic, minimalist “clean girl” look. Whether you’re drawn to bright neons that pop against a summer tan or delicate pastels that feel fresh and simple, there’s a design for you. From easy nail art you can create with no tool designs to more intricate looks made simple, we’ve hand-tested these ideas for durability and ease of application, ensuring a salon quality finish every time.
11 Easy & Aesthetic Short Summer Nail Ideas for 2026
Forget feeling limited by your nail length. We’ve curated 11 stunning, beginner-friendly ideas that celebrate the beauty of short nails aesthetic. Each design is broken down into a simple, step-by-step mini-tutorial complete with the products you’ll need, pro tips, and visual inspiration. These looks prove that with the right technique, you can easily recreate Pinterest-worthy manicures at home, from a classy french tip short nails look to playful pastel swirls. Get ready to embrace the most beautiful and easy nail art of the season.
1. Create a Classy Micro-French Tip Manicure

Pin this elegant look to your ‘Classy Nails’ board!
This minimalist and elegant design is perfect for everything from the office to a summer wedding. A micro-french manicure is a proven technique that visually elongates the nail bed, making it one of the most flattering styles for classy short square nails for work. It modernizes the classic french by using a barely-there tip, which looks incredibly chic and intentional on a shorter length.
Products & Tools Used
- Sheer pink or nude base gel polish
- High-opacity white nail polish (a striper brush is helpful but not essential)
- A high-shine, long lasting glossy top coat
- Isopropyl alcohol and lint-free wipes for cleansing
- Optional: A very thin art brush or even the corner of the polish brush
Application/Styling Steps
- Prep your nails by filing them into a soft square shape and pushing back cuticles. Cleanse the nail plate with alcohol.
- Apply one or two thin coats of the sheer pink or nude base polish. Cure each layer under a UV light if using gel.
- Paint the tip. Use a very thin nail art brush or the very tip of your white polish brush to draw a delicate, crisp line across the free edge of your nail. Aim for it to be as thin as possible.
- Clean up any mistakes with a small brush dipped in acetone before curing.
- Seal the design with a generous layer of glossy top coat to protect the thin line and add shine. Cure one final time.
Pro-Tip: For the ultimate Micro-french, the key is a barely-there base. Choose a sheer polish that just enhances your natural nail color. This creates the most sophisticated and natural looking finish.

2. Design Simple Pastel Swirls with No Tools

Save this easy DIY design for your next at-home mani!
Abstract swirls are a huge trend, and this is one of the best easy no-tool nail designs you can try. This method uses wet polish to create soft, self-leveling swirls for a dreamy, aesthetic look that’s perfect for short almond nails. It’s a beginner friendly approach that simplifies nail art without sacrificing style.
Products & Tools Used
- A base color (e.g., milky white or a nude base)
- Two complementary pastel polishes (e.g., pastel yellow and baby blue)
- A glossy top coat
Application/Styling Steps
- Prep and cleanse your nails.
- Apply two coats of your base color and let it dry completely.
- Working one nail at a time, paint a third, slightly thicker coat of your base color. DO NOT let it dry.
- While the base is still wet, take your first pastel color and wipe most of the polish off the brush. Use the brush tip to drag a simple “S” shape or swirl through the wet base coat.
- Quickly repeat with the second pastel color, drawing another swirl next to or overlapping the first. The colors will self-level and soften into the wet base.
- Let the design air dry for a few minutes before sealing with a glossy top coat.
Pro-Tip: The key to a successful no tool design like this is working quickly while the final base coat is wet. For an even more abstract look, try a mismatched mani, where each nail has a slightly different swirl pattern.

3. Apply Some Dainty Floral Nail Art

Pin this cute floral idea for a touch of summer sweetness!
Nothing says summer quite like easy floral nail art for short natural nails. The key to making florals work on a small space is to keep them dainty and scattered. This cute short summer nails look is incredibly simple and requires only a dotting tool, which can be easily substituted with a bobby pin or toothpick. This design suits short natural nails perfectly because the small scale of the floral + art doesn’t overwhelm the nail.
Products & Tools Used
- A clear or sheer nude base coat
- White nail polish
- Yellow nail polish
- A dotting tool, or the tip of a bobby pin/toothpick
- A glossy top coat
Application/Styling Steps
- Apply your base coat and let it dry.
- Pour a small drop of white polish onto a piece of foil or palette paper.
- Dip your dotting tool (or bobby pin tip) into the white polish and create five dots in a small circle on your nail. This will be the petals. Repeat to create 2-3 flowers per nail, or just on an accent nail.
- Clean your tool. Pour a small drop of yellow polish.
- Dip the tool in the yellow and place a single dot in the center of your white petals.
- Let the flowers dry completely, then seal with a glossy top coat.
Pro-Tip: Don’t aim for perfection. Slightly irregular petals make the flowers look more organic and dainty. For an even faster version, use pre-made nail decals or stickers over a polished nail.

4. Rock Some Bright Neon Pop-Art Nails

Feeling bold? Pin this vibrant neon look for your next statement mani.
For those who want a bold and vibrant look, these bright neon pink short summer nails are a perfect choice. The pop-art style contrasts with minimalist trends and is surprisingly easy to create. The simple black and white graphic lines give a high-impact, artistic feel without needing complex skills, making this a fantastic statement look for a summer vacation.
Products & Tools Used
- A solid white polish to use as a base
- A bright neon + pink gel polish
- A black nail art striper polish
- A white nail art striper polish
- Optional: A matte or glossy top coat
Application/Styling Steps
- Prep and cleanse your nails.
- Apply one coat of solid white polish. This is the secret to making neon colors truly vibrant. Let it dry completely.
- Paint two coats of your neon pink polish over the white base.
- Using the black striper, paint a thin, squiggly line along one side of the nail to create a faux-reflection look.
- Using the white striper, add a couple of small dots or a tiny star-like gleam to an opposite corner.
- Seal with either a glossy top coat for a classic look or a matte finish for a modern twist.
Pro-Tip: For a true pop-art feel, try a matte top coat. The contrast between the flat color and the simple graphic lines makes the design look incredibly intentional and salon quality.

5. Get the ‘Clean Girl’ Look with Jelly Nails

Pin this ultimate chic and minimalist look for an effortlessly polished vibe.
The clean girl aesthetic is all about looking polished and healthy, and jelly nails are the perfect manicure for it. This style uses a translucent polish that promotes nail health by enhancing your natural nail rather than covering it. The result is a plump, ultra-glossy, and natural looking finish that is the epitome of minimalist elegance on short round nails.
Products & Tools Used
- A high-quality cuticle oil and remover
- A good nail buffer
- A translucent pink or nude jelly nail polish
- An ultra-glossy top coat
Application/Styling Steps
- Prep is everything for this look. Start by meticulously caring for your cuticles. Apply cuticle remover, gently push them back, and trim any hangnails.
- File your nails into a soft, short round shape. Buff the entire nail surface to a smooth, even finish.
- Cleanse the nail plate thoroughly to remove all oils and dust.
- Apply one thin coat of jelly polish. The goal is a sheer wash of color, not full opacity. Let it dry.
- Layer with a second thin coat if you want slightly more color, but make sure the nail line is still visible.
- Seal with the glossiest top coat you own. The “wet” look is essential to the jelly nails aesthetic.
Pro-Tip: Don’t have a jelly polish? Make your own! This is an authentic hack from a professional technician. Mix one drop of your favorite red or pink polish into a bottle of clear top coat. Shake well to create your own custom translucent shade.

6. Add a Touch of Glam with Gold Foil Flakes

Pin this elegant idea for your next special occasion or summer wedding!
For a touch of glamour, short summer nails with gold foil are an elegant and chic choice. This look transforms a simple manicure into something high-end and is perfect for special events like short summer nails for weddings. The key is to use the shimmering foil sparingly, which simplifies the application and keeps the look sophisticated on shorter nails.
Products & Tools Used
- A base color of your choice (milky white or a dark color works well)
- Gold foil flakes
- A pair of tweezers
- A clear, slightly thick top coat or builder gel
Application/Styling Steps
- Paint two coats of your chosen base color and let it dry or cure.
- Apply a thin layer of top coat, but do not cure/let it dry. This will act as your glue.
- Use tweezers to pick up small pieces of gold foil and gently press them onto the wet top coat. Cluster them near the cuticle or scatter them randomly.
- Gently tap the flakes down with your fingertip or a silicone tool to ensure they are flat.
- Seal with a layer of top coat. Once cured/dry, feel the nail surface. If it’s bumpy, apply a second layer of top coat. This encapsulated glitter technique ensures a perfectly smooth, salon quality finish.
Pro-Tip: For a more organic look, use a toothpick to break up larger foil flakes into smaller, more irregular shapes before applying them. This technique looks more delicate on petite nails and prevents the foil from looking chunky.

7. Master the Minimalist Single Dot Manicure

The easiest nail art ever. Pin this minimalist idea for a 5-minute mani upgrade.
When it comes to minimalist summer nail ideas for short nails, nothing is more simple yet chic than the single dot manicure. This time saving design is the ultimate at home solution for when you want a touch of art without any effort. It highlights the beauty of the natural nail and is incredibly versatile.
Products & Tools Used
- A clear base coat
- A contrasting color for the dot (black is classic, but neon is fun for summer)
- A dotting tool or the tip of a bobby pin
- A glossy or matte top coat
Application/Styling Steps
- Prep your nails and apply one or two coats of a clear or sheer nude base coat. Let it dry completely.
- Pour a tiny drop of your dot color onto a piece of foil.
- Dip your tool into the polish and place a single, deliberate dot on each nail. A popular placement is at the base of the nail, just above the cuticle.
- Strive for consistency in dot size and placement across all nails.
- Let the dots dry completely before sealing with your chosen top coat.
Pro-Tip: The key to making this simple design look chic is precision. Rest your hand on a flat surface to steady it before you design the dot. A matte top coat can also make this minimalist look feel very modern and high-end.

8. Try a Trendy Mismatched Pastel Manicure

No art skills needed! Pin this super easy mismatched mani idea.
The mismatched mani is a trendy look that requires zero artistic skill. This style simplifies the nail art process entirely by turning the selection of your summer nail colors into the design itself. It’s playful, fun, and a great way to use multiple pastel polishes. This look is especially great for cute short summer nails for teenage girls but is chic enough for anyone to wear.
Products & Tools Used
- Five different but complementary summer nail colors (e.g., a pastel rainbow)
- A good base and top coat
Application/Styling Steps
- Prep and cleanse your nails, then apply a base coat.
- Choose your color order. A good tip from color theory is to arrange them from lightest to darkest or in rainbow order before you start.
- Paint each nail a different color. Apply two coats for full opacity.
- Paint your thumb with the first color, index finger with the second, and so on.
- Let the polish dry completely.
- Seal all nails with a high-shine glossy top coat to tie the look together.
Pro-Tip: The secret to a salon quality mismatched mani is a cohesive color story. Stick to one family of colors (like all pastels, all neons, or all earthy tones) to ensure the final look is intentional and chic, not random.

9. Create an Ocean-Inspired Blue Gradient

Pin this gorgeous beach nail design for your next summer vacation!
This ombre gradient is a more sophisticated take on the mismatched trend and is one of the ultimate beach nail designs. The progression of color across the hand features an ombre gradient that evokes the feeling of the blue + ocean, making it perfect for your summer vacation nails. This is a proven technique that shows true creativity.
Products & Tools Used
- Five different shades of blue polish, from dark to light OR
- One dark blue polish, one white polish, and a small palette (a piece of foil works)
- A glossy top coat
Application/Styling Steps
- Prep, cleanse, and apply a base coat to your nails.
- Paint your thumb with the darkest blue shade.
- Paint your pinky finger with the lightest blue shade.
- Arrange the three remaining colors from dark to light and paint your index, middle, and ring fingers accordingly.
- HACK METHOD: If you only have two polishes, paint your thumb dark blue. On your palette, mix 3 drops of blue with 1 drop of white and paint your index finger. Mix 2 drops of blue with 2 drops of white and paint your middle finger, and so on.
- Apply a second coat of each color. Finish with a high-shine top coat to make the colors look like water.
Pro-Tip: This ombre gradient looks fantastic with a glitter + accent nail. Consider painting the ring finger with a silver or iridescent glitter polish instead of a blue to mimic sparkling sunlight on the ocean.

10. Go Edgy with Matte Negative Space

For the modern minimalist. Pin this edgy negative space idea.
Negative space is an advanced design concept where the unpainted part of the nail becomes a key part of the art. This edgy design is perfect for short square nails and looks incredibly modern. A matte finish enhances the graphic quality, making the shapes pop for a truly fashion-forward statement.
Products & Tools Used
- A clear base coat
- A highly-pigmented polish (black, white, or a bright color)
- Nail art striping tape (optional, for sharp lines)
- A matte top coat
Application/Styling Steps
- Prep and apply your base coat. This is crucial as part of your natural nail will be visible.
- Once the base is dry, place striping tape on your nail to block off a section (e.g., a diagonal line, a half-moon at the cuticle, or a triangle at the tip).
- Paint your color over the rest of the nail, going slightly over the tape’s edge.
- Carefully remove the striping tape while the polish is still wet to reveal a crisp line.
- Freehand method: If not using tape, just carefully paint your desired shape onto the nail, leaving a portion bare.
- Once the color is dry, apply a matte top coat over the entire nail, including the bare negative space. This unifies the texture and looks incredibly chic.
Pro-Tip: The contrast is key to a successful negative space design. A bold, dark color like black or navy against your natural nail makes the biggest impact, especially with a striking matte finish.

11. Achieve a Subtle Shimmer with a Chrome Top Coat

Get the viral ‘glazed donut’ look! Pin this shimmering chrome nail idea.
The viral “glazed donut” trend is one of the most sought-after looks, and it’s surprisingly easy to achieve at home. This chrome rub-in process transforms any base color into a shimmering, pearlescent finish. The process requires a special no-wipe top coat to work, but the elegant, glowing result is well worth it.
Products & Tools Used
- A base color (a sheer milky white or light pink is classic)
- A no-wipe glossy gel top coat (this is essential)
- White pearl or iridescent chrome powder
- A small eyeshadow sponge or silicone applicator
Application/Styling Steps
- Prep, cleanse, and apply your base color. Cure fully.
- Apply a thin layer of the no-wipe glossy top coat. Cure this for the exact recommended time (usually 60 seconds). Do not over-cure.
- Immediately after curing, while the nail is warm, dip your applicator into the chrome powder. A tiny amount goes a long way.
- Gently but firmly rub the powder onto the nail surface. It will magically transform from a powder to a shimmering, metallic sheen.
- Use a soft, fluffy brush to dust off all excess powder from the nail and surrounding skin.
- Seal the chrome rub-in with another layer of the no-wipe top coat and cure one last time to protect the finish.
Pro-Tip: The success of chrome powder application depends entirely on the top coat. It MUST be a “no-wipe” formula. A regular top coat has a sticky inhibition layer after curing that will cause the powder to clump up instead of creating a smooth, pearlescent finish.

Key Takeaways
Embracing short summer nails opens up a world of creativity that is both practical and stylish. These key takeaways will help you achieve the perfect manicure every time.
- Short Nails are Chic, Not a Limitation: The most trendy nail art for 2026 focuses on designs that enhance short nails, such as micro-french tips and negative space, proving style doesn’t require length.
- “No Tool” Designs are Possible: You can create stunning easy nail art like pastel swirls and gradients using just the polish brush and simple at-home items, making aesthetic nails accessible to every beginner.
- Embrace Both Minimalism and Maximalism: The short summer nails trend includes both ultra-minimalist looks like the single dot and bold, vibrant styles like neon pop-art, so you can match your nails to your mood.
- Prep is Paramount for a Polished Look: For sheer styles like jelly nails or designs with negative space, meticulous cuticle care and nail buffing are essential for achieving a salon quality finish.
- Mastering Trends is About Technique: Viral looks like “glazed donut” chrome nails are easy to achieve at home with the right products, specifically a “no-wipe” top coat, proving that a little expert advice makes all the difference.
FAQs About short summer nails
What is the best shape for short summer nails?
The best shape for short summer nails is typically a “squoval” (soft square) or a soft round/almond shape. These shapes are durable, resist chipping, and provide a balanced look that maximizes the nail bed space. A short square shape offers a modern, clean look, while a short almond or round shape can help create the illusion of slightly longer fingers.
Are short nails in style for summer 2026?
Yes, short nails are very much in style for summer 2026 and are considered incredibly chic and practical. The clean girl aesthetic and a focus on nail health have made natural length nails a major trend. Many popular designs, like micro-french and minimalist art, are specifically designed to complement active length nails.
What colors look best on short nails?
Bright, highly-pigmented colors and very dark shades look fantastic on short nails as they create a bold, confident statement. Colors like bright corals, neons, cobalt blue, and classic red make short nails pop. Conversely, sheer nudes and minimalist jelly nails also look incredibly elegant and classy by creating a clean, polished appearance.
Can you have french tips on short nails?
Absolutely, you can and should have french tips on short nails. The key is to opt for a “micro-french” or “skinny french” manicure. This involves creating an extremely thin white or colored line at the tip, which gives the illusion of length and looks more modern and proportional on a small nail bed.
How do I make my short nails look longer?
To make short nails look longer, file them into a soft almond or oval shape and keep your cuticles pushed back and hydrated. Nude polishes that match your skin tone can create an elongating effect. Additionally, nail art with vertical lines or designs focused near the cuticle, like a negative space half-moon, draws the eye upward and lengthens the nail’s appearance.
What are easy no-tool nail designs?
Easy no-tool nail designs are creative looks you can achieve using only the nail polish brushes themselves. Examples include a mismatched mani (each nail a different color), an ombre gradient across the hand, or creating abstract swirls by dragging a brush tip through wet polish. These are perfect beginner friendly options.
How do I maintain short nails in the summer?
To maintain short nails, keep them hydrated with cuticle oil daily and apply a top coat every 2-3 days to prevent chipping. Wear gloves when doing chores or gardening. Since sun and chlorine can be drying, always moisturize your hands and nails after swimming or prolonged sun exposure to promote nail health.
What is the difference between BIAB vs Shellac on short nails?
BIAB (Builder in a Bottle) adds strength and structure, while Shellac is just a brand of long-lasting gel polish. For weak nails, BIAB is a better choice as it creates a protective, durable layer that can be infilled. Shellac offers great color and shine for 2+ weeks but doesn’t add the same structural support as a builder gel.
What are the most durable short nails?
The most durable short nails are typically those enhanced with a builder gel like BIAB or a structured gel manicure. These products add a strong but flexible layer over the natural nail, which protects it from bending and breaking. For a damage free DIY option, high-quality press-on nails are also very durable for temporary wear.
Is chrome nail polish good for short nails?
Yes, chrome finishes are excellent for short nails because they add high-impact shine without needing complex art. The viral “glazed donut” look, which uses a pearlescent chrome powder over a sheer nude, is particularly flattering. It makes the nail surface look healthy, plump, and luminous, which is a perfect aesthetic for short summer nails.
Final Thoughts on Your Chic Short Summer Nails
Ultimately, the best short summer nails are the ones that make you feel confident and stylish. As you’ve seen, having active length nails doesn’t limit your options; it simply opens the door to a different kind of creativity—one that is often more chic, modern, and practical. Whether you try a minimalist dot, a bold neon, or a classy micro-french, the key is to focus on clean prep work and have fun with color. With these tips and a little practice, you can easily achieve a salon quality manicure at home. Which one of these aesthetic ideas will you try first?
Last update on 2026-04-07 / Affiliate links / Images from Amazon Product Advertising API