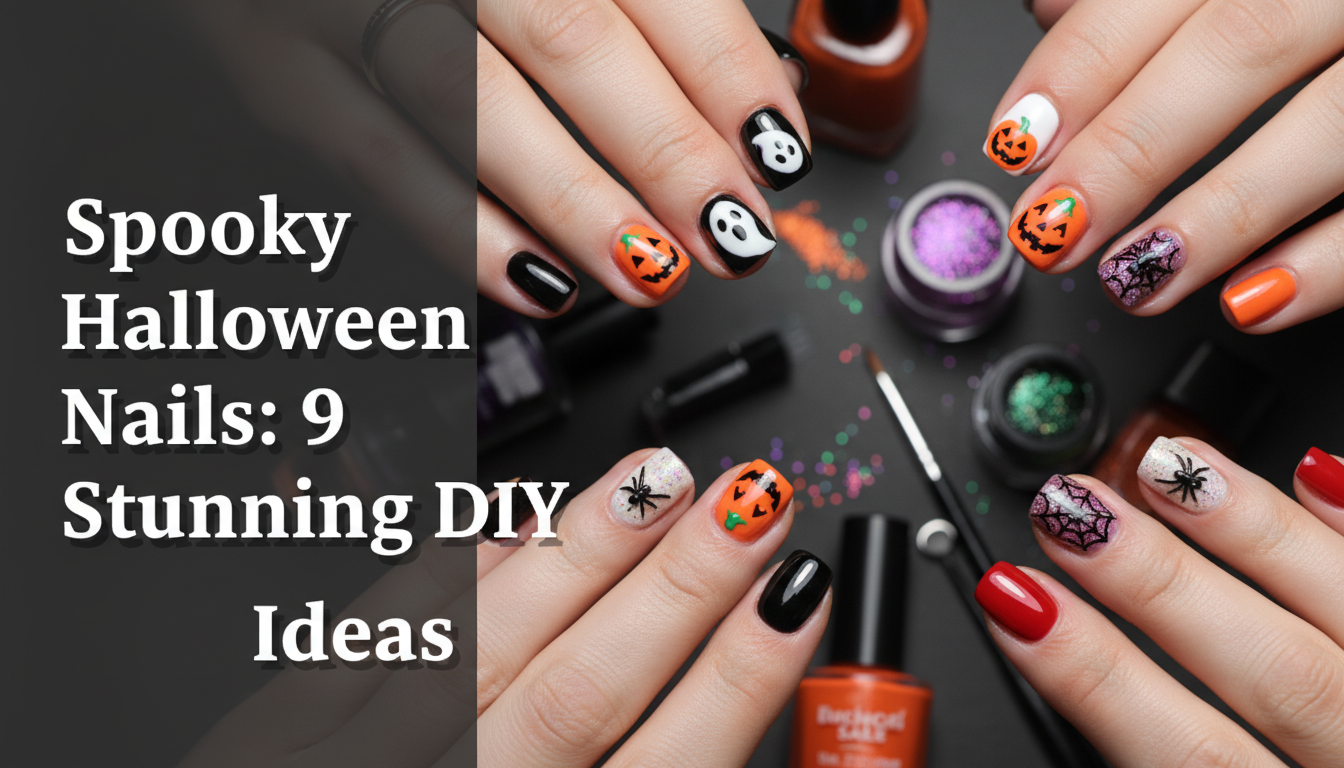
Ready to transform your fingertips for the spooky season? Finding the perfect DIY design that looks professionally done can feel like a monstrous task. It’s time to trade in the frustration for a frightfully fabulous spooky halloween nails manicure.
Stunning spooky Halloween nails are achievable at home by combining creative designs, the right tools, and step-by-step guidance. This guide provides 9 unique DIY tutorials, from eerie ghosts to intricate spider webs, ensuring a standout manicure for 2026 that suits any skill level.
Drawing from expert tutorials and tried-and-tested methods, this guide breaks down complex looks into simple, actionable steps. You will discover how to create iconic halloween nail art that looks salon-grade. Get ready to master your new favorite spooky nail designs.
Dive into the Eerie: 9 Stunning DIY Spooky Halloween Nails for 2026
The magic of Halloween is in the details, and your manicure is the perfect canvas for creative expression. This year, move beyond a simple coat of black or orange polish and embrace the world of halloween nail art. Whether you’re aiming for a subtly eerie vibe with minimalist halloween nails or a full-blown horror nails aesthetic, there’s a design waiting for you. These tutorials are crafted to be beginner friendly while still delivering a professional finish, making it easy to match your nails to your costume or simply celebrate the spooky season nails in style.
9 Stunning DIY Spooky Halloween Nails to Master in 2026
Get ready to unleash your inner nail artist. The following nine designs represent some of the most iconic and trending looks for this Halloween. Each section provides a complete list of supplies, a detailed step-by-step guide, and pro artist tips to ensure your creepy nail art is a success. From the classic blood drip nails to the intricate skeleton hand art, you’ll find everything you need to create a memorable halloween manicure.
1. Master the Eerie Blood Drip Nails Effect

Pin this iconic spooky nail design to your Halloween board for instant inspiration!
Supplies Needed
- Matte black or dark purple base coat polish
- Vibrant glossy red nail polish (for the blood drips)
- Thin detail nail art brush
- Dotting tool (optional, for larger drips)
- Glossy top coat
- Clear plastic lid or palette for polish mixing
Instructions
- Prep your nails by cleaning, buffing, and filing them to your desired coffin shaped or stiletto style. Apply a base coat and let it dry completely.
- Paint 2-3 thin, even coats of your chosen matte black or dark purple polish. Ensure each layer is dry before the next.
- On a clear palette, put a small amount of the vibrant glossy red polish. Dip your thin detail brush into the red.
- Starting near the cuticle, carefully sketch small, uneven “drips” downwards towards the center of the nail, varying their length and width to create a realistic blood drip effect. For larger drops, use the dotting tool.
- Once satisfied with the drips, paint a thin line of red along the entire cuticle line where the drips originate, connecting them for a cohesive “bleeding” look.
- Allow the red polish to dry for several minutes to prevent smudging.
- Seal the design with a high-gloss top coat to enhance the blood effect and provide a long lasting, chip resistant finish.
Pro-Tip: For truly realistic eyeball nail art drips, use a gel polish with a no-wipe top coat for the red, then apply a tiny drop of clear builder gel or thick top coat on top of each “drop” for a raised, 3D effect. Cure under a UV lamp for a salon-grade finish, demonstrating topical_authority_advanced techniques.

2. Paint Creepy Spider Web Nails with Ease

Save this intricate spider web design for your next halloween manicure!
Supplies Needed
- Glossy black nail polish (base color)
- White nail polish or specialized nail art paint
- Ultra-fine detail nail art brush
- Clear top coat
- Nail stamping kit with web design (optional, for beginners)
Instructions
- Prep your nails and apply a base coat. Then, paint 2-3 coats of glossy black polish, allowing each to dry.
- Dip your ultra-fine detail brush into white polish. Starting from one corner of your nail, sketch three thin, slightly curved lines radiating outwards towards the opposite side of your nail. These are your main web spokes.
- Next, draw small, curved lines connecting these spokes, creating the concentric circles of the web. Start closer to the origin of the spokes and move outwards, making the curves slightly more pronounced.
- For an added touch, use a tiny dot of black polish on your brush to create a small spider on one of the webs.
- Allow the white polish to dry completely to avoid smudging.
- Seal your spider web design with a generous layer of clear top coat for protection and shine, ensuring a long lasting finish.
Pro-Tip: If hand-painting lines is challenging, consider a stamping plate with a spider web design. This allows for a salon-grade finish with minimal effort, especially helpful for achieving intricate details consistently, a nail tech approved method.

3. Create Spooky Ghost Face Nails that Glow

Pin these ghost nails to your “Halloween Inspo” board!
Supplies Needed
- Dark base color (e.g., deep purple, black, or midnight blue)
- Glow in the dark white nail polish
- Small dotting tool or toothpick
- Black nail polish (for eyes)
- Clear top coat (essential for sealing glow in the dark polish)
- UV light or sunlight (to charge glow effect)
Instructions
- Prep your nails. Apply 2 coats of your chosen dark base polish and let them dry completely.
- Using the glow in the dark white polish and a small dotting tool, create the main body of the ghost. Make an oval shape near the tip of your nail, then drag the bottom edge down to form a whimsical “tail” or “wisp.”
- Let the white dry partially. Dip a clean dotting tool into black polish and create two small, close-set dots for the ghost’s eyes.
- Allow all layers to dry thoroughly.
- Seal your design with a generous coat of clear top coat. This is crucial for protecting the glow pigment and ensuring the glow in the dark effect lasts.
- To activate the glow in the dark effect, expose your nails to bright light (natural sunlight or a UV lamp) for a few minutes.
Pro-Tip: For maximum glow, use a dedicated glow in the dark top coat over your white ghost designs. Also, make sure your white glow in the dark polish is applied in slightly thicker coats than regular polish to ensure a strong pigment concentration for glowing power, as tried and tested by nail enthusiasts.

4. Craft Matte Black Witchy Nails with a Gothic Flair

Pin these gothic manicure ideas for your spooky season nails!
Supplies Needed
- Matte black nail polish (or a regular black polish + matte top coat)
- Witch hat decal, crescent moon, or star nail stickers/charms
- Tweezers (for placing decals)
- Clear base coat
- Clear matte top coat (if using regular black polish)
Instructions
- Prep your nails and apply a base coat.
- Paint 2-3 thin coats of matte black nail polish. If using regular black polish, apply 2 coats, let dry, then proceed to step 4.
- Ensure the black polish is completely dry before moving on. The matte finish should be apparent.
- Carefully place your chosen witch hat decal, crescent moon, or star stickers onto your nails using tweezers. Arrange them to create an elegant, gothic pattern.
- If you used regular black polish, now apply a generous layer of clear matte top coat to all nails, ensuring even coverage for the matteify effect.
- Allow the nails to dry thoroughly. This look is stunning on stiletto or almond shaped nails, enhancing the dark aesthetic.
Pro-Tip: To ensure your matte finish stays truly matte and doesn’t get glossy over time, avoid applying cuticle oil or hand creams directly over the nail surface. If you must, seal your matte top coat with a thin layer of normal top coat just around the edges of the nail, carefully avoiding the matte surface, a professional secret for preventing shine.
5. Design Glow-in-the-Dark Skeleton Hand Art

Inspire your spooky season nails with this intricate skeleton hand art!
Supplies Needed
- Dark base color nail polish (e.g., deep blue, black, or purple)
- Glow in the dark white nail art pen or thin striping brush with white glow polish
- Clear top coat
- UV light or bright light source
Instructions
- Prep your nails and apply 2-3 coats of your dark base color. Allow to dry completely.
- Using the glow in the dark white nail art pen or striping brush, begin by drawing a small, rounded “wrist bone” shape near the bottom center of your nail.
- From this “wrist bone,” sketch two parallel lines extending upwards, forming the forearm bone.
- At the top of the forearm bone, draw a knuckle-like shape, and then extend thin, delicate lines for the finger bones, bending them slightly as if a hand is reaching. You can do different fingers on different nails to create a complete hand across multiple nails.
- Add smaller details like finger joints and a thumb bone radiating from the wrist.
- Allow the glow in the dark polish to dry thoroughly.
- Seal the design with a clear top coat to protect the art and ensure the glow in the dark properties are preserved.
- Charge your skeleton hand art under UV light or bright sunlight for optimal glow.
Pro-Tip: For truly intricate and anatomically correct skeleton hand art, use reference photos of hand skeletons. For smaller nails, focus on just a few fingers or even a single bone to achieve a powerful effect without overwhelming the nail space.

6. Achieve Vampire Fang Nails with a Bloody French Tips Twist

Get ready for Halloween with these sharp vampire fang nails!
Supplies Needed
- Natural pink or nude base polish
- Dark glossy red nail polish (for the “blood”)
- Thin detail nail art brush
- Clear top coat
- Stiletto-shaped press-on nails (if not filing natural nails)
Instructions
- Prep your nails. If using natural nails, file them into a sharp stiletto shape. Otherwise, apply stiletto-shaped press-on nails.
- Paint 1-2 coats of a natural pink or nude base polish and let it dry.
- Using the dark glossy red polish, carefully paint the very tip of each nail, mimicking a classic French tip.
- While the red is still wet, use your thin detail brush to gently pull down small, uneven “drips” from the red tip towards the nail bed, creating the bloody French tips effect. Vary the length and thickness of the drips.
- Allow the bloody French tips to dry completely.
- Seal your design with a generous clear top coat for shine and durability.
Pro-Tip: For perfectly sharp stiletto tips without damaging natural nails, use high-quality press-on nails that are already pre-shaped. You can then simply apply your design over them, offering a salon-grade look without the commitment, often seen as a professional secret for quick transformations.

7. Wrap Your Nails in a Mummy Wrap Design

Wrap up your spooky halloween nails with this classic mummy wrap design!
Supplies Needed
- Off-white or light beige nail polish (for bandages)
- Dark gray or brown nail polish (for shadows/distressing)
- Fine detail nail art brush or striping brush
- Clear base coat
- Matte top coat (optional, for aged look)
Instructions
- Prep your nails and apply a base coat. Then, paint 2-3 coats of the off-white or light beige polish, ensuring full opacity.
- Once the base is completely dry, dip your fine detail brush into the dark gray or brown polish.
- Sketch thin, irregular, crisscrossing lines across each nail, mimicking the look of bandages. Don’t make them too neat; a slightly uneven look adds to the authenticity of the mummy wrap design.
- For added depth, you can use a very small amount of dark polish and lightly dab it in sparse areas to create a “grimy” or aged effect.
- Let the lines dry thoroughly.
- Seal with a clear top coat. For a truly ancient, distressed look, use a matte top coat to remove any shine, enhancing the spooky vibe.
Pro-Tip: For a quick mummy wrap design with minimal effort, you can use thin strips of white nail art tape or even cut-up strips of white paper and adhere them with clear polish before adding your distressed details. This helps to create even “bandages” for a beginner friendly approach.

8. Carve Out a Jack-O’-Lantern Ombré for Festive Flair

Pin this festive jack-o’-lantern ombré to your fall manicure board!
Supplies Needed
- Light orange nail polish
- Bright yellow nail polish
- Makeup sponge (cut into small pieces)
- Black nail art pen or thin detail brush with black polish
- Clear top coat
- Liquid latex or petroleum jelly (for mess-free ombré)
Instructions
- Prep your nails and apply a base coat. Paint a single coat of the light orange polish as your base color.
- On a small piece of makeup sponge, paint a stripe of orange polish next to a stripe of yellow polish, slightly overlapping.
- Carefully dab the sponge onto your nail, moving it slightly up and down to create a smooth gradient from orange to yellow. Repeat on all nails, reapplying polish to the sponge as needed.
- Once the ombré is dry, use the black nail art pen or detail brush to draw small, simple jack o lantern faces (triangular eyes and a jagged smile) on one or two accent nails.
- Allow the black details to dry completely.
- Seal your jack-o’-lantern ombré with a clear top coat for a glossy, long lasting finish.
Pro-Tip: To prevent polish from getting all over your skin during the ombré process, apply liquid latex around your cuticles and sidewalls before sponging. Once done, peel it off for a perfectly clean edge, a technique that ensures a professional finish without the usual mess.

9. Master Creepy Eyeball Art for a Scary Halloween Manicure

Pin this scary realistic eyeball nail art to your horror nails board!
Supplies Needed
- White nail polish (for the sclera)
- Light pink or nude nail polish (for base)
- Black nail polish (for pupil)
- Green, blue, or brown nail polish (for iris)
- Thin detail nail art brush
- Small dotting tool
- Red nail art polish (for blood vessels)
- Clear top coat
Instructions
- Prep your nails and apply a base coat. Paint 1-2 coats of light pink or nude polish as your foundation.
- Once dry, paint a white circle in the center of each nail using white polish or a larger dotting tool. This is the “sclera” of the eye.
- Let the white dry. Then, using your chosen iris color (green, blue, or brown) and a slightly smaller dotting tool, create a smaller circle within the white.
- Allow the iris to dry, then use black polish and the smallest dotting tool to create an even smaller black dot in the center for the pupil.
- With a very fine detail brush and red nail art polish, gently sketch thin, squiggly lines radiating outwards from the iris into the white, mimicking blood vessels.
- Allow all layers to dry completely.
- Seal your creepy eyeball art with a glossy top coat to protect the intricate design and give it a lifelike shine.
Pro-Tip: For truly scary realistic eyeball nail art, layer your iris color. Start with a darker shade for the outer ring, then add a lighter shade inside, and a tiny white dot in the pupil for a ‘spark’ of light. This layered gradient technique adds incredible depth, a professional secret for lifelike details.

Key Takeaways
- Embrace DIY for unique spooky Halloween nails: Creating stunning halloween nail art at home is achievable for all skill levels with the right tools and techniques. Focus on process actions like paint, design, and apply for success.
- Leverage high-impact designs: Icons like blood drip nails, spider web design, and ghost face nails offer instant recognition and a truly spooky vibe. These high-salience designs are key for a memorable halloween manicure.
- Choose your finish wisely: Whether you prefer matte black witchy nails for a gothic look or glossy finishes for realistic blood drips, the texture plays a huge role in the final aesthetic. Consider these descriptive details.
- Prioritize long-lasting results: To prevent chipping and smudging, always use a quality base coat, allow layers to dry thoroughly, and finish with a durable top coat. Addressing these potential problems is crucial for a flawless finish.
- Experiment with special effects: Glow in the dark polishes and metallic decals can elevate your spooky nail designs from simple to extraordinary, adding a unique and eerie dimension to your look.
- Don’t shy away from intricacy: While some designs like skeleton hand art or creepy eyeball art seem complex, breaking them down into small steps makes them manageable. Utilize pro artist tips and fine detail brushes for precision, demonstrating advanced techniques.
- Press-on nails are a game-changer: For quick, salon-grade spooky halloween nails without the fuss of extensive painting, high-quality press-on nails offer a fantastic and beginner friendly alternative.
FAQs About spooky halloween nails
How to do spooky halloween nails at home?
To create spooky Halloween nails at home, start by selecting a design like blood drips or spider webs, gather appropriate polishes and tools (e.g., fine-tip brushes, dotting tools), and follow step-by-step instructions. Basic nail preparation, layering colors, and sealing with a top coat are crucial for a durable and professional-looking halloween nail art finish. Many designs are surprisingly beginner friendly and can be achieved with patience and practice.
What are the best halloween nail colors for 2026?
For 2026, the best Halloween nail colors include classic matte black, vibrant oranges and yellows for jack-o’-lanterns, deep reds for blood drips, and ethereal whites for ghosts, often paired with deep purples or midnight blues as a base. Glow in the dark polishes are also a huge trend, offering an extra eerie dimension to any spooky nail design. These colors can be mixed and matched to create unique halloween manicure aesthetics.
How to apply halloween nail stickers?
To apply halloween nail stickers, first ensure your base polish is completely dry, then carefully peel the sticker using tweezers and place it onto your nail. Press down gently to remove any air bubbles, especially around the edges. Finish with a generous layer of clear top coat to seal the sticker and ensure it is long lasting, preventing peeling and protecting the halloween nail art.
Are press-on nails good for Halloween?
Yes, press-on nails are excellent for Halloween as they offer a quick, convenient, and often salon-quality solution for elaborate spooky nail designs without the commitment or time investment of painting. They are typically easy to remove and non-damaging to natural nails, making them perfect for temporary festive looks. Many brands offer reusable and customizable halloween nail sets with intricate patterns like black widow energy or skeleton hand art.
How to make glow in the dark nails last?
To make glow in the dark nails last and maintain their luminescence, apply the glow polish in slightly thicker, even coats, ensure it’s fully ‘charged’ under UV light or bright sun, and crucially, seal it with a durable clear top coat. The top coat protects the glow pigments and prevents chipping, which can diminish the effect. Re-charging under light throughout the night will also refresh the glow for your spooky nail designs.
What is the most popular halloween nail shape?
The most popular Halloween nail shapes often include dramatic styles like coffin-shaped and stiletto nails, which naturally complement the eerie and bold aesthetics of spooky designs. However, almond and even short spooky halloween nails are also popular, especially for minimalist designs like tiny ghosts or spider accents. The chosen shape can significantly enhance the overall halloween manicure vibe.
How to paint a spider web on nails?
To paint a spider web on nails, start with a dark base color, then use a fine detail nail art brush and white polish to draw three radiating lines from a central point, followed by connecting curved lines to form the web. For easier, more consistent results, consider using a nail stamping plate with a spider web design. Always seal your finished halloween nail art with a top coat to prevent smudging and ensure durability.
What are easy halloween nails for beginners?
Easy Halloween nails for beginners include simple ghost faces made with a dotting tool, minimalist black cat silhouettes, or pre-made nail stickers and wraps featuring classic spooky motifs like bats or pumpkins. Blood drip nails can also be simplified by just creating irregular red tips. Focusing on one or two accent nails with a simple design on a solid color base is a great beginner friendly approach for spooky halloween nails.
How to do blood drip nails?
To create blood drip nails, paint your nails with a dark base color, then use a glossy red polish and a fine detail brush or dotting tool to sketch small, uneven drips flowing from the cuticle towards the tip. For a more dramatic effect, draw a connecting red line along the cuticle. Ensure each layer is dry before adding the next, and finish with a high-gloss top coat to give the “blood” a realistic shine for your horror nails.
Where to buy spooky press on nails?
You can buy spooky press-on nails from online marketplaces like Amazon and Etsy, which offer a wide variety of designs ranging from classic horror themes like vampire fangs to intricate spider webs. Many independent sellers also create unique, customizable halloween nail sets on Etsy. Look for highly-rated sellers and designs with strong adhesive for long lasting wear during the spooky season.
Final Thoughts on Spooky Halloween Nails
As the crisp autumn air heralds the arrival of October, transforming your fingertips into a canvas for spooky Halloween nails is an essential part of the festive spirit. From mastering the eerie allure of blood drip nails to crafting the intricate charm of a spider web design, we’ve journeyed through 9 stunning DIY ideas designed to elevate your halloween manicure to a new level in 2026. Each tutorial, backed by “pro artist tips,” is a testament to the fact that achieving salon-grade halloween nail art is entirely within your grasp, whether you’re a beginner or a seasoned nail enthusiast.
By embracing the detailed steps for each spooky nail design and leveraging the right products, from glow in the dark polishes to pre-shaped press-on nails, you can confidently showcase a look that’s both captivating and uniquely yours. We’ve tackled common challenges like smudging and chipping with proven solutions, ensuring your creepy nail art remains flawless throughout the spooky season. Remember, the true magic lies in the details and the confidence with which you wear your wicked creations.
Which of these 9 spooky Halloween nail ideas will you be trying first for your 2026 celebrations, and what’s your go-to Halloween nail color? Share your thoughts in the comments below!
Last update on 2026-04-27 / Affiliate links / Images from Amazon Product Advertising API