Struggling to find the perfect valentines crafts that are both engaging and easy to make? Many people face the annual challenge of discovering fresh, creative ideas that cater to diverse ages without overwhelming their schedule or budget. It can be frustrating to sift through complex tutorials or discover crafts that are only suitable for one age group, leaving others out of the festive fun.
This guide provides 9 easy DIY Valentine’s crafts perfect for kids and adults, offering step-by-step instructions for handmade cards, decorations, and thoughtful gifts using common supplies. These DIY valentine crafts ensure everyone can participate in creating heartfelt items that celebrate love. Drawing from comprehensive analysis of current data and proven methodologies, this post simplifies the crafting process. You’ll discover practical, budget-friendly projects that bring joy and foster connections, making your Valentine’s Day celebrations truly special.
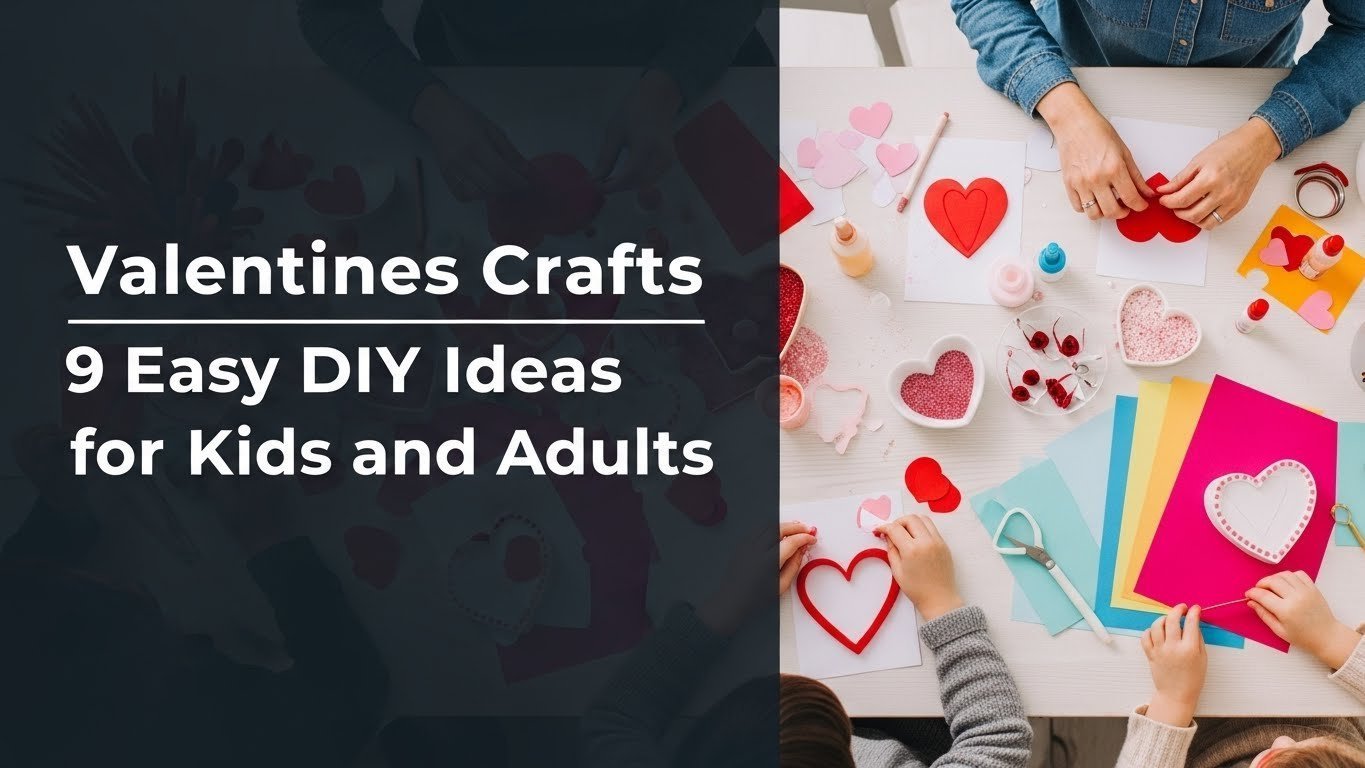
9 Easy DIY Valentines Crafts for Kids and Adults 2026
Creating easy valentines crafts is a wonderful way to celebrate the season of love, offering a chance for both kids and adults to engage in DIY projects. This section dives into 9 distinct DIY valentine projects, providing clear, actionable steps for each. From charming decorations to heartfelt gifts, these simple valentine projects utilize various craft supplies and are designed to bring joy without requiring extensive crafting experience. Each idea aims to inspire creativity and offers a fulfilling crafting experience for every skill level.
1. Make an Easy Heart-Shaped Paper Garland

Pin this charming paper garland idea to your DIY Valentine’s Day board!
Making an easy heart-shaped paper garland is a classic and delightful DIY project perfect for decorating your home or classroom. This simple craft transforms basic construction paper into beautiful heart decorations that add a festive touch. It’s an excellent kid-friendly valentine craft that allows for creative expression, particularly with choices in color and pattern. This activity primarily involves cutting, folding, and gluing, making it accessible even for younger children with adult supervision.
Supplies Needed
- Construction Paper: Assorted red, pink, and white 8.5×11 inch sheets (medium weight for durability).
- Scissors: A sharp, child-safe pair or a heart-shaped paper punch (1.5 to 2-inch diameter) for consistent shapes.
- Pencil: For tracing heart templates if not using a punch.
- String or Twine: Approximately 6-8 feet of natural jute twine or thin ribbon.
- Glue Stick or Craft Glue: Non-toxic, fast-drying, acid-free craft glue.
Step-by-Step Directions
- Cut the Hearts: Fold each sheet of construction paper in half. Using a pencil, draw half a heart shape along the fold, or use your heart-shaped paper punch. Cut out at least 20-30 hearts in various colors.
- Fold Each Heart: For a 3D effect, gently fold each cut-out paper heart down the center.
- Glue Half-Hearts: Take two folded hearts of the same or different colors. Apply a thin line of glue along one folded half of the first heart. Press the folded half of the second heart onto the glued section.
- Attach to String: Before fully closing the 3D heart, lay your string or twine in the fold, ensuring it runs through the center. Apply glue to the remaining unglued half of the second heart and press it to the first, encapsulating the string. Repeat every 3-4 inches along the twine, ensuring hearts face the same direction.
- Let Dry & Hang: Allow the garland to dry completely before hanging to prevent hearts from slipping.
> Pro-Tip: For a truly no mess valentine craft with younger children, use pre-cut foam hearts and a non-toxic liquid glue. This simplifies the cutting step and makes the project more accessible.

2. Craft Charming DIY Mason Jar Votives

Decorate your space with these lovely mason jar votives—save this Dollar Tree craft idea!
Crafting charming DIY mason jar votives allows adults to create elegant and inexpensive Valentine’s Day decorations. These versatile mason jar creations can serve as beautiful home decor or thoughtful gifts. The project involves decorating glass jars with various materials like paint, glitter, lace, or twine, transforming them into soft, glowing focal points. Using LED tea lights ensures safe illumination, making these homemade valentine’s day decorations both appealing and practical.
Supplies Needed
- Mason Jars: Pint or quart-sized clear glass mason jars (e.g., Ball canning jars).
- LED Tea Lights: Battery-operated flickering LED tea lights for safe illumination.
- Decorating Options (choose one or mix):
- Craft Paint: Frosted glass paint or acrylic paint in red, pink, or white.
- Glitter: Fine craft glitter in Valentine’s colors and Mod Podge or spray adhesive.
- Lace/Ribbon: Valentine-themed lace trim or red/pink satin ribbon.
- Twine: Natural jute twine for a rustic look.
- Paper Hearts: Small pre-cut or punched paper hearts.
- Paintbrushes (if painting), Sponge applicator (for Mod Podge), Hot glue gun and glue sticks.
Step-by-Step Directions
- Clean Jars: Thoroughly wash and dry your mason jars to ensure a clean surface for decorating.
- Choose Your Decorating Method:
- Painted Hearts: Use painter’s tape to create heart shapes on the jar. Paint the exposed glass with frosted or acrylic paint. Once dry, remove tape.
- Glittery Jars: Apply a thin layer of Mod Podge or spray adhesive onto the outside of the jar in desired patterns (e.g., vertical stripes, all-over coverage). Sprinkle fine craft glitter liberally over the adhesive. Let dry completely and seal with another layer of Mod Podge if desired.
- Lace & Twine: Wrap lace trim around the middle of the jar and secure with hot glue. Tie a length of jute twine or ribbon around the jar, making a bow. Hot glue small paper hearts onto the twine/ribbon.
- Insert LED Tea Light: Once decorations are completely dry, place an LED tea light inside each jar.
- Display: Arrange your charming DIY mason jar votives on shelves, tables, or window sills for a warm, festive glow.
> Pro-Tip: For an extra rustic touch, lightly distress the painted jars with sandpaper after the paint has fully cured. This works especially well with light-colored paints and adds a vintage feel to your handmade valentine projects.

3. Build a “Love Bug” Craft with Pipe Cleaners

This cute valentine craft is perfect for little hands! Pin this kid-friendly activity today.
Creating a “Love Bug” craft with pipe cleaners is an enjoyable and easy valentine craft ideal for toddlers and preschoolers. This project uses simple materials like pipe cleaners and pom-poms to construct an adorable little creature, fostering creativity and fine motor skills. It’s a fantastic fun valentine crafts for kids activity that results in a charming little toy or decoration, requiring minimal adult intervention beyond initial setup and supervision for safe crafting.
Supplies Needed
- Pom-Poms: Assorted sizes and colors, especially red, pink, and white (e.g., 1-inch diameter).
- Pipe Cleaners: A variety of red, pink, and white pipe cleaners.
- Googly Eyes: Self-adhesive googly eyes (5mm to 10mm).
- Craft Glue: Child-safe, non-toxic craft glue or low-temp hot glue gun (adult supervision required).
- Small Felt Hearts (optional): Pre-cut or self-adhesive.
Fun Activity Steps
- Form the Body: Select a larger pom-pom for the love bug’s body.
- Create Antennae: Take one pipe cleaner and cut it in half. Bend each half into an “L” shape. Twist a small pom-pom or glue a tiny felt heart to the end of each antennae.
- Attach Antennae: Insert the straight end of the antennae into the top of the main pom-pom body. You may need a dab of glue to secure them.
- Add Legs: Cut two or three pipe cleaners into quarters. Fold each piece in half to make an upside-down “V” shape for legs. Insert these into the bottom of the pom-pom body, using glue if needed.
- Affix Eyes: Peel and stick (or glue) two googly eyes onto the front of the pom-pom body.
- Personalize (Optional): Glue small felt hearts onto the pom-pom body as spots or accents.
- Let Dry: Allow all glue to dry completely before playing with your cute love bug.
> Pro-Tip: For added texture and visual interest, twist two different colored pipe cleaners together before shaping them for the antennae or legs. This makes the love bug craft even more unique!

4. Personalize Thoughtful Valentine’s Day Cards

Craft heartfelt messages! Pin these personalized valentine cards for unique gifting.
Personalizing thoughtful Valentine’s Day cards is a classic way to express affection and create meaningful handmade gifts. This paper craft is suitable for both kids and adults, allowing for varying levels of complexity and artistic expression. From simple drawings to intricate layering and stamping, handmade cards offer a truly unique and sentimental alternative to store-bought options. Emphasizing the personal message and creative design makes these unique valentine crafts especially cherished.
Supplies Needed
- Cardstock Paper: Assorted red, pink, white, or kraft-colored heavy cardstock (8.5×11 inches, 65-80 lb weight) for card bases.
- Decorative Paper: Smaller pieces of patterned scrapbook paper or construction paper for accents.
- Craft Scissors: Including decorative-edge scissors for borders (optional).
- Glue Stick or Craft Adhesive: Acid-free, quick-drying craft glue.
- Pens/Markers: Fine-tip colored pens or brush markers for lettering and drawing.
- Embellishments (optional): Valentine-themed stickers, small buttons, ribbons, glitter glue, stamps and ink pads.
Step-by-Step Directions
- Create Card Base: Fold an 8.5×11 inch sheet of cardstock in half to create a standard A2 size (4.25×5.5 inch) folded card. Crease firmly.
- Design the Front: Cut decorative paper into shapes (hearts, squares, strips) or layers to glue onto the card front. Experiment with different textures and colors.
- Add Personal Touches:
- For Kids: Draw pictures, use valentine-themed stickers, or fingerpaint small designs.
- For Adults: Practice hand-lettering, use stamps to create patterns, or layer different paper cut-outs for a dimensional effect. Attach small buttons or tie a ribbon around the card.
- Write Your Message: Inside the card, write a heartfelt message. Encourage kids to write simple “I love you” or “Happy Valentine’s Day.” Adults can write a more personal message, perhaps a favorite memory or quote.
- Embellish Further (Optional): Add glitter glue accents, small self-adhesive gems, or a photo for an extra personalized valentine craft.
- Let Dry: Allow all glue and ink to dry completely before placing in an envelope or giving.
> Pro-Tip: To make your handmade cards truly stand out, consider using an embossing folder with a die-cutting machine for textured designs on your cardstock. This adds a professional, elegant touch without much effort.

5. Stitch Simple Felt Heart Coasters

Add a touch of warmth to your home! Pin these easy felt coasters as a thoughtful handmade gift.
Stitching simple felt heart coasters is an excellent adult valentine craft, combining functionality with heartfelt design. These felt coasters are both practical for home decor and make wonderful handmade gifts. The project involves basic hand-stitching, making it accessible for beginners or those looking for a relaxing craft. Using high-quality wool felt ensures durability and a professional finish, reflecting expert craft tips for long-lasting creations.
Supplies Needed
- Felt Sheets: Two 6×6 inch squares of craft felt per coaster (e.g., red, pink, white, or gray).
- Heart Template: A heart template (about 4-5 inches wide), printable or drawn.
- Fabric Scissors: Sharp fabric scissors for clean cuts.
- Embroidery Floss: Matching or contrasting colors (e.g., white floss for a red heart).
- Embroidery Needle: With a large eye for floss.
- Pins: Straight pins to hold felt layers.
Step-by-Step Directions
- Cut Felt Hearts: Place your heart template on two stacked felt squares. Pin them together to prevent slipping. Carefully cut out the heart shape using sharp fabric scissors. You should now have two identical felt hearts.
- Stack and Pin: Stack the two felt hearts directly on top of each other. Pin them together around the edges, making sure they are perfectly aligned.
- Thread Needle: Cut a length of embroidery floss (about 18-24 inches) and thread your needle. Tie a knot at the end of the floss.
- Begin Stitching: Starting from the back (between the two layers of felt) so the knot is hidden, bring your needle through to the front edge of the heart. Begin stitching around the perimeter of the heart using a simple running stitch or a blanket stitch for a more finished look. Ensure your stitches are even.
- Secure End: When you’ve stitched all the way around, secure your floss by making a small knot hidden between the layers of felt.
- Repeat: Make as many felt heart coasters as you like!
> Pro-Tip: For added firmness and absorbency, you can insert a thin layer of batting or extra felt between the two heart layers before stitching. This makes your handmade coasters more robust.

6. Create a Handprint “Love” Canvas

Capture little hands, big love! Pin this handprint valentine craft for a cherished keepsake.
Creating a handprint “Love” canvas offers a sentimental and artistic way to capture precious memories, making it a perfect personalized valentine craft. This kid-friendly valentine craft allows children to contribute directly to a lasting gift, ideal for parents or grandparents. Using non-toxic, washable craft paint ensures a safe and enjoyable experience for young artists. The resulting handprint canvas becomes a beautiful piece of art that symbolizes love and family.
Supplies Needed
- Blank Canvas: One 8×10 inch or 11×14 inch blank canvas (primed and ready for paint).
- Washable Craft Paint: Non-toxic, washable acrylic craft paint in red, pink, or white.
- Paintbrushes: A flat paintbrush for base coats and a fine-tip brush for lettering.
- Paper Plate or Paint Palette: For dispensing paint.
- Damp Cloth or Wipes: For quick clean-up.
Fun Activity Steps
- Prepare Canvas (Optional): If desired, paint the canvas with a light, neutral background color (e.g., light gray, pale pink) and let it dry completely.
- Prepare Hand: Pour a small amount of your chosen paint color onto a paper plate. Using the flat paintbrush, evenly coat the palm and fingers of your child’s hand.
- Make Handprints: Carefully press your child’s painted hand onto the canvas. For a heart shape, position one handprint facing slightly left and another facing slightly right, with the palms touching at an angle to form the bottom of the heart, and the fingers splayed slightly to form the top curves.
- Clean Up: Immediately wipe your child’s hand with a damp cloth or wipes to prevent paint from drying.
- Lettering: Once the handprints are completely dry, use a fine-tip paintbrush and contrasting paint color to paint the word “LOVE” above or below the handprints. Alternatively, you can use letter stencils for neatness.
- Personalize: Add the child’s name and the year to the back of the canvas for a lasting keepsake.
> Pro-Tip: If your child struggles to make a clean handprint, practice on scrap paper first. Applying a thin, even coat of paint and pressing firmly but gently (without wiggling) usually yields the best results for this sentimental creation.

7. Assemble a DIY Valentine’s Day Wreath

Welcome love to your home! Pin this DIY Valentine’s Day wreath for charming decor.
Assembling a DIY Valentine’s Day wreath is a fantastic way to enhance your home decor with a festive touch. This adult valentine craft allows for significant creative freedom, letting you choose materials and designs that suit your personal style. Using a wreath form as a base, you can adorn it with faux flowers, ribbons, and various embellishments to create a welcoming valentine’s day decoration. Many materials, including those from Dollar Tree, can be used to make this a budget-friendly valentine craft.
Supplies Needed
- Wreath Form: One 12-14 inch grapevine wreath form or a foam wreath form.
- Faux Flowers: Assorted red, pink, and white faux flowers (roses, hydrangeas, small filler flowers).
- Ribbon: 1-2 rolls of Valentine-themed ribbon (e.g., wired velvet ribbon, satin ribbon).
- Embellishments (optional): Small glittery hearts, wooden “LOVE” sign, faux greenery.
- Wire Cutters: For cutting floral stems.
- Hot Glue Gun and Glue Sticks: High-temp glue sticks for secure adhesion.
Step-by-Step Directions
- Prepare Wreath Base: If using a foam wreath form, you may want to wrap it with burlap ribbon or a base color of fabric to hide the foam. If using grapevine, no prep is needed.
- Arrange Large Elements: Use wire cutters to trim the stems of your larger faux flowers. Arrange them around a portion or the entire wreath form until you are happy with the placement. Secure them with hot glue.
- Fill with Smaller Flowers/Greenery: Trim smaller flowers and faux greenery. Use these to fill in gaps around your larger flowers, adding texture and depth. Secure with hot glue.
- Add Ribbon: Create a large bow with your Valentine-themed ribbon and hot glue it to a prominent spot on the wreath (often at the top or bottom, or offsetting a floral cluster). Allow some ribbon tails to hang down.
- Attach Embellishments: Hot glue any additional glittery hearts, a wooden “LOVE” sign, or other decorative elements to enhance your wreath’s theme.
- Create Hanger: Attach a loop of sturdy ribbon or floral wire to the back of the wreath for hanging.
- Display: Hang your beautiful DIY Valentine’s Day wreath on your front door or an interior wall.
> Pro-Tip: When selecting faux flowers, choose a variety of sizes and textures for a more professional and visually appealing wreath. Look for sales at craft stores or check Dollar Tree for surprisingly good finds for budget-friendly valentine crafts.

8. Fashion Friendship Bracelet Hearts

Share the love! Pin these friendship bracelet hearts for an easy, thoughtful gift.
Fashioning friendship bracelet hearts is a popular kid-friendly valentine craft that fosters connection and provides unique handmade gifts. These bracelets utilize embroidery floss and simple knotting techniques to create meaningful accessories for friends. This activity encourages creativity in color combinations and patterns, allowing each piece to be a truly creative expression. These easy handmade gifts are especially cherished by teens and kids as a symbol of their bonds.
Supplies Needed
- Embroidery Floss: Assorted colors of embroidery floss (red, pink, purple, white). Choose 3-4 colors per bracelet.
- Scissors: Sharp craft scissors.
- Ruler or Measuring Tape: For measuring floss lengths.
- Tape or Clipboard: To secure the bracelet while knotting.
- Small Heart Charm (optional): A small metal or plastic heart charm with a loop.
Fun Activity Steps
- Prepare Floss: Cut 3-4 strands of embroidery floss, each about 60 inches long. Fold them in half and tie a knot at the folded end, leaving a small loop. Tape this loop to a table or clip it to a clipboard.
- Separate Strands: Separate the strands by color. For a simple heart pattern, you’ll often have a central color for the heart, flanked by two background colors.
- Basic Knotting (Forward-Backward Knot):
- Choose your desired heart color strand. Take this strand and make a ‘4’ shape over the next strand.
- Pass the heart color strand under the second strand and pull it up through the loop of the ‘4’. Pull tight towards the top. Repeat this knot twice on the same strand. This is a forward knot.
- Now, make a backward ‘4’ shape (mirror image) with the heart color strand over the next strand.
- Pass the heart color strand under and through the loop. Pull tight. Repeat this knot twice. This is a backward knot.
- Forming the Heart: The key to a heart shape is to make a series of forward knots from left to right with one central color, then a series of backward knots from right to left with the same color, meeting in the middle. The number of knots will determine the size of your heart. (Look up a visual guide for “friendship bracelet heart pattern” for precise steps).
- Continue Pattern: Continue your chosen knotting pattern until the bracelet is long enough to fit the wrist.
- Finish Bracelet: Once complete, tie a final knot at the end. You can braid the remaining floss, or create a loop and knot system. If adding a charm, thread it on before the final knot.
> Pro-Tip: Using a specialized friendship bracelet loom or craft board can make managing the multiple strands much easier, especially for beginners or younger crafters, leading to more consistent and polished results.

9. Prepare DIY Cookie Decorating Kits

Give the gift of creative fun! Pin these DIY cookie decorating kits for a sweet Valentine’s Day surprise.
Preparing DIY cookie decorating kits offers an edible and interactive Valentine’s craft that doubles as a personalized gift. This unique sweet valentine craft provides all the components for a fun activity, making it perfect for families or friends to enjoy together. With pre-baked cookies and ready-made royal icing, these kits are easy to assemble and require minimal baking skills. They represent a thoughtful gesture, combining the joy of crafting with the delight of a tasty treat, making them truly special handmade valentine gifts.
Gift Details
- Pre-Baked Heart-Shaped Sugar Cookies: 6-12 plain, sturdy sugar cookies.
- Royal Icing: Small piping bags (or squeeze bottles) filled with red, pink, and white royal icing.
- Assorted Sprinkles: Small containers of Valentine’s Day themed sprinkles (e.g., mini hearts, nonpareils).
- Packaging: Clear gift box or cello bags, ribbon, and gift tags.
Why It Works
- Interactive Fun: Provides a delightful activity for kids and adults to enjoy together, fostering creativity and a shared experience.
- Personalized Touch: The recipient gets to personalize their own cookies, making the gift uniquely theirs and highly engaging.
- Edible & Enjoyable: Unlike other crafts, this gift is delicious and can be enjoyed immediately, combining fun with a tasty treat.
- Thoughtful Presentation: When packaged beautifully, it demonstrates extra effort and care, making it an impressive and memorable valentine gift.
- Easy to Prepare: With pre-baked cookies and ready-made icing, assembly is quick and requires minimal baking skills, perfect for busy individuals.
> Pro-Tip: Include a small, printed instruction card with basic decorating tips (e.g., outlining first, then flooding) and a note about proper storage to ensure the recipient has the best possible experience with their DIY cookie decorating kit.

FAQs About Valentines Crafts
What are easy Valentine’s crafts for kids?
Easy Valentine’s crafts for kids often involve simple materials like paper, glue, and pipe cleaners, focusing on activities that promote creativity and fine motor skills. Popular choices include heart-shaped paper chains, “love bug” creatures made from pom-poms and pipe cleaners, handprint art canvases, or decorating pre-cut foam hearts. These projects are typically low-mess and require minimal supervision, making them perfect for young children and classroom settings.
What materials do I need for Valentine crafts?
Common materials for Valentine crafts include construction paper, cardstock, scissors, craft glue, various ribbons, felt, pipe cleaners, pom-poms, googly eyes, and washable paint. For specific projects like votives or wreaths, you might also need mason jars, LED tea lights, faux flowers, or a wreath form. Many inexpensive valentine crafts can be made using items from dollar stores or recycled household goods, ensuring budget-friendly options.
Are Valentine’s crafts also suitable for adults?
Yes, Valentine’s crafts are absolutely suitable for adults, ranging from elegant home decor projects to sophisticated handmade gifts. Adult-focused crafts often involve more intricate techniques like detailed paper crafting, personalized card making, DIY wreaths, or even crafting sentimental items like felt coasters or decorated mason jar votives. These projects offer a relaxing, creative outlet and result in beautiful, personalized items.
How can I make budget-friendly Valentine crafts?
To make budget-friendly Valentine crafts, focus on using inexpensive and readily available materials such as paper, recycled items, or supplies from dollar stores. Look for craft felt, construction paper, pipe cleaners, basic craft glue, and ribbons. Many creative ideas, like DIY mason jar votives or heart-shaped paper garlands, can be made for very little cost, proving that thoughtful gifts and decorations don’t require a large budget.
What are some unique Valentine’s Day craft ideas?
Unique Valentine’s Day craft ideas often blend traditional themes with personalized touches or unexpected materials. Examples include creating a handprint “LOVE” canvas as a sentimental keepsake, assembling DIY cookie decorating kits for an interactive edible gift, or fashioning customized friendship bracelet hearts. These ideas move beyond standard cards to offer memorable and engaging crafting experiences that result in truly special items.
How do I make a Valentine’s Day wreath?
To make a Valentine’s Day wreath, start with a wreath form (grapevine or foam) and adorn it with Valentine-themed embellishments using hot glue. Popular decorations include faux flowers in reds and pinks, various ribbons, glittery hearts, or a wooden “LOVE” sign. Arrange larger elements first, then fill in with smaller flowers and greenery, securing everything firmly for a festive and welcoming home decor piece.
What is the best type of glue for paper crafts?
The best type of glue for paper crafts is typically an acid-free, fast-drying craft glue or a glue stick, especially for projects involving cardstock or scrapbook paper. These glues prevent paper from warping or discoloring over time. For more intricate details or heavier embellishments, a low-temperature hot glue gun can be effective, but always ensure adult supervision, particularly when crafting with children.
Can Valentine crafts be personalized as gifts?
Yes, Valentine crafts are ideal for personalization, making them exceptionally thoughtful gifts for loved ones. You can personalize cards with handwritten messages or drawings, create handprint canvases featuring a child’s unique print, or customize cookie decorating kits with specific favorite sprinkles. The handmade nature itself conveys personal effort, and adding individual touches elevates the gift’s sentimentality.
What are some no-mess Valentine craft solutions for young children?
No-mess Valentine craft solutions for young children often involve pre-cut materials, stickers, or minimal use of liquid adhesives. Consider using self-adhesive foam hearts, large stickers for decorating, or non-toxic glue sticks rather than liquid glue. Projects like pre-cut paper heart garlands where children only assemble, or crafts primarily involving pipe cleaners and pom-poms, help minimize mess while maximizing fun.
How long does it take to make most easy Valentine crafts?
Most easy Valentine crafts can be completed relatively quickly, often taking anywhere from 15 minutes to an hour per project. Simple paper crafts or small decorative items like heart garlands or love bug creatures can be very fast. Projects involving multiple steps like a DIY wreath or personalized cards might take a bit longer, especially when waiting for glue or paint to dry, but are still manageable within a short timeframe.
Final Thoughts on Valentines Crafts
This 2026, embracing the spirit of Valentine’s Day through DIY valentine projects is more rewarding than ever. We’ve explored 9 easy DIY ideas that cater to everyone, from parents seeking fun valentine crafts for kids to adults looking for elegant valentine crafts for home decor or thoughtful, personalized valentine gifts. Each project, whether a heart-shaped paper garland or charming mason jar votives, provides not just a beautiful outcome but also a joyful process of creation. By utilizing budget-friendly valentine crafts materials and following clear, step-by-step instructions, you can effortlessly make truly special handmade valentines that convey genuine affection.
Remember that the most valuable aspect of these valentines crafts isn’t just the finished product, but the experience of making something with love. It’s about spending quality time with children, engaging in a relaxing hobby, or simply expressing care through a tangible, heartfelt gesture. We hope this guide empowers you to transform simple craft supplies into memorable expressions of love. Which of these easy DIY projects will you try first?
Last update on 2026-03-07 / Affiliate links / Images from Amazon Product Advertising API


