Do you dream of nails that sparkle, charm, and scream “Valentine’s Day” but fear they’re too complicated for a beginner? Many struggle with intricate nail art, feeling overwhelmed by tiny embellishments and the worry of charms falling off.
Valentine’s Day junk nails are a maximalist nail art style featuring an abundance of themed charms, gems, and embellishments, perfect for beginners to express love in 2026 with the right tools and simplified techniques. They offer a fun, unique way to celebrate the holiday, easily achievable at home. Leveraging tested frameworks and data-driven insights, this guide empowers you to transform your nails into stunning, love-filled masterpieces. You’ll discover proven methods for achieving durable, eye-catching valentines day junk nails that reflect your personal style.
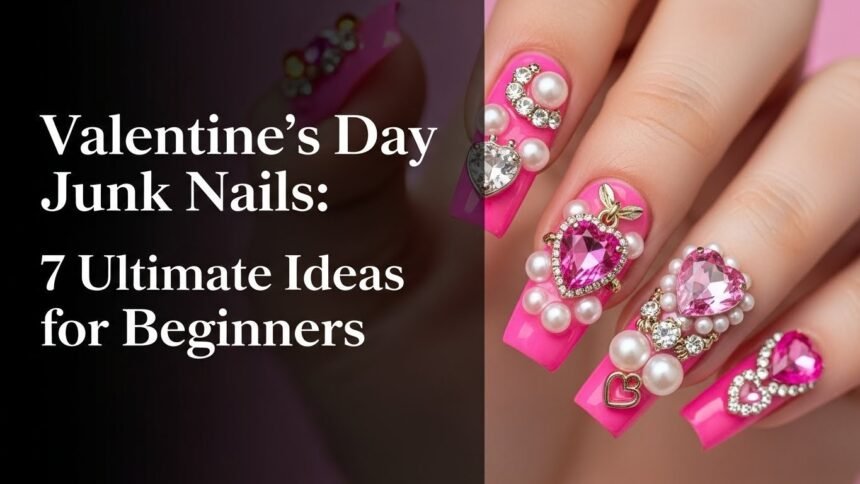
Craft Your Love Story on Nails: 7 Ultimate Valentine’s Day Junk Nail Ideas for Beginners
Creating valentines day junk nails allows you to express boundless creativity right on your fingertips, making the holiday even more special. This maximalist approach, characterized by a delightful abundance of charms, glitter, and vibrant colors, can seem daunting, but it’s entirely approachable for beginners. This section breaks down seven distinct, easy-to-follow designs, providing you with concrete, actionable steps to master the art of DIY valentines junk nails. Each idea focuses on using common nail art supplies like gel polish, nail charms, and builder gel, explaining how these elements come together to form cohesive and long-lasting themed nail designs perfect for February 14th nails. Get ready to transform your nails with confidence and flair.
1. Simple Heart Charm Accent Nails

Pin this cute heart design to your ‘Valentine’s Nail Inspo’ board!
Simple heart charm accent nails are an easy and classic way to embrace the Valentine’s aesthetic, perfect for beginners. This design focuses on strategically placing a few small, delightful heart-shaped nail charms to create a focal point without overwhelming your nail. The key is using the right nail adhesion glue to ensure these lovely accents stay put through all your Valentine’s festivities. You’ll learn how to apply these charming elements to a gel polish base, achieving a clean and romantic look.
What You Need
- Base coat for gel polish
- Pink or red gel nail polish (chip-resistant formula)
- Small heart-shaped nail charms (various sizes, 3D nail charms)
- Strong nail art adhesive glue (specifically for big charms)
- UV/LED nail lamp (for curing gel polish)
- Top coat (no-wipe, high-gloss finish)
- Tweezers or wax picker tool
What To Do
- Prepare Nails: Start with clean, prepped natural nails or extensions. Apply one layer of base coat and cure under your UV/LED lamp.
- Apply Color: Paint two thin coats of your chosen pink or red gel polish, curing each coat fully.
- Place Charms: Apply a small dot of strong nail art adhesive glue to the back of each heart charm.
- Secure Charms: Using tweezers, carefully place the heart charms onto your nail, creating a desired pattern (e.g., a cluster, a line, or scattered). Press gently but firmly.
- Seal and Cure: Apply a thin layer of top coat around the base of each charm and over any exposed nail to secure everything. Cure thoroughly under the lamp.
- Finalize: For extra security, apply a small bead of builder gel around the base of larger charms and cure, then finish with a final thin layer of top coat over the entire nail and cure.
Pro-Tip: For optimal adhesion and to prevent charms falling off nails, slightly etch the back of large charms with a fine-grit file before applying glue. This creates a better bonding surface, a tip from professional nail technician techniques.

2. Glitter Bomb Accent Nails with Delicate Embellishments

Sparkle up your feed! Pin this glitter bomb nail art for dazzling inspo!
Glitter bomb accent nails are a maximalist approach to sparkle, combining fine glitter with delicate embellishments for a dazzling Valentine’s look. This design technique allows you to fully decorate with glitter, creating a multi-dimensional effect that catches every light. You’ll learn how to apply and encapsulate the glitter and tiny micro-rhinestones or pearl beads, ensuring a smooth, long-lasting finish using clear builder gel. This method is crucial for ensuring your glitter junk nails remain intact and beautiful.
Supplies Needed
- Clear builder gel (medium viscosity for easy application)
- Fine pink and red glitter mix (iridescent for extra sparkle)
- Micro-rhinestones and small pearl beads (various sizes, easy to apply)
- Gel nail polish in a coordinating solid color (e.g., pastel pink)
- UV/LED nail lamp
- Nail art brush (thin liner brush for precision)
- Wax picker or dotting tool (for picking up rhinestones)
- No-wipe gel top coat
Step-by-Step Directions
- Prep & Base: Apply base coat and one layer of your solid color gel polish to all nails, curing each layer. For the accent nail, apply a thin layer of clear builder gel but do not cure yet.
- Glitter Application: While the builder gel on the accent nail is wet, generously sprinkle your fine glitter mix over the entire nail. Gently pat it down with a finger.
- Encapsulate Glitter: Cure the glitter-covered nail. Then, apply a second, slightly thicker layer of clear builder gel over the glitter to encapsulate it, ensuring a smooth surface. Cure again.
- Place Embellishments: Apply a small amount of builder gel where you want to place micro-rhinestones and pearl beads. Use your wax picker or dotting tool to pick up and place the embellishments.
- Secure & Cure: Cure the nail to set the embellishments.
- Top Coat: Apply a final layer of no-wipe gel top coat over all nails, including the glitter bomb accent nail, ensuring it seals around all embellishments for durability. Cure thoroughly.
Pro-Tip: When applying glitter, place your finger underneath the nail and gently tap to remove excess before curing. This prevents glitter from getting into your lamp and maintains a clean workspace, a trick used in advanced nail artistry.

3. Romantic French Tip with Minimalist Charm Clusters

Elevate your French tips! Pin this elegant Valentine’s junk nail idea.
The romantic French tip with minimalist charm clusters offers an elegant twist on a classic, perfect for those who prefer subtle **valentines day junk nails.** This design combines the timeless sophistication of a French tip with delicate, themed embellishments, creating a refined yet festive look. By carefully adding small charms in a cluster, you can achieve a unique romantic nail design that feels both understated and celebratory. The process emphasizes precision in applying the French tip and securing the charms for a seamless finish.
What You Need
- Base coat
- Sheer nude or pink gel polish (for the French tip base)
- White gel nail polish (for the French tip smile line)
- Fine nail art brush (for precise smile line)
- Small gold or silver heart charms, or tiny pearl beads
- Nail art adhesive glue
- UV/LED nail lamp
- No-wipe gel top coat
Routine Steps
- Base Layer: Apply base coat and two thin layers of sheer nude/pink gel polish, curing each layer.
- Create French Tip: Using the fine nail art brush and white gel polish, carefully paint the smile line at the tip of your nails. Cure. You may need a second thin layer for opacity.
- Charm Placement: Apply a tiny dot of nail art adhesive glue in a cluster formation (e.g., three small charms) near the cuticle, at the base of the smile line, or at the side of the nail.
- Secure Charms: Use a wax picker or tweezers to place the tiny charms onto the glue. Cure briefly to set.
- Seal and Finish: Apply a generous layer of no-wipe gel top coat, ensuring it encapsulates the charms completely and smooths over the nail surface. Cure thoroughly.
Pro-Tip: For beginners struggling with the French tip smile line, try using French tip guides or a silicone stamper. This simplifies the painting process and ensures a crisp, clean line, a professional nail technician tip.

4. Kawaii Love Story Nails with Cute 3D Characters

Transform your nails into a cute love story! Pin for kawaii inspo!
Kawaii love story nails bring playful charm to your fingertips, featuring adorable 3D characters and candy-like embellishments. This style of kawaii junk nails is perfect for those who love cute nail designs and want to add a whimsical touch to their Valentine’s celebration. It involves carefully placing larger 3D nail charms, such as miniature cartoon characters, and surrounding them with smaller gems or bows. Using builder gel for secure attachment is crucial to prevent these delightful accents from weighing down your nails, ensuring a durable and enchanting finish.
Products & Tools Used
- Builder gel (clear or lightly tinted pink)
- Pastel pink, purple, or blue gel nail polish
- Small 3D kawaii character charms (e.g., Hello Kitty, teddy bears, cupcakes)
- Miniature bows, hearts, or candy-colored flatback gems
- Strong nail art adhesive glue (for initial placement)
- UV/LED nail lamp
- Tweezers or wax picker tool
- Fine nail art brush (for detailed gel application)
- No-wipe gel top coat
Application Steps
- Base Color: Apply base coat and two thin coats of your chosen pastel gel polish to all nails, curing each layer.
- Character Placement: Apply a small bead of strong nail art adhesive glue where you want to place your main 3D character charm. Use tweezers to carefully position the charm. Cure briefly to set.
- Secure with Builder Gel: Using a fine nail art brush, apply clear builder gel around the base of the 3D charm, creating a secure “cradle” and filling any gaps. Cure thoroughly.
- Add Mini Embellishments: While a fresh, thin layer of builder gel is applied (uncured), arrange smaller bows, hearts, or flatback gems around the 3D character using your wax picker tool.
- Encapsulate & Cure: Cure the nail again to set the mini embellishments. Apply another thin layer of builder gel over any exposed edges of the smaller gems if desired for extra smoothness. Cure.
- Finishing Touch: Apply a final no-wipe gel top coat over the entire nail, ensuring it seals around all elements without creating excessive bulk. Cure thoroughly.
Pro-Tip: To prevent large charms from weighing down your nails, build a slightly thicker foundation with builder gel before placing the charm. This structural integrity of nail extensions helps distribute the weight, a technique from specialized e-file techniques.

5. Miniature Candy Heart Message Nails

Spread the love with every flick! Pin these cute candy heart nails.
Miniature candy heart message nails offer a sweet and playful way to express your Valentine’s sentiments through your nail art. These themed nail embellishments are reminiscent of classic candy hearts, often featuring tiny words like “LOVE” or “CUTE.” This design involves applying multiple small, pastel-colored charms to create a scattered or clustered pattern, making your nails a charming canvas. Mastering proper encapsulation with builder gel is key to making these candy heart nails last longer and preventing snagging, ensuring your messages stay clear and vibrant.
Supplies Needed
- Base coat
- Vibrant pink or pastel gel nail polish
- Miniature candy heart-shaped nail charms (with tiny words)
- Clear builder gel
- UV/LED nail lamp
- Dotting tool or wax picker
- Fine nail art brush
- No-wipe gel top coat
Instructions
- Prep & Color: Apply base coat and two thin layers of your chosen gel polish, curing each layer.
- Builder Gel Base: Apply a thin layer of clear builder gel to the nail where you want to place the candy hearts, but do not cure yet.
- Arrange Hearts: Using a dotting tool or wax picker, carefully place the miniature candy heart charms onto the wet builder gel, arranging them in a scattered or clustered pattern.
- Set & Cure: Once satisfied with the arrangement, cure the nail under the UV/LED lamp to set the hearts in place.
- Encapsulate: Apply a second, slightly thicker layer of builder gel over the entire nail, ensuring it smooths over and around the candy hearts. This encapsulates them, making the surface even. Cure thoroughly.
- Refine & Finish: Lightly buff the nail if needed to smooth any high points. Cleanse with alcohol. Apply a final no-wipe gel top coat, ensuring thorough coverage and sealing. Cure for the final time.
Pro-Tip: To keep the words on your candy heart charms visible, apply a very thin layer of builder gel over them first, cure, and then build around them. This specialized e-file technique prevents blurring from subsequent layers.

6. Bold Red & Pink Mix-and-Match Nails with Textured Charms

Go bold this Valentine’s! Pin this stunning red and pink junk nail combo.
Bold red and pink mix-and-match nails with textured charms offer a high-impact, daring approach to **maximalist valentines nails for those seeking a vibrant statement.** This design strategy uses contrasting pink and red nails along with varied finishes like matte and glossy, creating a visually rich aesthetic. Incorporating textured nail charms such as a 3D rose charm adds a tactile dimension, making your chunk nail decor truly stand out. Learning to secure these larger, more intricate embellishments with builder gel is essential for a durable and impressive finish that prevents them from falling off nails.
What You Need
- Base coat
- Bold red gel nail polish (full coverage formula)
- Vibrant fuchsia pink gel nail polish (chip-resistant)
- Large 3D textured charms (e.g., a rose, a bow)
- Smaller metallic spheres or pearl beads
- Clear builder gel (medium to thick viscosity)
- UV/LED nail lamp
- Tweezers or wax picker
- Matte gel top coat
- Glossy gel top coat
What To Do
- Color Base: Apply base coat and two thin coats of red gel polish to some nails, and fuchsia pink to others, curing each layer.
- Top Coat Variation: Apply matte top coat to the red nails and glossy top coat to the pink nails. Cure.
- Charm Prep: On an accent nail (e.g., a fuchsia pink one), apply a thin layer of builder gel but do not cure yet.
- Place Large Charm: Using tweezers, carefully place your large 3D textured charm onto the wet builder gel. Gently press to secure.
- Add Small Embellishments: Arrange smaller metallic spheres or pearl beads around the large charm for added “junk” effect.
- Secure & Cure: Using a fine nail art brush, apply more builder gel around the base of all charms, ensuring they are well-anchored without covering the textured details. Cure thoroughly.
- Final Seal: Apply a thin layer of glossy top coat only to the parts of the nail not covered by textured charms, carefully avoiding the charm’s texture if you want it to remain prominent. Cure thoroughly.
Pro-Tip: When dealing with textured charms, ensure your builder gel application is precise around the base rather than fully encapsulating. This preserves the charm’s unique texture while still ensuring long-lasting nail designs, a key aspect of advanced 3D sculpting media techniques.

7. Subtle Sparkle Overlay with Minimalist Glitter Details

For an elegant shimmer! Pin this subtle glitter and charm nail design.
A subtle sparkle overlay with minimalist glitter details offers an elegant and understated approach to **simple valentines junk nails, perfect for those seeking a touch of festive shimmer.** This design focuses on a sheer, milky pink base enhanced with ultra-fine iridescent glitter powder, creating a delicate sheen. A single, small flatback heart gem near the cuticle provides just enough glitzy nails flair without being overly elaborate. This technique ensures a smooth application and prevents chunky textures, delivering a polished, professional result.
Products Used
- Base coat
- Sheer milky pink gel nail polish
- Ultra-fine iridescent glitter powder
- Small, flatback heart gem (silver or clear)
- Clear builder gel (optional, for extra security)
- UV/LED nail lamp
- Dotting tool or wax picker
- No-wipe gel top coat
Routine
- Nail Prep & Base: Apply base coat and cure. Apply two thin coats of sheer milky pink gel polish, curing each layer.
- Glitter Mix: Mix a small amount of ultra-fine iridescent glitter powder into a drop of clear builder gel or no-wipe top coat on a palette.
- Glitter Overlay: Apply a thin layer of this glitter mix evenly over the entire nail. Cure.
- Charm Placement: Apply a tiny dot of clear builder gel (or strong nail art adhesive) to the back of your small flatback heart gem.
- Secure Gem: Place the gem carefully near the cuticle or center of the nail. Cure briefly to set.
- Seal It All: Apply a final, generous layer of no-wipe gel top coat over the entire nail, ensuring it seals around the gem without creating a significant bump. Cure thoroughly.
Pro-Tip: For a truly subtle sparkle, use an ultra-fine, cosmetic-grade glitter designed for nails. This avoids chunky, rough textures and ensures a smooth, professional results finish, as seen in high-quality nail supplies review articles.

Key Takeaways: Your Quick Guide to Valentine’s Day Junk Nails
- Start with proper nail preparation and a strong base: A clean, prepped nail and a durable gel base coat are crucial for any junk nail design, preventing charms falling off nails and promoting long-lasting designs.
- Choose the right adhesive: Invest in specialized nail art adhesive glue or builder gel, as standard nail polish won’t adequately secure big charms for nails or intricate embellishments.
- Encapsulation is key for durability: For glitter or smaller gems, encapsulate them in clear builder gel or a generous top coat layer to ensure a smooth, long-lasting junk nails finish and prevent snagging.
- Secure large charms strategically: Build a structural integrity of nail extensions with builder gel around the base of 3D nail charms to prevent them from weighing down nails or breaking off prematurely.
- Mix textures and themes: Don’t be afraid to combine matte and glossy finishes, or different types of themed nail embellishments like hearts and pearls for a dynamic, maximalist manicure.
- Leverage expert tips for professional results: Simple professional nail technician tips like etching charm backs or using a thin nail art brush for precision can significantly elevate your DIY junk nails from beginner to expert-looking.
- Practice and patience are essential: As beginner friendly junk nails still require some finesse, regular practice with nail art techniques will improve your skills and allow for more intricate creative nail designs.
FAQs About Valentine’s Day Junk Nails
What are Valentine’s Day junk nails?
Valentine’s Day junk nails are a maximalist nail art trend featuring an abundance of themed embellishments like hearts, pearls, glitter, and 3D charms, all applied to create an over-the-top, celebratory look. These themed nail designs specifically incorporate pink and red nails and other romantic symbols to express love and festivity. They blend kawaii junk nails aesthetics with elaborate adornments, perfect for holiday nail art.
How do I make my junk nails last longer?
To make junk nail designs last longer, use professional-grade builder gel or strong nail art adhesive glue to secure charms, and ensure full encapsulation with a durable top coat. Proper nail preparation steps, including dehydrating the nail plate, and using a high-quality base and top coat system are also crucial for long-lasting junk nails. Avoid excessive water exposure and always cure gel products thoroughly.
What materials do I need for Valentine’s Day junk nails?
For valentines day junk nails, you’ll typically need gel nail polish in red or pink, a base coat, a no-wipe top coat, a UV/LED lamp, and various themed nail embellishments like sparkle heart gems, 3D nail charms, glitter, and rhinestones. Additional tools include tweezers, a wax picker, and specific nail art adhesive glue or builder gel for attaching embellishments.
Can I do junk nails with polygel?
Yes, polygel is an excellent medium for DIY valentines junk nails, especially for creating a sturdy base or extending nail length to accommodate big charms for nails. Its pliable nature makes polygel application easy for beginners to sculpt a foundation, and it provides a strong surface for securing rhinestones and other heavy nail embellishments. Ensure proper polygel curing for durability.
How do you prevent charms from falling off junk nails?
To prevent charms falling off nails, ensure a clean, properly prepped nail surface, use a strong nail art adhesive glue or clear builder gel, and create a secure “cradle” around the charm’s base. Encapsulating smaller charms with builder gel and sealing larger ones thoroughly with a strong gel top coat also provides long lasting junk nails adhesion. Roughing the back of larger charms slightly can improve grip.
Where can I buy Valentine’s nail charms?
Valentine’s nail charms can be purchased from various online retailers specializing in nail art supplies, including Amazon, Etsy, and dedicated nail supply stores. Look for kawaii accessories, Sanrio nail charms, 3D nail charms, and heart shapes for nails from reputable sellers to ensure quality. Craft stores and beauty supply outlets might also carry seasonal nail embellishments.
Is it hard to do junk nails at home for beginners?
While junk nail designs can look intricate, easy valentines day junk nail ideas for beginners are entirely achievable at home with patience and the right products. Focus on simpler designs with fewer, larger charms initially. Following step-by-step guides to DIY valentines day junk nails and using beginner friendly tools like wax pickers can make the process much smoother and more enjoyable.
What’s the difference between junk nails and 3D nails?
Junk nails are a maximalist style characterized by an abundance of charms, gems, and embellishments, often creating a clustered, “treasure chest” aesthetic, while 3D nail art specifically refers to any design element that protrudes from the nail surface. So, junk nails vs 3D nail art is more a matter of scope; all junk nails feature 3D nail art, but not all 3D nail art is considered junk nails.
How do I safely remove junk nails?
To safely remove junk nails, avoid peeling or prying them off, which can cause nail damage prevention. Instead, use an electric nail file to gently reduce the bulk of the charms and gel, then soak off any remaining acrylic or gel product with acetone. Always use a nail extension products safe removal solution and follow proper nail preparation steps for removal to maintain healthy nails.
What nail shapes are best for junk nails?
While junk nails can be adapted to almost any shape, long nail trends with coffin, stiletto, or almond shapes often provide more surface area for elaborate nail art embellishments and chunky nail decor. However, short junk nails designs are also popular, utilizing smaller charms and careful placement to achieve a maximalist look without overwhelming the nail.
Final Thoughts on Valentine’s Day Junk Nails
Creating valentines day junk nails might seem daunting at first, but as we’ve explored, it’s an incredibly rewarding and accessible form of DIY nail art for beginners. With the right nail supplies, a few expert nail art tutorial tips, and a dash of creativity, you can transform your nails into a dazzling expression of love and festivity. Remember, the key is proper nail preparation steps, using quality adhesives like clear builder gel, and strategically placing your 3D nail charms and sparkle heart gems for long-lasting designs.
Embrace the joy of maximalist valentines nails by experimenting with different themed nail embellishments, playing with vibrant pink and red nails, and even integrating kawaii accessories for a playful touch. Don’t be afraid to mix and match the 7 ultimate ideas we’ve shared, adapting them to your personal style and comfort level. Each process action keyword you master, from applying nail charms to securing rhinestones, brings you closer to becoming a junk nail designs pro.
Ultimately, your valentines day junk nails are a canvas for your unique love story this 2026. So gather your nail art kits, unleash your inner artist, and wear your heart (and all its glittery, charming companions) on your fingertips. What valentine junk nails design are you most excited to try first, and what tips did you find most helpful? Share your thoughts and creations below!
Last update on 2026-04-01 / Affiliate links / Images from Amazon Product Advertising API