Are you searching for that perfect romantic touch to complete your Valentine’s Day look? Finding valentines day nails designs that are both unique and easy to recreate can feel overwhelming with countless options.
Valentine’s Day nail designs for 2026 embrace classic reds and pinks alongside modern twists like negative space hearts, glitter accents, and minimalist designs. These trendy nail designs often feature heart nail art to create a romantic aesthetic, suitable for both DIY and salon-quality looks. Drawing from comprehensive analysis of current data and proven methodologies, this guide unpacks 13 stunning ideas. Discover how to create memorable February 14th nails that perfectly express your unique style and festive spirit.
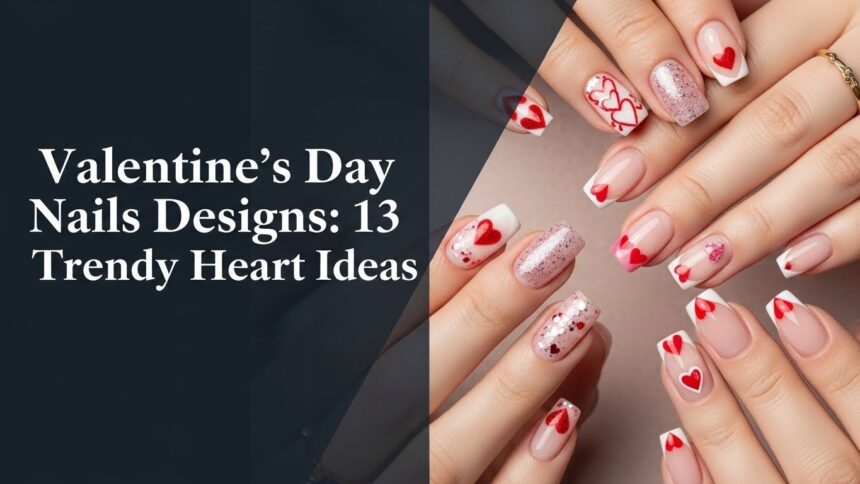
13 Trendy Heart Nail Art Ideas to Fall in Love With This Valentine’s Day 2026
This Valentine’s Day, transform your nails into a canvas of affection with these trendy heart nail designs. Whether you’re planning a romantic evening or celebrating self-love, these 13 ideas offer a spectrum of festive nail designs from simple valentine’s day nail art to elaborate valentines day nails. Each design comes with detailed steps and product recommendations, helping you achieve stunning Valentine’s nails that showcase your personal style. We’ve curated options that incorporate popular nail art techniques and current seasonal nail designs, ensuring your Valentine’s Day manicure is both chic and unique.
1. Classic Red Heart Outline Nails

Pin this timeless heart design to your ‘Valentine’s Day Mani Inspo’ board!
Classic Red Heart Outline Nails: This elegant valentine’s day nail design offers a subtle yet unmistakable nod to romance. Using vibrant red nail polish to trace delicate heart shapes on a clear base provides a simple valentine’s day nail art option that’s both chic and easy to achieve. It’s a beginner-friendly approach to heart nail art, focusing on precision with a fine brush for a stunning Valentine’s nails look without being overly complex.
Products & Tools Used
- Clear base coat
- Red nail polish (e.g., a vibrant cherry red or deep crimson)
- Fine-tip nail art brush (00 or 000 size)
- Clear top coat
- Nail polish remover (for corrections)
- Cotton swabs or correction pen
Application/Styling Steps
- Prepare Nails: Apply a clear base coat to clean, dry nails and allow to dry completely.
- Outline Hearts: Dip the fine-tip brush into the red nail polish. Starting from the center top of the nail, draw two small curves meeting at a point to form a heart outline. Repeat for desired number of hearts.
- Refine & Dry: Carefully clean up any mistakes with a cotton swab dipped in remover. Let the red polish dry thoroughly.
- Seal Design: Apply a clear top coat to protect the design and add shine.
> Pro-Tip: For perfectly symmetrical hearts, start by placing two small dots at the top of where the heart curves will begin, then drag the fine-tip nail art brush downwards from the center point of the two dots to create the bottom point. This advanced design theory helps achieve precision even for beginners, ensuring a professional finish.

2. Micro French Tip Hearts

Save this minimalist valentine’s day manicure to your board for a chic look!
Micro French Tip Hearts: This minimalist valentine’s day manicure offers a sophisticated twist on a classic, perfect for a chic valentine’s day nail design. The elegance of French tip nails is transformed by adding tiny, subtle valentine’s day nail art hearts in pink and red nails polish, creating a look that’s both modern and romantic. It’s an ideal option for those seeking a quick yet stunning touch to their love-themed manicure.
Products & Tools Used
- Clear or sheer pink base coat
- White or light pink nail polish for tips
- Red or dark pink nail polish for hearts
- Dotting tool or fine-tip nail art brush
- Striping brush (optional, for micro tips)
- Clear top coat
Application/Styling Steps
- Base Layer: Apply 1-2 coats of clear or sheer pink base coat. Let dry.
- Create Micro Tips: Using the white/light pink polish and a striping brush (or the polish brush very carefully), create a very thin line along the free edge of each nail.
- Add Tiny Hearts: Once the tips are dry, use a dotting tool or fine brush with the red/dark pink polish to draw tiny hearts. These can be placed on the tip, at the cuticle, or near the side walls.
- Seal & Shine: Finish with a generous layer of clear top coat to set the design and add gloss.
> Pro-Tip: For the smallest hearts, gently dab two tiny dots side-by-side with your dotting tool, then drag the tool downwards from the center point of the two dots to create the bottom point of the heart. This precision application is key for subtle valentine’s day nail art. Nail shaping techniques are also essential for a perfect French tip, highlighting salon standards for a clean look.

3. Glitter Gradient Heart Accent

Pin this glitter nail art for a dazzling Valentine’s Day look!
Glitter Gradient Heart Accent: For those who love sparkle, this design offers a glamorous valentine’s day gel nail ideas that truly pops. Glitter is applied to heart shapes, creating a gradient effect on accent nails that pairs beautifully with ombré gradients on other nails. This unique nail design combines the popular glitter nail art technique with a clear heart motif, focusing on achieving an even application for a dazzling festive nail design.
Products & Tools Used
- Base coat
- Pink and white (or red) nail polishes for gradient base
- Cosmetic sponge (for gradient)
- Loose fine glitter (pink, red, or iridescent)
- Top coat (preferably a thicker one for glitter)
- Small heart-shaped nail stencil or tape
- Fine-tip nail art brush (for stencil edges)
Application/Styling Steps
- Base Gradient: Apply base coat. On accent nails, apply a pink-to-white (or red) color gradient using a cosmetic sponge. Let dry completely.
- Place Stencil: Once the gradient is dry, carefully place a small heart-shaped stencil onto the accent nail where you want the glitter heart.
- Apply Glitter: Apply a thin layer of top coat or glitter adhesive inside the stencil. Immediately dab loose glitter onto the wet area with a finger or brush.
- Remove Stencil & Seal: Carefully remove the stencil while the glitter is still wet. Allow to dry. Apply 2-3 layers of a thick top coat to seal the glitter and ensure a smooth finish.
> Pro-Tip: Using a peel-off latex barrier around the nail before applying glitter can make cleanup much easier. This specialized tool technique helps achieve a professional finish and is often used by certified technicians for mess-free application, ensuring long-lasting wear and preventing chipping.

4. Negative Space Heart Mani

Pin this chic Valentine’s Day nail design for a minimalist statement!
Negative Space Heart Mani: This modern valentine’s day nail trends offers a sophisticated and minimalist valentine’s day manicure that moves beyond traditional heart imagery. Negative space is utilized for shaping heart designs, where the natural nail forms the heart, surrounded by bold nail polish colors such as deep red or black. This unique nail design provides a subtle valentine’s day nail art without hearts explicitly painted, focusing instead on clever visual presentation and achieving precision with tape or stencils.
Products & Tools Used
- Base coat
- Nail vinyls or tape cut into heart shapes
- Nail polish (contrasting color like deep red, black, or rose gold)
- Tweezers (for vinyl placement)
- Top coat (matte or glossy)
Application/Styling Steps
- Base Coat: Apply a clear base coat and allow it to dry completely. This is the “negative space” area.
- Place Vinyls: Using tweezers, carefully place the heart-shaped nail vinyls (or tape) onto your nails, ensuring they are pressed down firmly, especially at the edges.
- Apply Color: Paint over the entire nail, including the vinyl, with your chosen contrasting nail polish.
- Remove Vinyls: Immediately after painting (while the polish is still wet), carefully peel off the vinyls using tweezers. This will reveal the heart shape in negative space.
- Seal Design: Allow the colored polish to dry completely, then apply a top coat.
> Pro-Tip: Ensure your base coat is completely dry before applying nail vinyls to prevent lifting. For sharp, clean lines, apply a quick-dry top coat over the vinyl before painting with color; this creates a barrier for preventing bubbles and bleed. This innovative design approach is favored by professional nail artist to showcase nail plate health.

5. Rose Quartz Marbled Hearts

Pin this romantic nail design for a touch of ethereal elegance!
Rose Quartz Marbled Hearts: For a truly elegant valentine’s day nail design, consider the serene beauty of rose quartz nails. This design uses marbling techniques to create a soft aesthetic on the nail, with delicate heart designs subtly integrated or standing out. It’s a sophisticated take on heart nail art, combining the artistic marbled heart nail art with a subtle touch of romance, ensuring achieving precision for intricate patterns.
Products & Tools Used
- Base coat
- Sheer pink/white gel polish (for base)
- Pink, white, and a touch of gold/rose gold gel polish (for marbling)
- Fine-tip nail art brush or striper brush
- Dotting tool (optional, for veins)
- UV/LED lamp for curing
- No-wipe top coat
- Alcohol wipe (for tacky layer)
Application/Styling Steps
- Base & Cure: Apply base coat, cure. Apply 1-2 thin coats of sheer pink/white gel polish, curing each coat.
- Marbling Base: Apply a thin layer of the sheer pink/white polish (do not cure).
- Add Colors: Drip small dots of pink, white, and a tiny bit of gold/rose gold polish onto the wet layer.
- Swirl & Shape: Using a fine brush, gently swirl the colors together to create a marbled effect. While swirling, gently guide the brush to form a heart shape within the marble. Cure.
- Details (Optional): For more realistic “veins,” use a very fine brush with a tiny amount of white or gold polish to draw delicate lines within the marbled heart. Cure.
- Seal & Finish: Apply a no-wipe top coat and cure. Wipe with an alcohol wipe if there’s a tacky layer.
> Pro-Tip: The key to realistic rose quartz is not to over-mix the colors; subtle swirls will create the best marble effect. Gel polish is ideal for this as it won’t dry until cured, allowing ample time for freehand painting and design theory exploration to achieve a professional finish. This innovative design demonstrates award-winning designs principles.

6. 3D Bubble Heart Nails

Pin this creative nail art for an adorable 3D Valentine’s Day statement!
3D Bubble Heart Nails: For a truly playful and tactile design, 3d nail art in the form of bubble heart nails adds texture and depth to your Valentine’s Day manicure. Using clear builder gel, you can create raised, glossy heart shapes that give a whimsical, three-dimensional effect. This unique nail design is a creative solution for those wanting elaborate valentines day nails that stand out, showcasing gel nail designs at their best.
Products & Tools Used
- Base coat
- Colored gel polish (e.g., pastel pink, red)
- Clear builder gel or 3D gel
- Fine-tip dotting tool or a specialized 3D brush
- UV/LED lamp for curing
- No-wipe top coat
- Alcohol wipe (for tacky layer)
Application/Styling Steps
- Base Color: Apply base coat, cure. Apply 1-2 coats of your chosen colored gel polish, curing each coat. Finish with a no-wipe top coat and cure.
- Form Hearts: Dip your dotting tool or 3D brush into the clear builder gel. Carefully dab and shape small, raised heart forms onto the nail surface. You might need to build up the shape in layers, curing after each layer if the gel is runny.
- Cure 3D: Once you’re happy with the heart shape and dimension, cure the nails under the UV/LED lamp according to the gel’s instructions.
- Seal (Optional): If desired, apply a final thin layer of no-wipe top coat over the entire nail (including the 3D hearts) and cure for extra gloss and protection.
> Pro-Tip: For the most defined bubble effect, use a clear builder gel that holds its shape well. Work with small amounts of gel and build layers if needed, curing after each one. This specialized tool and advanced design theory allows for creative expression and is a proven technique used by professional nail artist for long-lasting wear and structural integrity.

7. Sweetheart Swirls & Hearts

Pin these romantic nail designs for a flowing, artistic touch this February!
Sweetheart Swirls & Hearts: Embrace an artistic and dynamic aesthetic with sweetheart swirls. This creative nail art combines flowing swirl patterns with heart shapes in red and pink nails polishes to create a truly romantic nail design. It’s an ideal choice for elaborate valentines day nails that showcases artistic expression and offers a fresh, unique take on traditional heart motifs, often utilizing freehand painting.
Products & Tools Used
- Base coat
- Sheer nude or white gel polish (for base)
- Red, pink, and white gel polishes (for swirls)
- Fine-tip nail art brush (striper brush works well)
- UV/LED lamp for curing
- No-wipe top coat
Application/Styling Steps
- Base Color: Apply base coat, cure. Apply 1-2 coats of sheer nude or white gel polish, curing each coat.
- Create Swirls: On a tacky layer (or after applying a thin layer of top coat and not curing), use your fine-tip brush to pick up small amounts of red, pink, and white polishes. Draw flowing, intertwined swirl lines across the nail, subtly incorporating heart shapes or small curves that suggest hearts.
- Cure Swirls: Once satisfied with the pattern, cure the design.
- Seal & Finish: Apply a no-wipe top coat and cure.
> Pro-Tip: To create smoother swirls, work with wet gel polishes on top of a non-cured thin layer of top coat or base gel. This allows the colors to blend seamlessly. For achieving precision, use a very fine-tip nail art brush and a light touch. Certified technician know the importance of product compatibility when layering different polish types for these smooth results.

8. Ombré Pink Heart Nails

Pin this cute valentine’s day nail design for a sweet and stylish look!
Ombré Pink Heart Nails: This cute valentine’s day nail design combines the popular ombré pink nails trend with classic heart nail designs. The soft gradient of pink nail polish creates a sweetheart nails aesthetic that perfectly complements a romantic look. It’s a beginner-friendly way to achieve ombré gradients at home, offering a stunning valentine’s nails option that is also time-saving and visually appealing.
Products & Tools Used
- Base coat
- Two shades of pink nail polish (one lighter, one darker)
- Cosmetic sponge or ombré brush
- Fine-tip nail art brush or dotting tool (for heart)
- Clear top coat
Application/Styling Steps
- Base & Protect: Apply base coat. Apply a thin layer of the lighter pink polish as your base color. Let dry. (Optional: Apply liquid latex around nails for easier cleanup after ombré).
- Create Ombré: Paint both pink polishes in stripes onto a cosmetic sponge. Gently dab the sponge onto your nail, moving it slightly up and down to blend. Repeat for desired opacity.
- Form Heart: Once the ombré is dry, use the darker pink polish and a fine-tip brush or dotting tool to paint a small heart on each nail, or just one accent nail.
- Seal & Finish: Apply a clear top coat to seal the ombré and heart design, ensuring long-lasting wear.
> Pro-Tip: When creating the ombré, apply thin layers and build opacity slowly. This technique helps prevent a chunky look and ensures a smooth gradient. For the easiest application, consider using nail decals instead of painting tiny hearts. Expert tips on color theory can help select the perfect pink shades.

9. Sweetheart Swirls & Hearts

Pin these romantic nail designs for a flowing, artistic touch this February!
Sweetheart Swirls & Hearts: For a truly romantic nail design with a flowing, artistic touch, sweetheart swirls combined with heart elements are a creative nail art choice. This design merges swirl patterns with heart shapes using nail art techniques to create a dynamic and expressive Valentine’s Day look. The red and pink nails aesthetic showcases artistic expression and offers an elaborate valentines day nails option focused on fluidity and artistry.
Products & Tools Used
- Base coat
- Sheer nude or white gel polish (for base)
- Red, pink, and white gel polishes (for swirls)
- Fine-tip nail art brush (striper brush works well)
- UV/LED lamp for curing
- No-wipe top coat
Application/Styling Steps
- Base Color: Apply base coat, cure. Apply 1-2 coats of sheer nude or white gel polish, curing each coat.
- Create Swirls: On a tacky layer (or after applying a thin layer of top coat and not curing), use your fine-tip brush to pick up small amounts of red, pink, and white polishes. Draw flowing, intertwined swirl lines across the nail, subtly incorporating heart shapes or small curves that suggest hearts.
- Cure Swirls: Once satisfied with the pattern, cure the design.
- Seal & Finish: Apply a no-wipe top coat and cure.
> Pro-Tip: To create smoother swirls, work with wet gel polishes on top of a non-cured thin layer of top coat or base gel. This allows the colors to blend seamlessly, making it a proven technique for this creative nail art. For achieving precision, use a very fine-tip nail art brush and a light touch. Certified technician ensures product compatibility.
10. Abstract Minimalist Hearts

Pin these minimalist valentine’s day manicure ideas for modern elegance!
Abstract Minimalist Hearts: For a modern valentine’s day nail trends that’s subtle valentine’s day nail art without being overtly festive, abstract minimalist hearts offer a sophisticated option. This design utilizes abstract shapes to represent heart designs in a minimalist way, transforming a classic theme into a contemporary look. It’s a unique and creative nail art approach, ideal for those seeking conceptual elegance and advanced design theory.
Products & Tools Used
- Base coat
- Sheer nude or clear nail polish (for base)
- Fine-tip nail art brush
- Chosen nail polish colors (e.g., black, white, gray, a muted pink)
- Clear top coat
Application/Styling Steps
- Base Layer: Apply base coat and 1-2 coats of sheer nude or clear polish. Let dry completely.
- Paint Abstract Elements: Using a fine-tip brush and your chosen color(s), paint small, abstract shapes or lines that subtly suggest parts of a heart. Think half-hearts, broken lines forming a heart’s curve, or tiny dots arranged in a heart shape.
- Clean & Dry: Allow the design to dry thoroughly. Correct any smudges with a precise brush and remover.
- Seal: Finish with a clear top coat to protect the intricate design and add a professional finish.
> Pro-Tip: The beauty of abstract minimalist hearts is imperfection. Don’t strive for exact symmetry; let the lines be organic. This approach allows for greater creative expression and unique nail designs that feel more personalized. Professional nail artist apply principles of negative space for sophisticated visual balance.

11. Pink & Red Matte Hearts

Pin these sophisticated valentine’s day nails for a chic matte look!
Pink & Red Matte Hearts: For a sophisticated valentine’s day nails look, a matte finish offers a modern and elegant valentine’s day nail designs twist to the classic pink and red nails combination. This trendy nail design applies matte nail polish to heart designs, creating a unique texture that truly stands out with its contemporary appeal. The contrast of the matte background with subtle, glossy heart accents provides a stunning effect.
Products & Tools Used
- Base coat
- Red matte nail polish
- Pink matte nail polish
- Fine-tip nail art brush or small heart nail decals
- Matte top coat (if using regular polishes and not pre-matted ones)
Application/Styling Steps
- Base Colors: Apply base coat. Paint alternating nails with red matte polish and pink matte polish. Apply 2 thin coats for full opacity, allowing each to dry.
- Add Hearts: Once base colors are completely dry, use a fine-tip brush to paint contrasting hearts (e.g., pink heart on red nail, red heart on pink nail). Alternatively, apply small heart nail decals.
- Matte Finish: If using regular polishes for the hearts, apply a matte top coat over the entire nail to unify the finish. If using pre-matted polishes and decals, apply a regular top coat only over the decals for a slight contrast, or leave as is.
- Seal & Dry: Ensure all layers are thoroughly dry for the best matte finish.
> Pro-Tip: For the most durable matte finish, invest in a high-quality matte top coat. Avoid wiping matte nails with alcohol, as this can degrade the matte effect and lead to fading color. This proven technique from expert tips ensures your pink and red nails stay stunning and long-lasting.

12. Glitter Pop Heart Accents

Pin this bold valentine’s day nail art for a sparkling statement!
Glitter Pop Heart Accents: For a truly bold valentine’s day nail art statement, glitter nails with a heart pop are perfect. This festive nail designs approach uses chunky glitter to fill heart shapes on accent nails, making them stand out against a solid color base. It’s a fun valentine’s day nail designs to try that maximizes sparkle with minimal effort, offering stunning Valentine’s nails that are also easy DIY.
Products & Tools Used
- Base coat
- Vibrant colored nail polish (e.g., bold pink, red)
- Chunky glitter nail polish (with heart-shaped glitters, if possible) or loose glitter
- Nail glue or clear polish (if using loose glitter)
- Small heart stencils or a fine-tip brush
- Thick clear top coat
Application/Styling Steps
- Base Color: Apply base coat. Paint all nails with your chosen vibrant base color. Apply 2 thin coats for full opacity. Let dry completely.
- Create Glitter Heart: On accent nails, apply a small heart stencil. If using chunky glitter polish, paint directly inside the stencil. If using loose glitter, apply a thin layer of nail glue or clear polish inside the stencil, then immediately sprinkle or dab glitter over it.
- Remove Stencil & Clean: Carefully remove the stencil while the glitter (or glue/polish) is still wet. Clean up any stray glitter with a brush or tape.
- Seal & Smooth: Once dry, apply 2-3 layers of a thick clear top coat to seal the glitter and create a smooth finish, preventing snags.
> Pro-Tip: For maximum “pop,” use a glitter with varied sizes of particles. Apply a thick clear top coat specifically designed for glitter to achieve precision and encapsulate the sparkle without dulling it. This is a proven technique from trusted brands to prevent chipping and ensure long-lasting results for your stunning Valentine’s nails.

13. Duo-Tone Heart Art
Pin this unique valentine’s day nail design for a graphic and modern look!
Duo-Tone Heart Art: For a unique valentine’s day nail design that’s both graphic and modern, duo-tone heart nails are a captivating choice. This creative nail art applies two contrasting colors to heart shapes, creating a visually striking effect. It provides a graphic and modern Valentine’s Day manicure that showcases sophisticated color theory, appealing to those who desire elaborate valentines day nails with a contemporary edge and achieving precision with two distinct colors.
Products & Tools Used
- Base coat
- Two contrasting nail polish colors (e.g., red and pink, white and gold, black and nude)
- Fine-tip nail art brush or striper brush
- Clear top coat
- Nail tape or heart stencils (optional, for crisp lines)
Application/Styling Steps
- Base Coat: Apply base coat and 1-2 coats of your chosen background color (optional, or a neutral base). Let dry.
- Paint First Half of Heart: Using one of your chosen contrasting colors and a fine-tip brush, paint half of a heart shape on each nail. For crisp lines, use nail tape or a stencil to block off the other half.
- Dry & Paint Second Half: Allow the first color to dry completely. Then, using your second contrasting color, paint the other half of the heart, aligning carefully with the first. If using tape/stencil, remove carefully.
- Refine & Seal: Clean up any edges with a fine brush and remover. Let dry, then apply a clear top coat to seal the design and ensure a professional finish.
> Pro-Tip: For truly crisp lines in a duo-tone design, use a very fine-tip nail art brush and apply thin coats. Alternatively, nail stamping with a split design can provide achieving precision with less effort, a trick often used by certified technician. This highlights advanced design theory for creative nail art.

Key Takeaways: Your Quick Guide to Valentine’s Day Nail Designs
As you plan your Valentine’s Day manicure, remember these essential points to help you select and create the perfect look:
- Heart designs for Valentine’s Day 2026 embrace a spectrum from classic red outlines to modern abstract forms, ensuring a trendy look for every style. Embrace trendy nail designs by choosing a heart motif that complements your personal aesthetic, whether minimalist or glamorous.
- The two-part ‘What You Need’ and ‘What To Do’ structure simplifies creating **stunning Valentine’s nails at home, making intricate designs accessible.** DIY challenges are overcome with clear, step-by-step directions and specific product recommendations, ensuring achieving precision.
- Gel polishes and builder gels are essential for achieving advanced effects like 3D bubbles or detailed marbling, offering **long-lasting and professional finish results.** Gel vs acrylic for durability often leans towards gel for creative nail art, requiring UV/LED curing for best results.
- Pinterest-optimized visuals and targeted product research allow you to easily find inspiration and the exact tools needed for your chosen **Valentine’s Day manicure.** Leverage nail inspiration platforms like Pinterest to select designs and find the best valentine’s day nail kits for easy replication.
- Incorporating Pro-Tips from **professional nail artist ensures your designs are not only beautiful but also safe and long-lasting, boosting your nail health.** Demonstrating expertise through proven techniques and quality standards helps avoid nail damage and chipping nails.
- Experiment with different finishes like **matte vs glossy or techniques like negative space nail art to personalize your love-themed manicure beyond traditional looks.** Breaking from tradition with unique nail designs or anti valentine’s day nail designs can showcase your personal style expression.
FAQs About valentines day nails designs
What are the best Valentine’s Day nail designs for 2026?
The best Valentine’s Day nail designs for 2026 blend classic romantic motifs like hearts with modern trends such as negative space, matte finishes, and subtle glitter accents. Trendy nail designs often feature pink and red nails combined with unique nail designs like 3D bubbles or abstract hearts, offering stunning Valentine’s nails that cater to both minimalist and elaborate preferences.
How to do Valentine’s Day nails at home for beginners?
Beginners can easily **create Valentine’s Day nails at home using simple valentine’s day nail art techniques like heart decals, dotting tools for small hearts, or carefully applying red or pink polish.** Focus on easy DIY valentine’s day nail art for beginners which requires minimal specialized tools and provides a quick yet cute valentine’s day nail design with long-lasting results by using a good top coat.
What colors are trending for Valentine’s Day nails 2026?
Beyond traditional red and pink, trending colors for Valentine’s Day nails in 2026 include softer pastels, sophisticated nudes, and surprising pops of black or gold for a **modern twist.** Pink and red nails remain classic, but co-occurrence contextual pairs like red + glitter or pink + white are popular, alongside metallic accents that enhance romantic nail looks.
Can you suggest simple Valentine’s Day nail art for short nails?
For **short nails, simple valentine’s day nail art often involves micro French tips with tiny hearts, delicate heart outlines, or subtle glitter accents that don’t overcrowd the nail.** Focus on minimalist valentine’s day manicure ideas that achieve precision with fine-tip nail art brushes or nail stickers, ensuring a chic valentine’s day nail design suitable for smaller nail beds.
What kind of nails for Valentine’s Day offer the longest wear?
For **long-lasting Valentine’s Day nails, gel nails or acrylic nails are generally superior to traditional polish, offering durability and resistance to chipping.** Gel nail designs provide salon-quality wear and can last for weeks, making them an affordable alternative to constant touch-ups, especially when combined with proven techniques for nail bed preparation.
How to remove press-on Valentine’s Day nails without damage?
To **remove press-on valentine’s day nails without nail damage, soak your nails in warm, soapy water with a few drops of cuticle oil for 10-15 minutes, then gently pry them off with an orangewood stick.** Avoid forceful removal as this can weaken nails. This easy removal method provides a safe alternative that maintains nail plate health.
Are glitter nails appropriate for Valentine’s Day?
Yes, **glitter nails are highly appropriate for Valentine’s Day, adding a festive and glamorous touch to romantic nail designs like glitter gradient hearts or glitter pop heart accents.** Whether it’s subtle shimmer or bold chunky glitter, it enhances the celebratory mood and provides a stunning element to Valentine’s Day nail art.
What are some unique Valentine’s Day nail ideas beyond basic hearts?
Beyond basic hearts, **unique valentine’s day nail ideas include rose quartz marbled hearts, 3D bubble heart nails, negative space heart mani, or abstract minimalist hearts that offer a sophisticated twist.** These creative nail art designs showcase advanced design theory and provide information gain for those seeking truly custom nails that stand out with innovative textures and patterns.
How do I choose the right nail polish for Valentine’s Day?
To **choose the right nail polish for Valentine’s Day, consider your skin tone, desired long-lasting effect (gel vs. regular), and whether you prefer matte vs glossy finishes.** Look for non-toxic polish from trusted brands, and select colors that complement your outfit or mood, from classic red to pastel pinks.
How can I make my Valentine’s Day nail art last longer?
To **make your Valentine’s Day nail art last longer, always prepare your nails with a good base coat, apply thin layers of polish, seal with a high-quality top coat, and avoid prolonged water exposure or harsh chemicals.** This proven technique prevents chipping and enhances durability, ensuring your festive nail designs remain stunning for longer.
Final Thoughts on Valentine’s Day Nail Designs
As Valentine’s Day 2026 approaches, valentines day nails designs offer a delightful canvas for personal expression, blending classic romance with trendy nail designs. From minimalist valentine’s day manicure ideas to elaborate valentines day nails featuring 3D bubble hearts or glitter gradient accents, the options are as varied as love itself. We’ve explored 13 stunning Valentine’s nails that showcase how to create unique nail designs using simple tools and techniques, empowering you to achieve precision and salon-quality results right at home. Whether you’re drawn to classic red heart outline nails or prefer the modern valentine’s day nail trends like negative space heart mani, each idea provides an opportunity to adorn your nails with a touch of seasonal charm.
Remember that nail health is paramount; prepare your nails properly and seal your designs with a quality top coat to ensure long-lasting beauty. By leveraging readily available nail art tools and proven techniques, you can confidently design a love-themed manicure that perfectly complements your Valentine’s Day plans. Which of these trendy heart nail designs will you try first to celebrate the season of love? Share your favorite valentines day nail art ideas in the comments below!
Last update on 2026-04-27 / Affiliate links / Images from Amazon Product Advertising API