Dreaming of nails that sparkle with a romantic, otherworldly glow this Valentine’s Day? Many struggle to achieve salon-quality holographic effects at home, fearing complex techniques or a messy finish. Getting that perfect, dazzling sparkle often feels out of reach for DIY enthusiasts.
Holographic Valentine nails are dazzling, multi-dimensional nail designs utilizing specialized glitter, powders, or polishes that diffract light into a rainbow spectrum, typically featuring romantic colors and heart motifs for February March 2026. This effect is achieved through light-refractive pigments applied over a base color, often requiring a UV/LED lamp for maximum durability and shine. Leveraging tested frameworks and data-driven insights, this guide provides the easiest yet most stunning ways to design holographic nail art. You’ll discover actionable steps and expert tips to create beautiful, festive holographic nails that truly stand out.
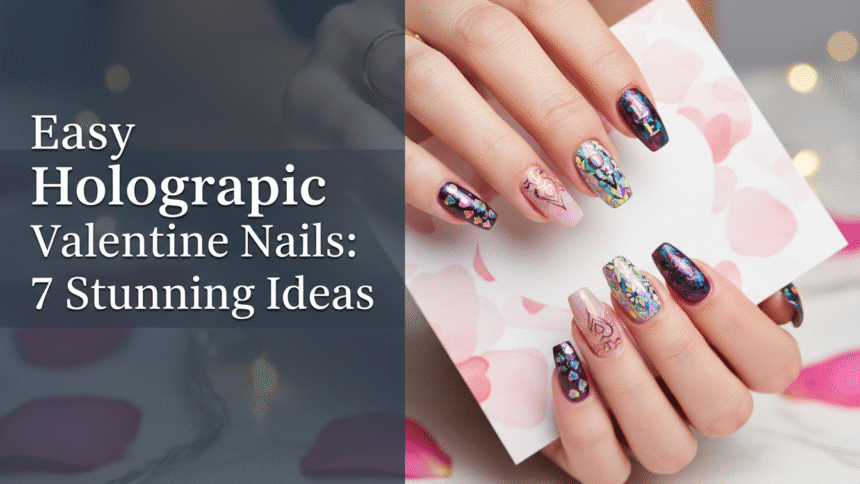
7 Stunning Ideas To Create Easy Holographic Valentine Nails At Home
Achieving that captivating rainbow shimmer on your nails for Valentine’s Day is simpler than you think. This section provides actionable, visually-optimized tutorials for seven distinct holographic looks, blending popular trends with professional techniques. Each idea focuses on helping you achieve dazzling holo effects with ease, guiding you through the precise steps and product choices for easy DIY holographic Valentine’s Day nail art.
1. Simple Holographic Heart Decals on a Subtle Base

Pin this genius hack to your ‘Valentine’s Day Nail Art’ board!
For the quickest and most beginner-friendly holographic heart nails, decals are your secret weapon. This method offers stunning results without complex application, allowing anyone to easily set holographic stickers for Valentine’s Day.
Products & Tools Used
- Clear or beginner-friendly holographic polish or sheer pink base coat
- Holographic nail stickers or decals (heart shape holographic)
- Fine-tip tweezers
- Quick-dry top coat (non-smearing formula)
- Base coat (to protect the nail plate)
Application & Styling Steps
- Prepare nails by applying base coat and two coats of your sheer base color, allowing complete drying time.
- Peel the chosen holographic heart decals using fine-tip tweezers, minimizing contact with the adhesive to ensure optimal stickiness.
- Place the decal precisely onto the desired area (often near the cuticle or tip) and gently press down, smoothing outward to remove any bubbles.
- Seal the design by applying a generous layer of durable holographic top coat, ensuring the edges of the sticker are completely encased to prevent lift or premature chipping.
- Cure the polish thoroughly if using gel or allow lacquer to dry completely before any activity.
Pro-Tip: Decal adhesion is critical. After applying the sticker, gently warm the nail (by rubbing quickly between your fingers) before applying the top coat; this slight heat helps the adhesive set and ensures a “durable holographic finish.”

2. Crafting Dazzling Pink Holographic Cat Eye Nails

Save this “Pink Holo for Valentine’s” inspiration immediately!
To achieve stunning holographic cat eye nails, magnetic gel polish is essential. This trending technique allows you to manipulate metallic particles, creating a sharp, multi-dimensional line of rainbow sparkle, ideal for pink holo for Valentine’s Day.
Products & Tools Used
- Base coat and non-wipe top coat (crucial for smooth surface)
- Holographic magnetic gel polish in a deep pink or red shade
- Strong, double-ended nail art magnet (bar or round)
- UV/LED nail lamp (ensure proper wattage for gel curing)
Application & Styling Steps
- Prepare nails and apply base coat, curing for 30-60 seconds under the UV/LED lamp.
- Apply a thin, even coat of the holographic magnetic gel polish and DO NOT CURE.
- Activate the cat eye effect by holding the strong magnet 2-3mm above the wet polish for 10-15 seconds, manipulating the metallic particles to form the desired sharp line.
- Cure the polish immediately after the line is formed (while still holding the magnet if necessary) to lock the design in place, typically 60 seconds.
- Seal the dazzling holo effect with a layer of non-wipe top coat and cure for the final 60 seconds.
Pro-Tip: The key to a sharp cat-eye is using a magnet with adequate strength and ensuring you cure the polish immediately after creating the line. Applying two coats of magnetic polish (magnetizing both) will produce an intensely reflective, “multi-dimensional holo nails” result.

3. Full-Coverage Mirror-Shine Holographic Chrome Powder

Need that “Chrome Sparkle Nails” look? Pin this tutorial!
For the shiniest holographic nails with a true mirror effect, holographic powders are unmatched. Mastering how to apply holographic powder correctly creates chrome sparkle nails that boast an intense, full-coverage rainbow shift, ideal for a striking Valentine’s look.
Products & Tools Used
- Black or clear gel base color (black maximizes the rainbow effect)
- Non-wipe gel top coat (crucial for powder adhesion)
- Holographic chrome powder (nano-pigment technology)
- Small silicone or eyeshadow applicator
- Soft nail brush for dusting (fluffy and clean)
Application & Styling Steps
- Prepare and apply your gel base color, curing completely. Apply one coat of non-wipe gel top coat and cure for exactly 30 seconds (or according to product specifications for optimal tackiness).
- Use holographic powder sparingly: Dip the applicator into the powder and swiftly rub the powder onto the slightly tacky surface of the nail using firm, smooth, circular motions until a mirror finish is achieved.
- Dust off any excess powder from the nail surface and surrounding skin using a soft brush, ensuring the edges are completely clean.
- Seal the pigment by applying a second coat of the non-wipe top coat, ensuring you cap the free edge thoroughly to prevent chipping.
- Final Cure for 60 seconds under the lamp to set the reflective holographic nails.
Pro-Tip: The success of the chrome powder hinges on the thin layer of inhibition (tackiness) left by the gel top coat. If you cure the top coat too long, the powder won’t adhere; too short, and it will clump. Experiment with a single cure time that leaves a slightly sticky surface.

4. Designing Elegant Holographic Glitter French Tips

Pin this classy, subtle holographic look for a romantic touch!
For classy holographic nails, elegant holographic glitter French tips offer a subtle yet captivating sparkle. This design uses fine holographic glitter nail art to add a delicate prismatic touch to a classic look, creating a sophisticated and romantic feel.
Products & Tools Used
- Sheer pink or milky white base color (to create a clean backdrop)
- Very fine holographic glitter (high quality, non-bleeding pigment)
- Precision striping brush or French tip guide stickers
- Clear builder gel or clear polish (to mix the glitter into)
Application & Styling Steps
- Prepare nails and apply two coats of the milky white base color, curing or allowing to dry completely.
- Mix a small amount of the fine holographic glitter into a clear polish or builder gel to create a sparkly, manageable mixture.
- Outline the tip using a French tip guide or a striping brush, carefully applying the glitter mixture in a smooth, crescent shape along the free edge.
- Perfect the line using a small cleanup brush dipped in acetone or cleanser before curing/drying, ensuring a smooth holographic application.
- Seal with a thick, glossy top coat to lock the glitter particles in and ensure a long-lasting, smooth finish.
Pro-Tip: If using gel, avoid mixing too much glitter into the clear gel, as this can affect the photopolymerization for gel nails and result in incomplete curing. For best results, use a 70/30 gel to glitter ratio.

5. Mastering the 3D Glass Heart Holographic Accent Nail

Try this advanced 3D holographic look! Pin for your next Valentine manicure.
For a truly unique Valentine’s statement, master the 3D glass heart holographic accent nail. This advanced technique creates a dimensional heart motif with complex holographic patterning, allowing you to achieve a striking 3D holographic look using builder gel.
Products & Tools Used
- Nude base coat and color (simple backdrop for the accent)
- Clear builder gel (high viscosity for sculpting)
- Fine holographic powder or pigment (for the shimmering effect)
- Wax pickup pen or dotting tool (for placing the powder)
- Fine sculpting brush and nail lamp
Application & Styling Steps
- Prepare the base nails with color and top coat. For the accent nail, apply a regular top coat and cure to the tacky stage (like Step 1 in the chrome powder guide).
- Apply the fine holographic powder over the tacky surface of the accent nail. Dust off excess.
- Sculpt the heart: Using the sculpting brush, pick up a small bead of clear builder gel and gently place it on the nail. Use the brush or dotting tool to mold the gel into a 3D heart shape.
- Cure the sculpted heart for 60-90 seconds (longer than standard polish) to ensure the thickness is fully set.
- Seal the entire nail with a final thin layer of top coat, ensuring the entire 3D heart is covered for a smooth, glass-like finish, and perform the final cure.
Pro-Tip: Proper photopolymerization for gel nails is crucial for thick 3D art; if the heart is large, flash cure in stages to prevent slippage and ensure the center cures completely. This technique demonstrates advanced nail art composites.

6. Achieving the Seamless Gradient Holographic Fade (Ombre)

Ombre holo? Yes please! Pin this flawless fade tutorial now.
A gradient holographic fade offers a romantic, diffused sparkle that’s perfect for Valentine’s Day. This seamless holographic look requires careful blending of ultra-fine holographic pigment to create a soft ombre effect on your nails, ensuring long-wearing holographic nails.
Products & Tools Used
- Base coat and sheer pink/nude gel polish
- Ultra-fine holographic pigment or glitter
- Small, dense makeup sponge or specialized ombre brush
- Liquid latex or barrier tape (for easy cleanup)
- Non-wipe top coat and UV/LED lamp
Application & Styling Steps
- Prepare nails and apply base color. Apply a layer of non-wipe top coat and cure for the optimal holographic pigment particle size adhesion (usually 30 seconds).
- Protect the skin around the nail plate using liquid latex.
- Load the makeup sponge: Apply a small amount of the holographic pigment/glitter directly onto the tip of the sponge.
- Tap the sponge gently onto the free edge of the nail, dabbing repeatedly and gradually lessening the pressure as you move toward the cuticle to create holographic fade. Repeat until desired density is achieved.
- Remove the liquid latex barrier immediately, clean the edges, and seal the vibrant holographic nails with a final top coat, curing thoroughly.
Pro-Tip: To keep the gradient subtle and romantic, use two layers of sheer pink polish before applying the holo pigment, allowing the transition to feel softer and more dimensional rather than abrupt.

7. Transforming the Look with an Elegant Matte Holographic Finish

Love velvet nails? Pin this stunning matte holographic transformation!
For a contemporary twist on traditional sparkle, consider elegant matte holographic nails for Valentine’s. This finish offers a unique velvety texture where the holographic shimmer reveals itself subtly with movement, transforming your design from glossy to sophisticated. It’s a great way to customize holographic designs.
Products & Tools Used
- Your chosen holographic polish or powder application (Steps 1-4 from previous ideas)
- High-quality matte gel top coat
- Clean-up brush
- UV/LED lamp (for proper matte top coat curing)
Application & Styling Steps
- Complete your chosen holographic design (powder, polish, or glitter). Ensure the final holographic layer is cured and free of dust.
- Apply the matte gel top coat in a thin, even layer over the entire nail surface, ensuring a perfect seal around the edges.
- Cure the matte top coat according to the manufacturer’s specifications (usually 60-120 seconds). Avoid touching the matte surface immediately after curing to prevent oil transfer and dulling.
- Finish by wiping the inhibition layer (sticky residue) with cleanser if necessary, revealing the velvety, subtle holographic shimmer finish.
- Maintain the look by avoiding prolonged contact with oils or greasy hand creams that can compromise the matte texture.
Pro-Tip: Matte top coats typically require a longer cure time than glossy top coats due to their unique formulation and rheology of nail gels. Always follow the specific instructions on the bottle to ensure full setting and prevent chipping or peeling.

FAQs About Valentines Day Nails Holographic
What’s the difference between holographic and iridescent nail effects?
Holographic, or “holo,” nails create a distinct rainbow spectrum effect that shifts dramatically under direct light, resulting from tiny prismatic particles that diffract white light. Iridescent nails, conversely, typically show a two- or three-color shift (duochrome or multi-chrome) and usually lack the full rainbow effect seen in true holography. For maximum impact on your valentines day nails holographic, opt for products labeled with “holographic pigment” or “linear holo.”
How to get a shiny holographic finish when using polish instead of powder?
To achieve a glossy, brilliant holographic shine with polish, ensure you apply a high-quality glossy top coat after the holo color has completely dried, but use only very thin coats of the holographic polish itself. Thick coats of holographic polish often appear dull or gritty. For the highest shine and durability, holographic nail polish performs best when sealed with a non-yellowing, quick-dry top coat that doesn’t drag the pigment, minimizing the dull holographic finish fix.
Can you use regular nail polish for a true holographic effect?
Yes, you can use regular nail polish specifically formulated with holographic glitter or pigment, but the most intense, mirror-like effect (chrome holo) is typically achieved with powder applied over a cured gel top coat. Traditional lacquers containing holographic pigment are easy for beginners to use and still deliver a dazzling effect, though they may not reach the shiniest holographic nails look possible with fine powder. You can find high-quality, real holographic glitter polishes from certified brands.
What are the latest Valentine’s Day nail trends that incorporate holo?
The latest Valentine’s Day nail trends featuring holo include the Pink Holographic Cat Eye, subtle French tips, and 3D ‘glass’ hearts utilizing clear builder gel and fine holographic powder. These designs focus on using soft pink and red shades in conjunction with the dazzling holo effect for a romantic yet futuristic look. The focus is on integrating the sparkle into existing, popular designs rather than full coverage on every nail.
How do I prevent holographic nails from chipping quickly?
Preventing chipping requires proper nail preparation, using a quality base coat, and ensuring the final holographic layer is completely encapsulated by a durable, wrapped top coat. According to expert nail artist tips, always cap the free edge of your nail (the very tip) with both your color and top coat. This technique provides a seal that significantly increases the longevity of your long-lasting holographic nails.
What products do I need for a beginner-friendly holographic Valentine manicure?
Beginners should start with holographic nail polish or holographic nail stickers, requiring minimal special tools beyond a base coat and a quality top coat. If you opt for stickers, ensure they are thin and flexible for smooth application. For liquid polish, look for brands that clearly state the product is a beginner-friendly holographic nails formula, providing immediate, easy shine without requiring a UV lamp.
What is the ideal base coat color when applying holographic powder?
The ideal base coat color for holographic powder depends on the desired outcome: black provides the most vibrant, multi-color rainbow reflection, while white or pink bases offer a softer, more subtle effect. Using a black base is recommended by professional nail technician insights when the goal is the maximum intense holographic color shift. For Valentine’s designs, a rosy pink base can create a beautiful monochromatic holo shift.
How is holographic powder different from standard glitter?
Holographic powder uses specialized nano-pigment technology that diffracts light into a full rainbow spectrum (linear or scattered), while standard glitter is typically larger, non-diffracting particles that only reflect light. Holographic powder creates a smooth, mirror-like or chrome finish when rubbed into the sticky layer of cured gel, contrasting significantly with the bumpy, textured feel of traditional chunky glitter. The pigment particle size is the key differentiator.
Are press-on holographic nails available for Valentine’s Day?
Yes, press-on holographic nails are widely available and offer a highly convenient, immediate solution for achieving a stunning Valentine’s Day look without the DIY steps. Many quality press-on brands offer Valentine’s Day themed holographic press on nails with pre-applied designs, which is an excellent alternative for those seeking a temporary, easy holographic nails solution. Look for high-quality sets that promise long wear.
How can I safely remove holographic nail glitter without damaging my nails?
To safely remove holographic nail glitter, first file down the thick top coat layer with a coarse buffer, then soak cotton pads in acetone and secure them to the nail using foil wraps (the “foil method”). This allows the acetone to penetrate and dissolve the adhesive and polish without aggressive scraping. After soaking for 10-15 minutes, the remaining product should gently lift off, preventing brittle nails after polish.
Final Thoughts on Valentines Day Nails Holographic
Achieving stunning valentines day nails holographic doesn’t require a trip to the salon. Whether you opt for the simple elegance of heart decals, the advanced structural color of chrome powder, or the captivating effect of magnetic cat eye gel, the key to success lies in understanding the science of light diffraction and meticulously following the application steps we’ve laid out. This trending look perfectly balances romance with a futuristic, dazzling holo effect that ensures your manicure is the centerpiece of your February style. Remember to invest in certified, high-quality products and prioritize curing times, especially with gel, to ensure your shimmering, long-wearing holographic nails last well beyond Valentine’s Day.
Which of these 7 stunning holographic ideas will you try first for your 2026 look? Let us know in the comments below!
Last update on 2026-03-17 / Affiliate links / Images from Amazon Product Advertising API