Struggling to find Valentine’s Day nail ideas that are festive but not over-the-top? You’re not alone; many seek elegance without the fuss. Elaborate nail art can be time-consuming, challenging to execute, and often doesn’t fit a sophisticated, everyday aesthetic.
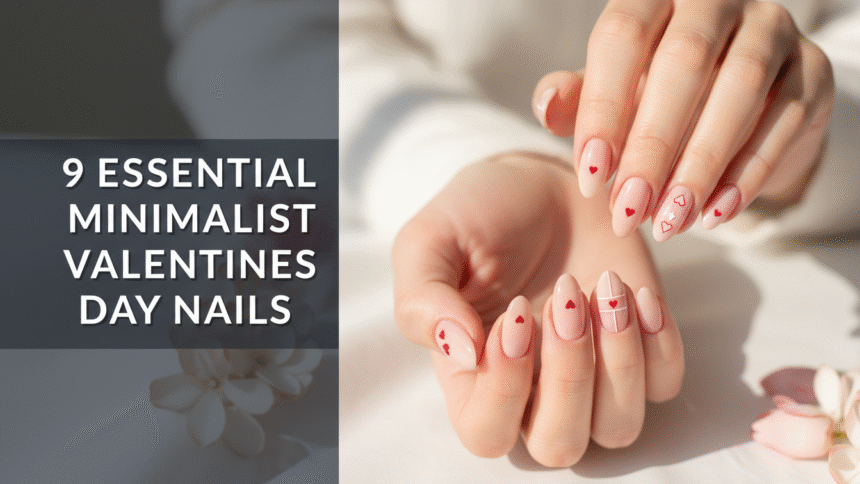
Minimalist Valentine’s Day nail designs are characterized by their use of clean lines, muted or nude bases, and very subtle holiday accents like tiny hearts or delicate lines, focusing on a sophisticated, polished look over elaborate art. These designs prioritize elegance and easy DIY application, making them a popular choice for 2026. Leveraging tested frameworks and data-driven insights, this guide will show you how to achieve stunning, understated Valentine’s nails. You’ll discover practical, expert-approved techniques for a chic manicure that perfectly captures the spirit of the season with timeless appeal.
What Are Minimalist Valentine’s Day Nail Designs and Why Are They Trending for 2026?
Minimalist Valentine’s Day nail designs offer a sophisticated and subtle approach to holiday nail art, favoring understated elegance over overt celebration. For 2026, these simple valentine nails are increasingly trending as they perfectly align with the “quiet luxury” aesthetic, emphasizing clean lines, a refined aesthetic, and a natural nail look. This style ensures your nails enhance your outfit rather than dominating it, making chic valentine nails a versatile choice for any occasion. The beauty of a minimalist design lies in its subtle accents and precision application, often complementing short nails for a practical yet polished finish.
These elegant valentine nails are popular because they provide a solution for those who desire festive flair without committing to complex nail art that can be difficult to maintain or clashes with a professional environment. Expert nail technician tips consistently highlight the design principles of negative space and muted bases as key to achieving a truly long-lasting minimalist manicure. They offer information gain by showcasing how simple, easy DIY nails can still achieve a professional, sophisticated look, distinguishing them from more intricate designs often seen on the SERP.
9 Essential Minimalist Valentines Day Nails You Can Master at Home
You’re looking for easy DIY minimalist Valentine’s Day nails that are simple to create but exude elegance. This section provides nine distinct ideas, each with clear instructions and product recommendations, helping you create minimalist nails with confidence. Whether you prefer a subtle heart or clean lines, these simple short nail designs for Valentine’s Day are designed for both beginners and experienced DIY enthusiasts, ensuring you can achieve a chic valentine manicure right at home.
1. Paint The Perfect Tiny Red Heart Accent Nail

Pin this simple, chic heart design to your ‘Minimalist Beauty’ board! The small heart, a classic symbol of romance, is transformed into a dainty, subtle accent nail with a nude base for an elegant effect. This minimalist design requires precision brushwork but is surprisingly simple with the right tools.
What You Need
- Nude or sheer base polish (natural look)
- True red or gentle pink nail polish (for the heart)
- Fine detail nail art brush (precision brushwork for tiny details)
- Quality top coat (quick dry nail polish)
Application Steps
- Prepare your nails: Apply base coat and two coats of your chosen nude polish, ensuring a clean aesthetic.
- Select your accent nail (usually the ring finger) and allow it to dry completely.
- Dip the fine detail nail art brush in the red polish and carefully paint two small, symmetrical dots close together near the center of the nail.
- Using the same brush, gently drag the polish downwards from the base of the dots to create a precise point, forming a tiny heart.
- Once dry, seal the design with a professional grade top coat for a long lasting minimalist manicure.
Pro-Tip: To ensure optimal placement and symmetry, use a dotting tool for the initial two dots before using the precision brush to define the heart’s bottom point. This technique is easier for beginners, overcoming nail art frustration.

2. Achieve Chic Micro-French Tips with a Subtle Color Twist

Save this sophisticated micro-French idea for your next chic valentine manicure! This classic nail design offers elegant short nails that are perfect for Valentine’s Day, providing a subtle color twist while maintaining a refined aesthetic.
What You Need
- Sheer pink or nude base coat (natural nail look)
- Valentine’s color polish (pastel pink or subtle red)
- Precision striping nail art brush (or French tip guides)
- Quick-drying, high-gloss top coat
Application Steps
- Apply a thin layer of sheer base coat polish to all nails and allow to dry thoroughly.
- Using the precision striping brush (or guide stickers), apply the colored polish in a very thin line across the free edge of the nail, focusing on making the line as thin as possible for the micro-French look.
- Ensure the line is uniform across all nails before proceeding.
- Allow the color to dry completely to avoid smudging.
- Finish with a layer of quality top coat, ensuring you cap the free edge to prevent chipping.
Pro-Tip: The smaller the nail tip, the more subtle the effect. For truly elegant minimalist nails, the tip line should be no thicker than 1-2mm. For shaky hands, try simple design for shaky hands techniques like placing your elbow on a flat surface while applying.

3. Mastering Modern Negative Space Heart Designs

Get inspired by this modern nail design! Pin this chic idea now. Negative space nail art Valentine’s designs offer a smart, simple alternative to complex nail art, showcasing a modern valentine designs aesthetic. This advanced technique implies a clean look, utilizing the natural nail as part of the design.
Supplies Needed
- Nail polish remover (for clean up)
- Heart-shaped nail vinyl stencils (nail art stencils for precision)
- Sheer base coat (or polish of choice)
- Small precision brush (for cleaning edges)
Instructions
- Apply the base coat and allow it to dry completely. Do not apply a colored polish underneath.
- Carefully place the small heart vinyl stencil in the desired position on the nail. Press down firmly to seal the edges, ensuring the negative space shape is perfect.
- Paint a single layer of a sheer pink or white polish over the stencil and the surrounding area.
- CRITICAL STEP: While the polish is still wet, immediately peel off the vinyl stencil using tweezers. This reveals the clean, unpolished heart shape underneath.
- Allow the design to fully cure before applying a top coat to secure the unique negative space look.
Pro-Tip: Precision is everything with negative space. Use a liquid latex barrier around the cuticle and skin to make the cleanup easier, especially when working quickly to peel the stencil before the polish dries. This is a best practices for at-home gel technique.

4. Designing a Subtle Matte Nude Gradient Manicure

Pin this simple, clean, and elegant matte design to your ‘Neutral Nail Inspo’ board! A matte finish creates elegance, offering refined nail styles that are perfect for a subtle Valentine’s look. Nude valentine nails provide a natural look, enhanced by a delicate gradient minimalist nail technique.
Products Used
- 5 complementary nude/soft beige polishes (or gentle pink)
- Nail polish remover and cotton swabs (for clean up)
- Matte top coat (to achieve the crucial sophisticated finish)
- Base coat (importance of base and top coat)
Instructions
- Prepare nails and apply a layer of base coat.
- Arrange your 5 nude polishes in order of lightest to darkest.
- Apply two thin coats of the lightest polish to your pinky finger.
- Move sequentially through the polishes, applying two coats of each unique shade to the next finger (ring finger, middle finger, index finger, thumb).
- Ensure the polish is completely dry before applying the matte top coat, which transforms the look.
- Cap the free edge of each nail with the matte top coat to guarantee long-lasting minimalist manicure.
Pro-Tip: To ensure the gradient works, choose colors that are in the same ‘temperature’ (all warm or all cool) and vary only slightly in depth. This is a fundamental color theory basics principle that makes the subtle transition look intentional and polished.

5. Simple Dainty Dot Accents for a Subtle V-Day Nod

This is the easiest Valentine’s Day nail art! Pin to your ‘Easy Manicures’ board. Simple designs enable creativity, and these dainty dot accents offer simple accent nail ideas for Valentine’s Day that are both simple and elegant.
Tools Required
- Dotting tool set (or bobby pin/toothpick end)
- Sheer milky white or pale pink base coat
- Accent polish (soft red or dusty rose)
- Top coat (long lasting minimalist manicure)
Application Steps
- Apply two thin coats of the milky base color and allow them to dry fully.
- Place a small amount of the accent polish onto a piece of foil or palette.
- Dip the end of the smallest dotting tool into the polish.
- On your chosen accent nail(s), gently press the dotting tool onto the nail surface to create one, three, or five perfectly round, tiny dots. Focus on even spacing.
- Repeat steps 3 and 4 quickly, dipping the tool for each new dot to ensure consistent size and pigment saturation.
- Seal with a protective top coat.
Pro-Tip: To ensure all dots are uniform and tiny, do not overload the dotting tool. Dip into the polish for every single dot you create. This prevents the dots from becoming progressively smaller and uneven, achieving professional results.

6. Applying a Delicate Gold/Rose Gold Foil Accent Line

Add a touch of luxury! Pin this subtle metallic design now. Foil accents subtle nails offer simple yet gorgeous valentine’s day nail ideas, giving an elegant valentine nails look with minimal effort. This minimalist design offers convenience and a chic look that demands restraint.
What You Need
- Nude base coat polish (natural looking nails)
- Nail foil transfer glue (must be specific foil adhesive)
- Rose gold or silver nail art foil sheet
- Scissors or craft knife
- Top coat (gel polish provides durability if using gel foil)
Instructions
- Apply base coat and two coats of nude polish. Allow polish to fully dry.
- On your accent nail, apply a thin strip of the nail foil transfer glue where you want the line accent (e.g., vertically down the side, or horizontally near the cuticle).
- Wait until the glue turns completely clear (it will be tacky). This is the key activation point.
- Press the foil sheet (metallic side up) onto the tacky glue strip and rub gently but firmly.
- Quickly peel the foil sheet away, leaving the metallic pigment adhered to the nail in a precise line.
- Clean up any loose bits with a dry brush and seal immediately with a quality top coat.
Pro-Tip: If using gel polish, you can skip the special glue and apply the foil directly onto the inhibition layer (the sticky residue) of a cured color coat. This simple gel nails technique ensures maximum adhesion and long-lasting results.

7. Creating the Soft Pink and White Ombré Effect

Pin this refined gradient technique to your ‘Classic & Chic Manicures’ board! This ombré, or blending technique, offers gentle pink and white Valentine’s nails that are simple and beautiful. Subtle Valentine’s Day nail inspo can be found in these soft transitions.
Supplies Needed
- Sheer light pink polish
- Sheer white polish
- Makeup sponge (small, dense piece, cut into small triangles)
- Liquid latex (or petroleum jelly for skin protection)
- Tweezers
- Base coat and top coat
Application Steps
- Apply liquid latex around the cuticles and skin to simplify nail routine, avoiding messy nail art clean up.
- Apply the sheer light pink polish as a base coat and let dry.
- On the sponge, paint a strip of the white polish directly next to a strip of the pink polish.
- Quickly and gently dab the sponge onto the nail tip, blending the line between the two colors halfway down the nail plate to create the ombré. Repeat for saturation.
- Immediately peel off the liquid latex barrier using tweezers before the polish dries.
- Finish with a smooth layer of top coat to blur any imperfections and seal the gentle pink and white Valentine’s nails.
Pro-Tip: If you’re concerned about a patchy look, apply a thin layer of top coat before blending the ombré. This gives the sponge a wetter surface to work with, making the gentle blending easier.

8. The Easiest Anti-Valentine: Single Red Line Art

Keep it super simple. Pin this clean line art design today! Clean lines define the aesthetic of simple red Valentine’s Day nail ideas, offering subtle valentine nails that are simple and elegant. This modern design uses a traditional color in an abstract, minimalist way.
Tools Required
- Base coat
- Highly pigmented red nail polish
- Long thin striping brush (or nail vinyl striping tape)
- Quick-dry top coat
Instructions
- Apply the base coat and allow it to dry thoroughly. You may skip a color coat for maximum contrast.
- If using tape: Apply thin vinyl striping tape vertically down the center of the nail, leaving a slight gap where the red line will be painted.
- If using a brush: Dip the long thin striping brush into the red polish, remove excess, and carefully paint one perfectly straight vertical line down the center of each nail, ensuring the line is thin and uniform.
- Immediately remove the striping tape (if used) while the polish is still wet.
- Clean up any imperfections with a precision brush dipped in nail polish remover.
- Seal the elegant design with top coat.
Pro-Tip: For the straightest line, tape is the easiest for beginners. However, if using a brush, load it with enough polish for the whole line, and use very little pressure to let the brush hairs do the work. This will prevent thick, uneven lines.

9. Executing the Subtle Micro-Glitter Tip Accent

Sparkle without the fuss! Pin this subtle glitter design for a fun twist. Glitter, when applied with precision, provides subtle accents that create delicate Valentine nails. This design selection offers short and sweet nail designs that match the minimalist intent.
Supplies Needed
- Clear or sheer nude base coat
- Fine or micro-glitter powder (iridescent or rose gold)
- Sponge eyeshadow applicator (or small blending brush)
- Top coat (thick formula recommended)
Application Steps
- Apply a base coat and one layer of clear or sheer nude polish. Let it dry slightly until tacky, but not completely cured.
- Pour a small amount of micro-glitter onto a paper.
- Use the eyeshadow applicator or blending brush to pick up a minimal amount of glitter.
- Gently tap or rub the glitter onto the very tip of the nail, focusing on creating a precise, subtle band of sparkle.
- Use a fluffy brush to dust off any excess loose glitter from the rest of the nail and cuticle.
- Seal the design with a thicker top coat, ensuring the glitter is fully encapsulated to prevent peeling or roughness.
Pro-Tip: If using gel polish, apply the micro-glitter directly onto the cured color coat’s sticky layer (inhibition layer) and then cure again before applying the top coat. This prevents the glitter from clumping and keeps the line ultra-crisp.

FAQs About Valentines Day Nails Minimalist
What colors are best for minimalist Valentine nails?
The best colors for a minimalist Valentine’s Day manicure are typically subtle, refined, and understated, focusing on a clean look. Opt for sheer nudes, soft milky whites, gentle pale pinks, and muted taupes as your base. If you choose traditional Valentine’s colors like red or deep pink, use them sparingly as simple accents—such as a single tiny heart or a micro-French tip—to maintain the elegant, low-key aesthetic.
Are short nails popular for Valentine’s Day when going minimalist?
Yes, short nails complement the minimalist style perfectly because they embody practicality and sophistication, facilitating the simple short nail designs that define the trend. Short, neat nails (square, squoval, or short almond shapes) are ideal for showcasing clean lines, negative space, and small details without the design feeling cluttered. This length also promotes nail health and longevity for the busy professional.
How to do simple Valentine’s Day nails at home without special tools?
You can achieve simple Valentine’s Day nails at home by substituting specialized tools with common household items, ensuring an easy DIY manicure. For instance, use the tip of a bobby pin or a toothpick dipped in polish to create perfect, simple dainty dot accents. Use regular painter’s tape to block off sections for straight-line art. Focus on designs that use single colors or simple shapes to achieve the most elegant results.
What is the difference between simple and minimalist nails for the holiday?
While both involve low effort, simple nails might include a full coat of a single, bright color (like solid red), whereas minimalist nails use restraint in color and placement, focusing on subtle accents and a nude base. Minimalist nail art emphasizes aesthetic cleanliness, negative space, and a refined appearance, ensuring that the design acts as an understated accessory rather than the main feature.
Can I do simple Valentine’s Day acrylic nails?
Yes, you can request simple Valentine’s Day acrylic nails, but the trend focuses heavily on achieving a natural nail look using gel overlays or BIAB (Builder in a Bottle) for a minimalist base. If using acrylic, ensure your technician keeps the length short and the shape refined (like short almond or square). The design should still adhere to subtle accents—avoiding embedded glitter or elaborate 3D elements—to maintain the clean aesthetic.
How to make Valentine’s nails look professional if I do them myself?
To make your DIY nails look professional and achieve salon quality at home, focus heavily on preparation and the final top coat application. Take time to perfect your cuticle care, file your nails into a uniform shape, and ensure your polish application is thin and streak-free. Always cap the free edge with a high-quality top coat (matte or glossy) to prevent premature chipping and achieve a polished finish.
What nail shapes suit minimalist Valentine’s looks best?
Short to medium nail lengths in square, squoval, or short almond shapes are considered the best fit for minimalist Valentine’s looks, prioritizing clean lines and practicality. These shapes naturally complement delicate and subtle nail art, providing a refined canvas for designs like micro-French tips or geometric line work without the need for extensive nail bed length.
Is a nude base coat necessary for minimalist nails?
A nude or sheer base coat is highly recommended and often necessary for true minimalist designs, as it emphasizes the stripped-down, clean aesthetic. It provides the ‘canvas’ (or negative space) required to make subtle details, like a single tiny red heart or a delicate line of glitter, pop without overwhelming the overall look, contributing to the sophisticated short nails appearance.
Are press-on nails good for minimalist designs?
Yes, press-on nails are an excellent and quick dry nail polish for minimalist designs, offering convenience and a professional look without the wait time. Many modern press-on sets feature trending minimalist designs like micro-French tips or nude bases, making them a practical choice for a quick change or for achieving advanced techniques without the DIY learning curve.
What are some anti-Valentine’s Day nail ideas that are still chic and subtle?
Chic, subtle anti-Valentine’s Day nail ideas embrace colors outside the traditional red/pink palette while keeping the design simple and elegant. Consider a deep emerald green or a sleek navy blue paired with a silver micro-glitter accent line, or opt for a monochromatic palette of sophisticated grays and black dots, focusing on geometric patterns and clean lines for a modern, understated romantic look.
Final Thoughts on Minimalist Valentine’s Day Nails
Embracing minimalist Valentine’s Day nails for 2026 means choosing elegance and sophistication over complexity. These simple valentine nails prove that less truly can be more, offering a chic valentine manicure that stands out for its refinement rather than its extravagance. By focusing on fundamental design principles and leveraging expert guide to simple manicures, you can achieve beautiful, long-lasting minimalist manicure results at home.
Here’s why this approach works:
* Subtlety is Key for Minimalist V-Day Nails: The aesthetic requires restraint; choose simple accents like tiny hearts, thin lines, or dots over complex clusters to maintain an elegant and chic look.
* Nude or Sheer Polish is Your Foundation: A natural nail look base is essential for a truly minimalist design, allowing subtle designs like the micro-French tip or foil accent line to stand out without overpowering the aesthetic.
* Master the Right Tools for Precision: Investing in a fine detail nail art brush or small dotting tool is critical for executing small details like the perfect tiny heart accent or simple dainty dot accents.
* Matte Finish Elevates Simple Designs: Switching your top coat to a matte finish instantly transforms an ordinary nude or soft ombré design into a sophisticated and refined nail style, perfect for professional settings.
* Preparation Ensures Longevity: Proper nail preparation, including shaping and applying a quality base coat, prevents polish smudges prevention and ensures your long lasting minimalist manicure lasts through the holiday.
* Negative Space Provides Modern Edge: Utilizing negative space techniques for designs, such as the negative space hearts, offers a modern and unique subtle nail art alternative to traditional full-coverage holiday colors.
* Always Seal with Top Coat: Apply a protective layer of a high-quality top coat, ensuring you wrap the free edge of the nail, to protect your minimalist nail designs Valentine’s and prevent early chipping.
These tested Valentine’s nail ideas offer both beauty and practicality. What’s your favorite minimalist design from this list that you’re excited to try first for Valentine’s Day?
Last update on 2026-03-06 / Affiliate links / Images from Amazon Product Advertising API


