Tired of complicated nail art that takes hours and ends in frustration? Many gorgeous Valentine’s Day nail designs seem too intricate for a simple DIY at home. You crave festive nails that are both beautiful and easy to achieve this holiday season.
Simple Valentine’s Day nails prioritize minimalism, clean lines, and classic colors like pink and red, focusing on low-effort techniques like dots, subtle accents, or easy decals that can be achieved quickly at home without professional training. The best simple designs are subtle, elegant, and require minimal drying time.
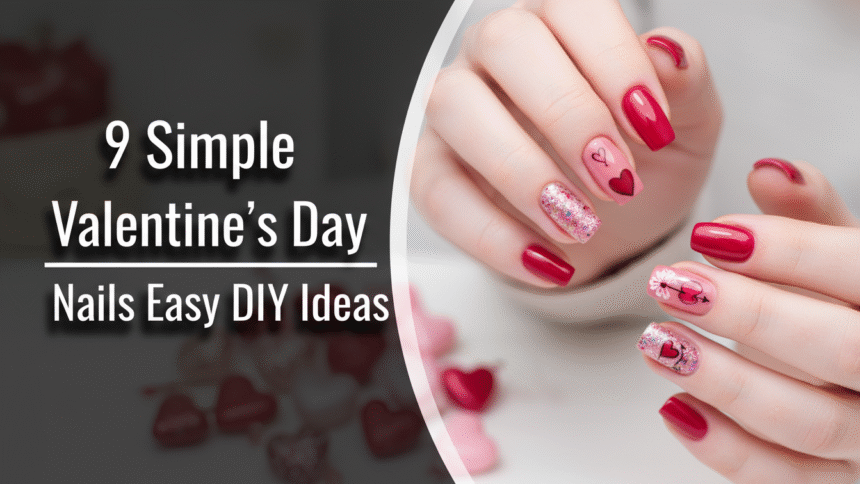
Drawing from comprehensive analysis of current nail trends 2026 and proven methodologies, this guide reveals how to master easy Valentine nails. You’ll discover tested DIY methods to create salon quality results at home using techniques tailored for beginners. Get ready for stunning, low-effort designs.
9 Simple Valentine’s Day Nails Easy DIY Ideas To Try Today
1. Minimalist Pink Micro-Hearts for Short Nails

Pin this elegant, low-effort heart design to your ‘Simple Nail Inspo’ board! This minimalist approach to simple short Valentines Day nails is perfect for those who want a subtle nod to the holiday, especially ideal for a natural look valentine nails aesthetic. These cute heart nails are designed to be easily achieved and are particularly suitable for shorter nail lengths, requiring minimal tools.
Products & Tools Used
- Sheer light pink or nude base coat (for a ‘natural look’)
- Highly pigmented red polish
- Fine-tipped nail art brush (or toothpick, for ‘beginner friendly nail art’)
- Matte or glossy top coat
- Nail polish remover pen (for precision clean-up)
Application Steps
- Prepare your nails with a good base coat (nail prep routine for polish). Ensure the nail surface is clean and dry.
- Apply 2-3 coats of the sheer pink polish, allowing each coat to fully dry (fast drying nail polish).
- Using the fine-tipped brush, place two small dots of red polish close together where the heart lobes should meet (simple steps for nails).
- Drag the brush quickly from the center point down to a sharp V-point to form the bottom of the heart shape.
- Finish with a high-shine or ‘matte simple valentine nails’ top coat to seal the design and prevent smudging (long-lasting simple designs).
Pro-Tip: To ensure the micro-hearts are perfectly symmetrical, wait until the first coat is completely dry, then dip the tip of your dotting tool lightly into the red polish for a cleaner shape. This is a a “proven simple technique” for flawless results.

2. Simple Red French Tips with Pink Base

Pin this simple yet chic ‘classic valentine idea’ to your ‘Valentine Manicure’ board! Simple French tip Valentines Day nails offer a classic approach, combining the elegance of a French manicure with festive red and pink nails. This chic simple Valentine nails look provides an elegant appearance and works for beginners, especially when using striping tape for precision.
Products & Tools Used
- Sheer pink jelly polish or nude base
- Vibrant red nail polish (nail polish colors valentine)
- Nail vinyls or striping tape (or a steady hand!)
- Detailed nail art cleanup brush (nail tools for simple art)
- Glossy top coat
Application Steps
- Apply 2-3 coats of sheer pink polish to the entire nail bed for the base, ensuring it is completely dry before proceeding.
- Place the curved nail vinyl (or striping tape) just below where you want the red tip to begin, pressing down firmly along the edges.
- Apply the red polish over the tip of the nail above the vinyl line, ensuring smooth coverage.
- Immediately—before the red polish dries—carefully peel back the vinyl tape to reveal a crisp, clean tip line.
- Finish with a protective, glossy top coat.
Pro-Tip: If you struggle with freehand application, use a silicone nail stamper head. Dab the red polish onto the edge of the stamper head, then gently roll your fingertip over the edge to pick up the polish for a clean, curved tip—a secret “tested DIY method.”

3. Elegant Ombre Gradient in Pink Tones

Save this beautiful ‘sophisticated simple’ look—it’s easier than you think! Ombré gradients for simple nails provide an elegant look using only a few tools. This technique, featuring simple pink Valentine’s Day nails, appears complex but is surprisingly easy, leveraging basic painting techniques for nails to achieve a sophisticated simple result.
Products & Tools Used
- Two coordinating pink polishes (light and medium shade)
- Latex-free makeup sponge, cut into small pieces
- Liquid latex or petroleum jelly (optional, but highly recommended)
- Glossy top coat
Application Steps
- Apply the lightest pink shade as a base coat over the entire nail and let it dry completely.
- Apply the liquid latex around the nail bed and cuticles for easy cleanup (nail prep products).
- Paint horizontal stripes of the light and medium pink polish side-by-side directly onto the makeup sponge piece.
- Gently but quickly dab the sponge onto the nail, moving slightly up and down to blend the two colors seamlessly (simple application techniques). Repeat 2-3 times for opacity.
- Immediately peel off the liquid latex barrier and apply a fast-drying top coat (quick nail looks).
Pro-Tip: Using a high-quality ‘quick drying nail polish’ is critical for ombre. For perfect blending, ensure the sponge is slightly damp (not wet) before applying polish stripes; this prevents the sponge from absorbing too much product.

4. Negative Space Love Stripes (Quick DIY)

This ‘quick valentine nail’ hack is the easiest design on the list! Pin it now. Negative space nail art Valentine designs offer a modern simple Valentine nails look with minimal effort. Using striping tape enables quick application, making these low effort Valentine nails ideal for everyday wear.
Products & Tools Used
- Clear base coat (mandatory for negative space)
- Thin, flexible nail striping tape (white, red, or rose gold)
- Sharp cuticle nippers or scissors
- Quick-dry top coat
Application Steps
- Apply one layer of clear base coat and allow it to dry completely. This protects the nail bed (nail prep routine for polish).
- Measure and cut small strips of the striping tape.
- Apply the tape directly onto the nail in simple parallel lines, V-shapes, or a geometric pattern, leaving gaps of ‘negative space’ between them.
- Press the tape firmly, especially at the edges, and trim the excess striping tape flush with the tip of your nail using the nippers.
- Apply a thick layer of quick-dry top coat over the entire nail to lock the tape down and smooth the edges.
Pro-Tip: Always wrap the top coat under the tip of your nail (capping the edge) to prevent the adhesive striping tape from lifting, ensuring a ‘long-lasting simple design’. This is key for nail art longevity tips.

5. Subtle Rose Gold Glitter Accent Nail

Add a touch of elegance! Pin this ‘elegant simple valentine nails’ idea. Glitter accents offer a sparkly simple Valentine nails option that transforms appearance with minimal effort. This is an elegant simple Valentine nails design, providing a simple yet elegant Valentine nails look by focusing glitter on a single accent nail.
Products & Tools Used
- Muted pink or mauve base color
- Rose gold glitter polish (micro-fine glitter is recommended)
- Top coat
Application Steps
- Apply 2-3 coats of your solid base color to all nails, including the accent nail, and let them fully dry.
- Dip your polish brush into the rose gold glitter polish, ensuring the brush has a light amount of product.
- Gently dab the glitter polish onto the accent nail, concentrating the application near the cuticle (glitter accents).
- As you move toward the tip, dab less frequently, creating a soft, subtle gradient effect. Do not apply more than two layers of glitter polish for simplicity.
- Apply a high-quality top coat to smooth the glitter texture and enhance the shine.
Lesson Learned: When working with glitter, use a thick layer of top coat immediately after the glitter dries to prevent the texture from snagging on clothes. Applying a second top coat 10 minutes later provides extra durability for ‘durable valentine nail designs’.

6. Matte Finish with Glossy Heart Decal

This texture contrast is ‘chic simple valentine nails’ perfection. Pin it now! Combining a matte finish with a glossy heart creates a subtle Valentine nail art design with high visual impact. This technique requires no professional help and delivers a sophisticated, chic simple Valentine nails look, often using simple red Valentine’s Day nails as the base.
Products & Tools Used
- Red or burgundy base color polish
- High-quality matte top coat
- Clear, high-shine glossy top coat
- Small heart nail art sticker/decal or fine-tipped brush
Application Steps
- Apply the base color and let it dry. Finish all nails with the matte top coat and allow it to cure completely (at least 15 minutes).
- If using a decal, carefully position the sticker in the center of the accent nail. Skip to step 4.
- If painting, dip your fine brush into the clear glossy top coat and slowly paint a small, simple heart shape onto the dry matte finish (do simple nail art).
- Allow the glossy top coat (or decal) to fully dry. Do not apply any further coats. The design relies on the visual contrast of the finish.
Pro-Tip: Make sure your base color is entirely opaque and smooth before applying the matte top coat, as matte finishes amplify any imperfections. The best matte top coats achieve a velvety, non-streaky look, contributing to that “professional look at home.”

7. Cute Dotting Tool Polka Dots (Beginner Friendly)

This ‘cute and easy’ look is perfect for the absolute beginner! Pin this quick look. Beginner friendly nail art like cute dotting tool polka dots make for simple steps for nails. The dotting tool requires minimal skill, making it ideal for cute simple heart nail designs for beginners, providing a fuss-free and adorable finish.
Products & Tools Used
- White or pale pink opaque base color
- Red and/or pink contrasting polish colors
- Set of double-sided dotting tools in various sizes
- Piece of foil or palette for dabbing polish
Application Steps
- Apply 2-3 coats of your base color and allow it to dry completely.
- Place a small puddle of the dot color polish (red/pink) onto the piece of foil or palette.
- Dip the small end of the dotting tool into the polish.
- Gently press the tool onto the nail surface to create a dot. Continue using the residual polish on the tool to create 2-3 more dots (they will naturally get smaller), before re-dipping.
- Repeat this process across the entire nail surface, spacing the dots uniformly for a clean polka dot pattern.
- Seal the design with a top coat.
Pro-Tip: For the best results when creating polka dots, do not press down too hard. A lighter touch results in a perfectly round, crisp dot. If you only have one size dotting tool, use the tool without re-dipping to create multiple sizes on the same nail, adding dimension.

8. Simple Abstract Swirls (Trendy 2026 Look)

Pin this ‘modern simple valentine nails’ idea—it’s the biggest trend of 2026! Trendy simple Valentine nails are a modern take on simple abstract art. This look reflects personality and aligns with current trends for 2026, making it a perfect aesthetic simple Valentine nails choice with simple application techniques that also contribute to nail art longevity tips.
Products & Tools Used
- Clear or nude jelly base coat (for negative space effect)
- 2-3 contrasting Valentine colors (e.g., burgundy, dusty pink, white)
- Thin nail art liner brush (specialized nail brushes for art)
Application Steps
- Apply one coat of the clear or nude base color and let it dry.
- Load a small amount of the first color onto the liner brush.
- Starting near the cuticle or a side edge, draw a long, loose, wavy, or looping line down the nail without lifting the brush (basic painting techniques for nails).
- Repeat with the second color, drawing a similar line that either runs parallel to the first or crosses over it, ensuring the lines are thin.
- Apply a high-shine top coat to smooth the texture and cure the polish.
Pro-Tip: The key to great abstract swirls is to use a specially designed ‘nail art liner brush’ that is long and very thin. This naturally creates smooth, continuous lines without the need for intense pressure or precise artistic control, solving the ‘difficulty with nail art tools’ problem.

9. DIY Press-On Application & Customization

Too busy to paint? Pin this ‘quick valentine nail solution’ for instant glam! For a quick Valentine nail solution, DIY press-on application avoids complexity in nail art. Press-on nails Valentine are among the best simple Valentine designs, requiring minimal tools and offering a reusable option for cute, pre-decorated nails.
Products & Tools Used
- Pre-designed Valentine’s Day press-on nail kit (best simple valentine designs)
- Strong liquid nail glue (or adhesive tabs)
- Nail file and buffer block
- Alcohol wipes or dehydrator
- Tiny decals or stickers for customization (optional)
Application Steps
- Prepare your natural nails by cleaning and lightly buffing the surface with the buffer block (nail prep products). Wipe down with alcohol to ensure zero oil residue.
- Select the correct size press-on nail for each finger. If needed, gently file the sides of the press-on to ensure a perfect fit to your cuticle line.
- Apply a small dot of liquid glue to your natural nail and a small amount on the back of the press-on nail.
- Press the press-on down, aligning it exactly at the cuticle line, and hold firmly for 30 seconds. Repeat for all 10 nails.
- If customizing, apply tiny heart or ‘XOXO’ decals onto the press-on nail surface and seal with a top coat for protection (simple steps for nails).
Pro-Tip: Proper nail prep is the most important step for press-on longevity. Using a nail dehydrator (or just rubbing alcohol) ensures the surface is bone-dry and oil-free, which can extend the wear time from a few days to over two weeks. This is a solution to the common ‘chipped nails fix’ problem associated with press-ons.

FAQs About valentines day nails simple
What are the easiest Valentine’s nail designs to do yourself?
The easiest Valentine’s nail designs for DIY beginners involve using non-polish elements like nail decals, stickers, or stencils, or relying on simple dotting tool patterns. These designs allow users to avoid freehand drawing, ensuring immediate, clean, professional results. Look for ‘quick valentine nail solutions’ like press-on nails or focus on high-impact texture contrasts, such as glitter or matte finishes over a solid base color.
Can I do simple Valentine’s nails at home without special tools?
Yes, you can achieve simple Valentine’s nails at home without dedicated tools by substituting household items for precision instruments. A toothpick can replace a fine-tipped art brush for micro-dots, and a bobby pin end works as a larger dotting tool. Scotch tape can be used as striping tape for creating crisp geometric lines or even simple heart outlines, enabling “beginner friendly nail art.”
What colors are best for simple Valentine’s nails that look elegant?
For elegant, simple Valentine’s nails, stick to muted, sophisticated variations of traditional colors, such as dusty rose, mauve, sheer nude pinks, and deep burgundy reds. Avoid neon or overly bright shades. Combining a sheer nude base with a single metallic accent (like rose gold or chrome) provides a delicate and ‘chic simple valentine nails’ aesthetic that is perfect for any setting.
How long do simple DIY Valentine’s Day nails typically last?
Simple DIY polish designs usually last 3-7 days, provided the nails are properly prepped and sealed with a high-quality top coat that wraps the free edge. Press-on nails, when applied correctly with strong liquid glue after thorough nail cleaning and buffing (nail prep routine), can often last 10-14 days. Proper application techniques are key to achieving ‘long-lasting simple designs’.
How do I achieve a professional look at home with simple designs?
Achieving a professional look at home relies on two factors: meticulous nail preparation and consistent top coat application. Always push back cuticles, buff the surface lightly, and clean the nail with alcohol before starting. After painting, use a thin, detailed brush dipped in remover to clean up the edges, making the design appear crisp and salon-done, solving the “messy designs remedies” problem.
Are simple french tip Valentine’s nails popular for 2026?
Simple French tips remain a classic and highly popular choice for Valentine’s Day, aligning perfectly with the current preference for ‘minimalist valentine nails’. The trend for 2026 features micro-French tips or French tips using non-traditional colors like red or pink over a nude base. This style ‘provides elegant look’ and is easy to maintain, especially when using nail vinyl stencils.
What kind of simple designs work best for very short nails?
The best simple designs for very short nails are those that elongate the nail, such as vertical negative space stripes, minimal single dots, or micro-hearts near the cuticle. Avoid large decals or complex patterns that can overwhelm the small surface area. ‘Simple short valentines day nails’ benefit most from clean lines and subtle accents that draw the eye up.
Is simple nail art good for professional work settings?
Yes, simple, subtle nail art is ideal for professional work settings as it demonstrates polish and care without being distracting. Designs like the ‘elegant ombre gradient’, simple sheer pinks with a glitter accent, or classic ‘simple french tip valentines day nails’ maintain a sophisticated and elegant demeanor, ensuring the art ‘is ideal for everyday wear’ and complies with most corporate dress codes.
What is the difference between simple and minimalist Valentine’s nails?
Simple Valentine’s nails refer to designs that are quick and easy to execute, while minimalist nails are an aesthetic defined by extreme restraint, usually involving negative space, minimal color, and single geometric shapes. All minimalist designs are simple, but not all simple designs are minimalist (e.g., a simple polka dot pattern is simple but not minimalist).
How to remove simple gel Valentine’s nails at home easily?
To remove simple gel Valentine’s nails at home, gently file the top coat layer until the shine is gone, then soak cotton pads in pure acetone and place them directly on the nail. Wrap each nail tightly in foil and let them sit for 10-15 minutes. The gel should lift easily; gently scrape off the residual gel using a wooden stick. This is the safest way for ‘remove gel valentine nails’ at home.
Key Takeaways
- Use the Right Tools for Precision – Simple designs like micro-hearts and dots are instantly upgraded using inexpensive dotting tools or a fine-tipped liner brush. These “tools for simple art” eliminate the need for advanced freehand skill.
-
Prioritize Low-Effort Techniques – Focus on designs using striping tape, press-ons, and simple decals. These methods “enables quick application” and are the “easy alternatives to complex designs.”
-
Matte vs. Glossy for Sophistication – The easiest high-impact look is achieved by using one top coat over the other—a glossy heart over a matte base creates instant, elegant contrast without intricate painting.
-
Prep is Key to Longevity – Whether using press-ons or traditional polish, ensure your nail bed is completely clean and oil-free using alcohol or a dehydrator to prevent chipping and ensure “long-lasting simple designs.”
-
Minimalism is the Trend – The most “trendy simple valentine nails” of 2026 rely on negative space, single accent nails, or sheer washes of color. Embrace ‘understated nail art’ over overly elaborate designs.
-
Ombre is Beginner Friendly – Achieve a stunning gradient effect effortlessly using a dedicated nail art sponge and two similar polish shades, demonstrating a sophisticated ‘basic painting technique’.
-
Cure Time Matters – Always allow each layer of polish, especially the base coat, to fully dry before applying the next design element or top coat to prevent smudging and achieve a “smudge-proof nail art” finish.
Final Thoughts on Simple Valentine’s Day Nails
This 2026, achieving beautiful, festive Valentine’s Day nails doesn’t have to mean booking an expensive salon appointment or spending hours meticulously painting tiny details. We’ve demonstrated that simplicity is the key to elegance, embracing ‘minimalist manicures’ and quick hacks that deliver professional-grade results. Whether you choose the timeless subtlety of the minimalist micro-heart, the bold contrast of the matte/glossy finish, or the convenience of customized press-ons, these nine ‘simple valentine nail designs’ are designed for fast application and maximum impact. You now have the full guide, from the right ‘nail tools for simple art’ to ‘step-by-step simple nails’ instructions. Trust the process, embrace the simplicity, and get ready to express yourself this holiday season.
Which of these easy DIY Valentine’s Day nail ideas are you trying first? Let us know in the comments below!
Last update on 2026-03-03 / Affiliate links / Images from Amazon Product Advertising API


