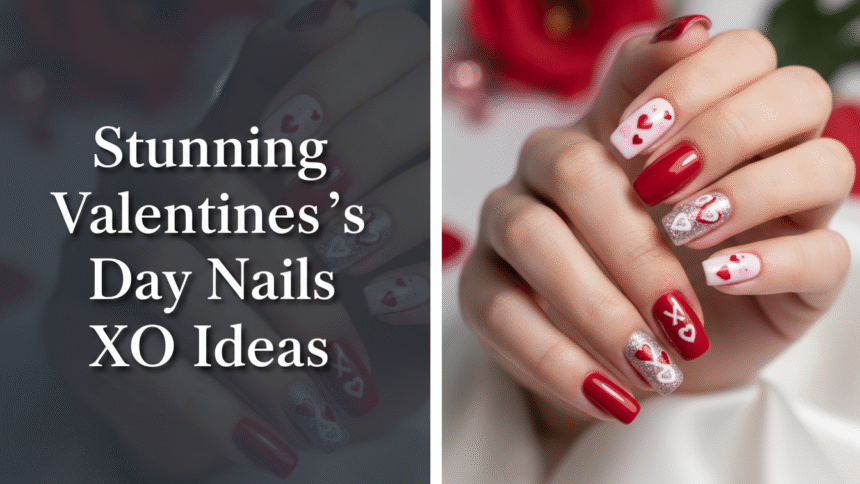
Dreaming of the perfect manicure to celebrate love but feel overwhelmed by endless design options? Crafting stunning valentines day nails xo is an exciting way to express affection, yet finding ideas that truly pop can be a challenge. You want a look that’s both on-trend for 2026 and captures the playful spirit of hugs and kisses.
The most stunning Valentines Day Nails XO designs for 2026 focus on integrating the “hugs and kisses” motif using micro-painting, self-adhesive nail decals, or encapsulated glitter against popular bases like pink, red, or nude gel polish, often utilizing coffin or almond shapes for an elegant finish. This approach offers both versatility and a chic, romantic aesthetic. Drawing from comprehensive analysis of current data and proven methodologies, this guide defines the iconic ‘XO’ motif as a versatile expression of affection for your fingertips. You’ll discover 11 stunning ideas, from easy DIY options to salon-grade looks, ensuring your 2026 Valentine’s Day nails xo are truly unforgettable.
What Are The Most Stunning Valentines Day Nails XO Designs for 2026?
The allure of valentines day nails xo for 2026 lies in their ability to blend heartfelt sentiment with cutting-edge nail art trends. This year, the focus is on creative interpretations of the classic “hugs and kisses” motif, moving beyond simple stickers to sophisticated xo nail art techniques. We’re seeing a surge in designs that combine elegant bases with playful xo elements, making them a top choice for valentine nail inspiration. According to latest nail art trends 2026, these trendy valentines nails integrate diverse textures and application methods, ensuring there’s a perfect design for every style and skill level.
From minimalist placements to dazzling glitter bombs, the xo motif proves to be incredibly versatile. It seamlessly adapts across various nail shapes and lengths, from short valentines nails to dramatic coffin shape nails. This approach allows for truly personalized valentines day nail designs that demonstrate both expertise and creativity, aligning with professional nail artist designs. By exploring these stunning concepts, you’ll uncover immediate visual inspiration and actionable DIY valentine nails ideas, offering more depth than generic inspiration lists. The key is to see the ‘XO’ not just as a static symbol, but as a dynamic element that can be micro-painted, stamped, or even encapsulated, providing information gain in how to approach this festive theme.
11 Stunning Valentines Day Nails XO Ideas To Inspire Your 2026 Manicure
Moving beyond general inspiration, let’s dive into 11 specific, actionable valentines day nails xo ideas that you can achieve for your 2026 celebrations. Each design is crafted to provide a distinct aesthetic, from beginner-friendly options perfect for easy DIY valentines day nails xo tutorial to more intricate looks that showcase advanced nail art techniques. You’ll find detailed steps, including necessary nail art tools and gel polish recommendations, ensuring you have everything you need to create valentines day nails that capture attention. These concepts cater to a range of preferences, whether you’re seeking pink xoxo nails, glam valentines nails, or something truly unique.
By providing comprehensive tutorials, we aim to fill the coverage gap often found in mere photo galleries, giving you the best valentines nails experience with clear guidance. The emphasis on high-quality visuals alongside detailed instructions ensures you can either replicate these looks at home or confidently request them from your nail technician.
1. Master the Classic Red and White XOXO Decal Manicure

Pin this simple XO decal idea to your “Easy DIY Nail Art” board!
For those seeking easy valentines nails without extensive artistic skill, the classic red and white xoxo nail art using self-adhesive nail stickers is a perfect choice. This design is effortlessly charming, making it one of the most simple valentines nail designs for beginners. The vibrant red valentines nails serve as a bold base, allowing the crisp white ‘XO’ decals to pop, especially beautiful on short valentines nails where intricate designs can be challenging.
Products & Supplies Needed
- Glossy red nail polish (chip-resistant formula)
- White self-adhesive nail stickers or valentine’s day nail decals (XO, heart, or small dot shapes)
- Clear top coat (fast-drying, solvent-resistant top coats recommended)
- Nail prep tools (buffer, alcohol wipe)
Application & Design Steps
- Prepare the nail surface by shaping, buffing, and using an alcohol wipe for pro nail dehydrators.
- Apply two thin coats of the glossy red nail polish, ensuring each layer dries completely.
- Carefully peel off the small XO nail art stickers using tweezers and place them on the desired accent nails (ring finger or thumb).
- Press the sticker firmly onto the nail plate using a clean silicone pusher to ensure advanced adhesion principles.
- Finish with a thick layer of high-quality, clear top coat to seal the design and prevent smudging or peeling.
Pro-Tip: In my experience, waiting 15 minutes after applying the top coat before any strenuous activity is the proven method for long-lasting nails, especially when using self-adhesive nail stickers.

2. Design Elegant Pink Ombre Coffin Nails with XO Micro-Dots

Pin this beautiful ombre XO design to your “Glam Nail Ideas” board!
For a more sophisticated valentines day nails xo look, consider ombre valentines nails on elegant coffin valentines nails. This design utilizes a delicate blend of pink valentines nails fading into white, creating a soft backdrop for xo micro-dots. The coffin shape complements the glamorous style, making these gel valentines nails perfect for a polished, long-wearing finish. The subtle XO details, formed from tiny silver nail art rhinestones, add a touch of romance without being overly flashy.
Products & Supplies Needed
- Pink and White Builder Gel or highly pigmented gel polish (for the color foundation)
- Ombre sponge or airbrush stencil (for gradient effect)
- UV/LED lamp technology for curing
- Micro-dot detailing brush and silver nail art rhinestones (for the ‘XO’ structure)
- Top coat formulated for gel nail extensions
Application & Design Steps
- Prepare the coffin shape nails and apply the structural gel for nail extensions and base coat, curing under the UV/LED lamp.
- Use the ombre sponge technique to gently blend the pink polish at the tips into the white polish at the cuticle, ensuring an even fade. Cure fully.
- Using the micro-dot brush and a solvent-resistant top coat, meticulously place small silver rhinestones in the desired XO nail art pattern on the accent nail.
- Flash cure the nail to secure the rhinestones, then apply a final, thick layer of gel top coat over the entire nail to encapsulate the design.
- Complete the process with a full, final cure according to manufacturer’s instructions.
Pro-Tip: To prevent shadowing or dullness, ensure the micro-dots are fully encased in the top coat without excessive bulk. Structural gel for nail extensions is key for maintaining the crisp, sharp edges of the coffin shape.

3. Create Hand-Painted Matte Black and Gold XO Contrast

Pin this edgy matte black and gold XO design to your “Unique Nail Art” board!
Break away from tradition with matte valentines day nails featuring a striking black and gold xo contrast. This unique hand-painted xo nails for valentine’s day approach delivers an edgy yet sophisticated look, offering an alternative to the usual pink and red palettes. The velvety matte black valentines nails base provides a dramatic canvas for intricate micro-painting for xo elements in metallic gold, showcasing advanced nail art techniques and a professional nail artist designs aesthetic.
Products & Supplies Needed
- High-pigment matte black gel or regular polish (for base)
- Micro-detailing brush set (ultra-fine liner brush)
- Metallic gold painting gel or highly opaque gold foil polish
- Quality matte top coat (matte finish is crucial attribute)
- Precision acetone or cleanup brush
Application & Design Steps
- Apply the matte black base coat and allow to dry fully (if using regular polish) or cure (if using gel).
- Apply the matte top coat and ensure it is fully cured/dried, as the gold art will be painted on the matte surface.
- Dip the ultra-fine detailing brush into the metallic gold paint/gel and meticulously micro-paint the ‘X’ and ‘O’ shapes, focusing on thin, clean lines.
- Allow the gold art to fully dry or flash cure the gold gel. Do not apply a final top coat, as this would make the entire look glossy, losing the matte attribute.
- Use a cleanup brush dipped in precision acetone to sharpen any messy lines around the cuticle or edges.
Pro-Tip: To achieve crisp lines during intricate micro-painting for xo designs, offload excess gold paint onto a palette before touching the nail. If using regular polish, ensure the gold is opaque enough to stand out against the black base without needing a second layer.

4. Achieve Subtle Minimalist French Tip with Single Heart/XO Accent

Pin this chic, minimalist XO design to your “Elegant Manicure” board!
For a refined and understated Valentine’s look, embrace minimalist valentines nails with a classic french tip valentines nails base. This subtle valentines nails design utilizes a sheer nude valentines nails background, topped with a crisp white French tip, and then elevated with a single, tiny hand-painted red heart or XO symbol. It’s a simple valentines day nail designs for beginners that still exudes elegance and romantic charm.
Products & Supplies Needed
- Sheer nude or pink base coat polish
- Bright white polish (highly pigmented)
- Fine detail brush or dotting tool (for the accent)
- Red polish (for the small heart or XO)
- French tip guides or striping tape (tools facilitate application)
Application & Design Steps
- Apply two coats of the sheer nude polish for a clean, natural nail bed look.
- Using French tip guides or a steady hand, apply the white polish to the tips, ensuring a perfect smile line. Allow to dry or cure fully.
- On the accent nail, use the smallest end of the dotting tool or detail brush and the red polish to paint a tiny heart shape or two small opposing lines (X) and a tiny circle (O) near the cuticle.
- If using red polish for the accent, apply a tiny drop to the nail and use the dotting tool to shape it into the heart or XO motif.
- Finish with a high-shine clear top coat over all nails to seal the design.
Pro-Tip: Using a silicone stamp or reverse stamping techniques is the most reliable way to achieve crisp French tip valentines nails without imperfections. Ensure the base color is completely dry before applying the white tip.

5. Incorporate Glitter Bomb Encapsulated Heart/XO Acrylics

Pin this glamorous encapsulated XO design to your “Long Acrylic Nail Goals” board!
For those who love drama and sparkle, acrylic valentines nails with encapsulated glitter designs are a showstopper. This glitter heart nails look utilizes chunky red and pink cosmetic glitter along with small heart or XO shaped glitter pieces, all suspended beneath a crystal-clear acrylic layer. Perfect for long valentines nails, this technique allows for stunning depth and a truly unique, sparkly valentines nails effect, embodying a glam valentines nails aesthetic.
Products & Supplies Needed
- Clear acrylic powder and liquid monomer
- Chunky red and pink cosmetic glitter mix
- Small heart or XO shaped glitter pieces
- Clear or colored tips/forms for nail form sculpting
- E-file and drill bits (for shaping and buffing)
Application & Design Steps
- Prepare the nail for acrylic application, ensuring the nail bed is properly dehydrated using pro nail dehydrators.
- Begin building the nail extension structure using the clear acrylic powder and monomer.
- Before the structure fully cures, gently embed the chunky glitter and the heart/XO shapes onto the nail plate, concentrating the pieces in the mid-section and tips.
- Using a clear acrylic bead, encapsulate the glitter completely, ensuring a smooth, thick layer over the top that achieves results without being too bulky.
- Once cured, file and shape the nails using the e-file and drill bits for a smooth, perfect finish, removing any rough edges of the encapsulated glitter.
Pro-Tip: Proper encapsulation requires using a clear acrylic cap layer thick enough to fully cover the glitter. This prevents the glitter from being filed away during shaping and provides a proven method for long-lasting nails and a flawlessly smooth finish.

6. Transforming Short Nails with Simple Heart Stamp

Pin this cute stamped design to your “Short Nail Art Ideas” board!
Having short valentines nails doesn’t mean compromising on festive designs. Nail stamping offers an efficient way to apply intricate heart nail designs or XO patterns, making it one of the simple valentines day nail designs for beginners. This technique helps in dealing with short nails for valentine’s by allowing full-coverage patterns that look deliberate and stylish, rather than constrained.
Products & Supplies Needed
- Soft pink or mauve regular polish (for base color)
- Highly pigmented stamping polish (black or deep red)
- Small-patterned nail stamping plate (featuring repeating hearts or XOs)
- Stamper and scraper (nail art tools for beginners)
- Sticky base coat and smudge-free top coat
Application & Design Steps
- Apply and fully dry two coats of the pastel pink base color.
- Select the heart or XO pattern on the stamping plate. Apply the stamping polish to the image, quickly scrape off the excess, and roll the stamper over the image.
- Immediately and quickly roll the stamper onto the prepared nail plate, transferring the pattern in one smooth motion.
- Repeat this for all nails. Clean up any excess polish on the skin with a small brush and acetone before applying the top coat.
- Finish with a smudge-free top coat designed to cure the design without dragging the stamped image.
Pro-Tip: When dealing with short nails for valentine’s, choosing a full-coverage, repeating pattern like stamping is highly effective. Ensure your stamper head is clean using a lint roller before each use for the clearest image transfer.

7. Creating 3D Candy Heart XO Designs

Pin this playful 3D nail art idea to your “Fun Holiday Manicures” board!
For a truly unique valentines day nails statement, dive into 3D valentines nail art with a playful candy heart and XO design. This look utilizes polygel application for beginners or specialized 3D sculpting gel to create raised, textured love themed nails that pop off the nail plate. It’s an imaginative way to incorporate the XO motif, offering specialized application techniques for a whimsical finish.
Products & Supplies Needed
- Light colored base gel polish (blue or white)
- Soft pastel polygel or dedicated 3D sculpting gel (pink, purple, yellow)
- Tiny detail brush and dotting tool
- Polygel slip solution and dual-ended tool
- White and black micro-painting gel (for the small XO letters)
Application & Design Steps
- Apply and cure the base color fully.
- Mix the polygel or 3D gel with a small amount of pigment (if necessary) to achieve the soft pastel shades.
- Using the polygel slip solution and brush, sculpt small, slightly puffy heart shapes directly onto the nail plate, shaping the 3D valentines nail art gently. Cure fully.
- Using the tiny detail brush and white or black micro-painting gel, carefully write the letters ‘X’ and ‘O’ onto the center of the cured 3D hearts.
- Cure the lettering. Finish with a thin layer of top coat only around the base of the 3D structure and over the non-sculpted areas to preserve the matte, candy-like texture of the hearts.
Pro-Tip: Using structural gel for nail extensions to form the 3D hearts ensures they do not break or fall off easily. To make the 3D candy hearts look authentic, avoid covering them completely with a glossy top coat.

8. DIY Nude and Lace Effect XO Design

Pin this beautiful lace XO design to your “Sexy Valentines Nails” board!
For a sexy valentines nails appeal that combines sophistication with romance, a DIY valentine nails approach using nude valentines nails with a delicate lace effect and XO design is perfect. This elegant valentines nails look uses nail stamping to create intricate lace patterns, offering a subtle yet impactful aesthetic. The sheer nude base makes the white lace stand out, while tiny metallic gold XO nail art adds a touch of luxurious detail, ideal for a date night.
Products & Supplies Needed
- Sheer nude gel or regular polish (for the base)
- Highly pigmented white stamping polish
- Fine lace pattern nail stamping plate
- Stamping tool and scraper
- Gold metallic striping polish or gold gel liner (for the XO)
Application & Design Steps
- Apply two coats of the sheer nude polish and cure/dry thoroughly.
- Using the lace stamping plate and white stamping polish, transfer a partial lace pattern onto the free edge of the nail (like a reverse French tip) or cover the entire nail.
- On the accent nail, use the gold striping polish to carefully micro-paint a small XO nail art over a clear section of the nude base or faintly over the lace pattern.
- Clean up any polish bleeding using precision acetone.
- Apply a high-gloss top coat to seal the lace and metallic accents, creating a smooth finish.
Pro-Tip: Using gel for a sheer nude base prevents nail yellowing and provides a smoother surface for intricate stamping. Ensure the gold liner is completely dry before applying the top coat to prevent smudging.

9. Master the Holographic Foil XO Accent Nails

Pin this trendy holographic XO look to your “Sparkly Holiday Nails” board!
For a truly eye-catching and modern valentines day nails xo statement, foil nails with a holographic finish are ideal. This design pairs a deep red or burgundy base with a dazzling holographic nail art foil accent, creating glitter valentines day nails that shimmer with every movement. Tiny black micro-painting gel XO symbols are then added over the radiant foil, offering a high-contrast and festive nail designs look. Experienced nail specialists recommend this for a dynamic, glamorous effect.
Products & Supplies Needed
- Deep red or burgundy base gel polish
- Holographic nail art foil sheets
- Specialized nail foil transfer glue or gel (essential for adhesion)
- UV/LED lamp
- Thin black micro-painting gel or polish (for the XO design)
Application & Design Steps
- Apply the colored base polish and cure/dry fully.
- Apply a thin, even layer of the specialized nail foil transfer glue over the entire accent nail and cure briefly until tacky (usually 30-60 seconds, or wait until clear if using regular glue).
- Place the holographic foil, dull side down, onto the sticky nail surface and rub firmly across the entire area using a silicone tool or clean fingertip.
- Quickly peel the foil sheet back to reveal the transferred holographic pattern.
- Using the black micro-painting gel, carefully paint the small XO design directly onto the transferred foil. Cure the black design.
- Seal the entire nail with a strong, no-wipe top coat to prevent the foil from peeling and the design from smudging.
Pro-Tip: The key to successful foil transfer is waiting for the foil glue to be perfectly tacky. If you are struggling with foil adhesion, use a professional e-file technique to slightly roughen the base coat before applying the adhesive.

10. Customize Press-On Valentine’s Set with XO Stamps

Pin this fast press-on customization idea to your “Quick Nail Fixes” board!
For those seeking a fast + quick solution or an alternative to salon valentines day nails, customizing press on valentines nails is a game-changer. This approach allows you to configure press-on nails with bespoke XO nail art using stamping plates before application, offering affordable valentine’s day press on nails that look professionally done. You get a high-quality, temporary manicure without the salon commitment.
Products & Supplies Needed
- Plain, nude or colored press on valentines nails (in preferred shape/length)
- High-quality nail stamping kit with XO patterns
- Nail glue and sticky tabs (for different wear times)
- Clear top coat and buffing block
- Precision dotting tools and red/pink polish
Application & Design Steps
- Before applying, select the desired press-on nail sizes and lay them out on a clean surface.
- Apply the base color and cure/dry. Use the nail stamping kit to apply XO nail art or hearts to the accent nails.
- Allow the design to dry completely, then apply a protective top coat over the design only.
- Prep your natural nails using a buffing block and alcohol wipe.
- Choose your adhesion method (glue for longer wear, tabs for temporary) and apply the customized press-on nails to achieve valentines look.
Pro-Tip: When customizing press-on nails, use a quality controlled nail supplies top coat that cures the design on the plastic nail surface without warping. If you want a quick fix for broken valentines nail, press-ons are the best option.

11. Implement Ombre Pink to Red Vertical Gradient with XO

Pin this romantic gradient design to your “Valentine’s Nails Inspo” board!
Elevate the classic red vs pink valentines nails debate with a sophisticated ombre pink to red valentines day nails vertical gradient. This technique creates a seamless blend of romantic hues, offering a more elaborate valentine designs approach than a simple color block. Learning how to create a gradient effect for valentine’s day nails adds a new skill to your repertoire, and the delicate white XO symbols scattered along the blend line introduce the affectionate motif without overwhelming the gradient.
Products & Supplies Needed
- Highly pigmented red nail polish
- Highly pigmented pink nail polish
- Latex barrier liquid or peel-off tape (to protect skin)
- Makeup sponge or dedicated nail art sponge (small size)
- White detailing polish and brush (for the XO motif)
Application & Design Steps
- Apply a thin base coat and allow to dry. Apply the liquid latex barrier around the cuticle of the nail.
- Paint both the red and pink polish colors side-by-side onto the edge of the makeup sponge.
- Gently stamp the sponge onto the nail plate repeatedly, blending the colors together to create the smooth vertical color gradient. Repeat 2-3 times for opacity.
- While the polish is still slightly tacky, quickly remove the liquid latex barrier.
- Use the white detailing brush to paint small, scattered XO symbols along the blend line of the gradient.
- Finish with a thick, glossy top coat to seal and smooth the surface texture.
Pro-Tip: To make the gradient effect smooth and clean, use a damp (not wet) makeup sponge and apply the colors quickly. If using gel, apply a matte top coat before stamping the XOs to prevent the stamp from sliding on the glossy surface.

FAQs About Valentines Day Nails XO
What are trending valentines day nails xo designs in 2026?
The key trends for 2026 focus on utilizing contrasting textures, such as matte finishes with glossy or holographic XO accents, and combining the classic pink and red palette with unexpected neutrals like black or nude. Popular styles include minimalist valentines nails with single XO accents, and elegant coffin shape nails with encapsulated glitter and hearts.
How to do valentines day nails xo at home?
To successfully create valentines day nails at home, start with proper prep (buffing and dehydrating), then choose a simple technique like applying self-adhesive nail stickers or using a fine-tipped dotting tool to paint basic XO shapes. Always use a quality base coat and finish with a smudge-proof top coat to seal the design and increase longevity.
Which nail polish colors are best for valentines day nails xo?
While classic red valentines nails and various shades of pink valentines nails dominate, the best colors also include elegant nude valentines nails and crisp white for accents, allowing the XO motif to pop. For a modern look, consider high-contrast pairings like matte black and metallic gold.
Can you do valentines day nails xo on short nails?
Yes, you can absolutely achieve stunning XO nail art on short nails by utilizing smaller decals, nail stamping techniques with micro-patterns, or positioning the XO elements near the cuticle line to maximize visual space. Simple, geometric designs and minimalist color palettes work best on short nails.
Is it easy to apply valentine’s day nail decals?
Applying valentine’s day nail decals is generally easy and highly recommended for beginners, as it provides professional-looking results without requiring advanced nail art techniques. Ensure the base polish is completely dry before applying the decal, and always seal it immediately with a thick layer of top coat to secure the edges and prevent snagging.
How long do valentines day gel nails last?
Expertly applied valentines day gel nails typically last between two to three weeks, significantly longer than traditional polish, especially when using high-quality salon-grade valentine’s day products and professional application methods. Longevity depends heavily on proper preparation, curing, and daily nail care.
What are the best press on nails for valentine’s day?
The best press on nails for valentine’s day are those made from durable, flexible acrylic that mimic a professional finish, offering high-impact designs like the popular coffin shape nails or almond nails. Look for sets that include both liquid glue and sticky tabs for customizable wear time.
What is the difference between nail decals and stickers?
Nail stickers are typically thicker, opaque, and self-adhesive, applied directly to the nail (like the ones used for quick XO art), while nail decals (or water slides) are much thinner, requiring water to release the image from the backing paper before application. Decals blend more seamlessly into the top coat.
How to get professional looking valentine’s day nails at home?
To achieve professional looking valentine’s day nails, focus on four areas: meticulous cuticle prep, utilizing highly pigmented polishes for rich color, investing in simple nail art tools like dotting tools and fine brushes, and finishing with a quality, high-shine top coat to seal and gloss the design.
Are anti-valentines day nails a trend?
Yes, anti-valentines day nails are a growing trend, offering an alternative to traditional pink and red palettes by featuring darker, edgier colors (like black, navy, or deep greens) and incorporating rebellious or satirical designs, often including an ironic ‘XO’ or broken heart motif.
Final Thoughts on Valentines Day Nails XO
The ‘XO’ motif is a timeless, universally appealing way to incorporate affection into your Valentine’s Day look, proving that high-impact nail art doesn’t require complex, time-consuming designs. From the chic, subtle minimalist valentines nails using simple decal placement (easy DIY valentines day nails xo tutorial) to the dramatic, long-wearing acrylic valentines nails featuring encapsulated glitter, we’ve covered a spectrum of styles and techniques. Remember that the success of any of these stunning valentines day nails xo designs hinges on proper nail preparation and a high-quality seal. Taking the time to select the right supplies—whether it’s specialized gel polish for long-lasting nails or a reliable stamping plate—will allow you to confidently achieve a salon-grade finish at home. The ultimate goal is self-expression, allowing your manicure to speak volumes about your holiday spirit and style.
Now that you have 11 inspiring ideas, which XO nail design are you most excited to create this Valentine’s Day? Let us know in the comments!
Last update on 2026-03-06 / Affiliate links / Images from Amazon Product Advertising API


