Tired of the same old manicure choices? You’re looking for something that’s clean, sophisticated, and endlessly versatile, but still makes a statement. Finding a look that is both a timeless classic and a modern trend can feel like an impossible challenge.
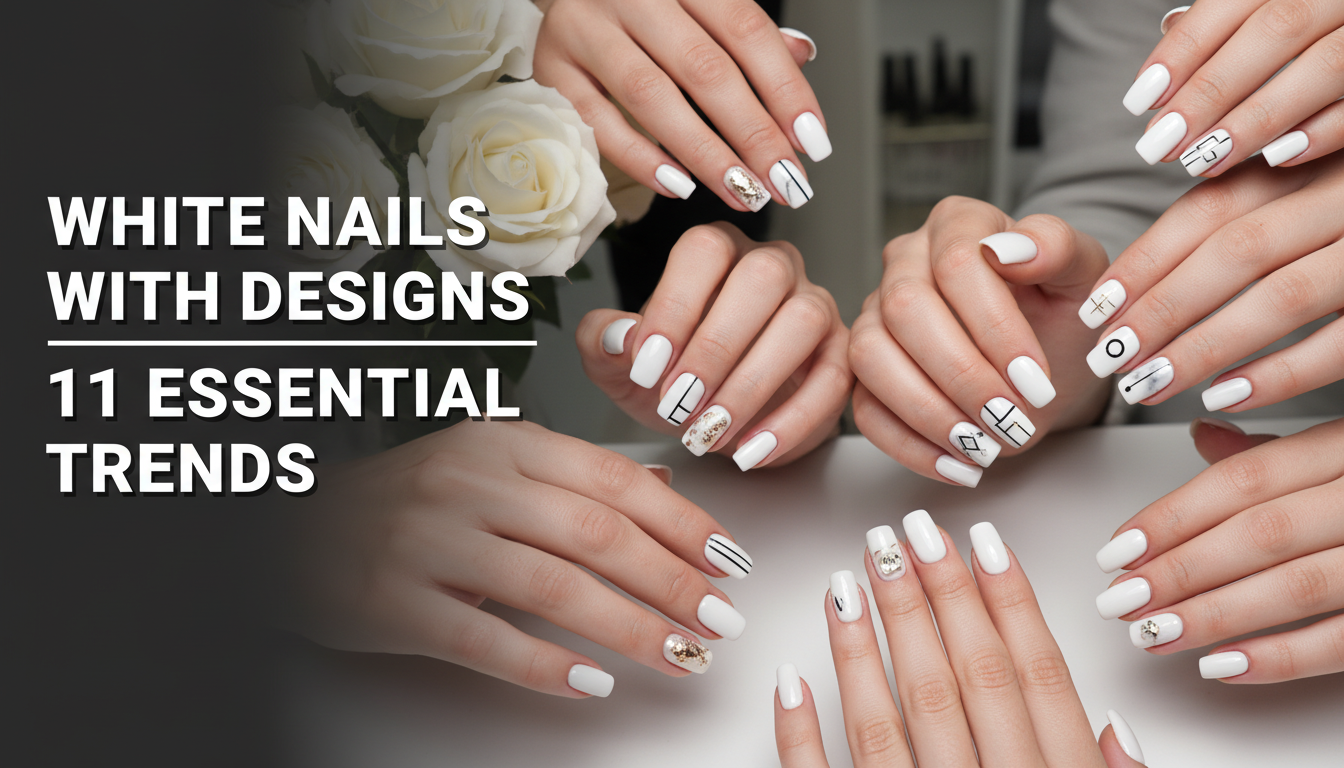
White nails with designs are a top trend for 2026 because they offer a clean, versatile canvas for endless creativity, making it a timeless yet modern choice. From minimalist swirls to elegant gold foil and sophisticated marble, a white manicure can be adapted for any season, occasion, or personal style. This makes it the ultimate nail art foundation.
Drawing from established best practices and an analysis of current trends, this guide provides a complete gallery of inspiration. A white manicure serves as the perfect canvas, allowing design elements to truly shine. In this post, you’ll discover 11 essential designs, from simple DIY patterns to salon-worthy masterpieces, and learn exactly how to achieve them.
Why Are White Nails With Designs the Ultimate Style Statement?
The enduring appeal of white nails with designs lies in their unique duality. On one hand, white is the ultimate neutral—clean, fresh, and sophisticated. It provides a crisp backdrop that makes any color or embellishment pop. On the other hand, it’s a bold statement, offering a bright, eye-catching look that feels intentional and chic. This versatility allows a white manicure to be customized for any personality or event, whether it’s the subtle elegance of a milky white nail art for the office or a dazzling white and gold combination for a special occasion. By varying the finish from a velvety matte white nails look to a high-shine glossy white finish, you can completely alter the mood, proving that this classic choice is anything but boring.
11 Essential White Nail Designs to Elevate Your Look in 2026
Ready for some inspiration? We’ve curated the top 11 trending white nail art ideas that you’ll be seeing everywhere in 2026. This gallery is more than just pretty pictures; it’s a complete guide to achieving these looks yourself. For each design, you’ll find a list of the necessary tools, step-by-step instructions, and expert tips to ensure a flawless finish. Whether you’re a DIY novice or a seasoned nail artist, you’ll find the perfect white polish designs to match your style, from white summer nail trends to elegant white wedding nail ideas.
1. Achieve the Luxurious White and Gold Marble Effect

Pin this elegant design to your ‘Dream Nails’ board!
This look combines the timeless luxury of marble with the trendy appeal of gold accents. The white marble nail art technique creates a soft, veined look that mimics real stone, while flecks of gold foil add a touch of glamour. It’s a surprisingly achievable design that makes a sophisticated statement, perfect for anyone wanting classy white nails.
Products & Tools Used
- Opaque white gel polish (a stark, pure white for high contrast)
- A sheer, milky white polish for layering
- Grey or light black gel polish
- Clear blooming gel polish
- Fine-tipped nail art brushes or a dotting tool
- Gold foil flakes or gold leaf
- No-wipe gel top coat (for a glossy white finish)
- UV nail lamp
Application Steps
- Prepping the nail bed is crucial. Shape the nail, push back cuticles, and buff the surface lightly.
- Apply base coat and cure for 60 seconds under an LED lamp.
- Apply one thin coat of opaque white gel polish and cure.
- Apply a thin, uncured layer of clear blooming gel. Do NOT cure this layer.
- Using a fine-tipped brush, draw a few wispy grey lines onto the wet blooming gel. Watch as it “blooms” and softens.
- Immediately place a few tiny gold foil flakes into the wet polish. Cure for 60 seconds once satisfied with the design.
- Finish by sealing with top coat and curing for a final 60 seconds.
Pro-Tip: For a more subtle, white quartz stone effect, use a very diluted grey polish and apply it sparingly. The blooming gel does most of the work, so less is more.

2. Create Delicate, Minimalist White Swirls

Save this clean girl aesthetic to your ‘Minimalist Nails’ board!
The essence of the “clean girl” aesthetic, white swirl nail designs are all about understated elegance. This look features delicate, abstract lines of opaque white over a sheer or milky base, creating a beautiful negative space effect. It’s the perfect example of a chic white manicure that’s modern, versatile, and ideal for those who prefer minimalist white nails.
Products & Tools Used
- A translucent white or sheer pink base coat (like a ‘jelly’ polish)
- Opaque white nail art liner gel or a highly pigmented white polish
- Extra-long, fine-tipped striping brush
- Glossy or matte white nails top coat
- UV nail lamp
Application Steps
- After standard nail prep, apply one or two coats of your translucent white base color. Cure each layer.
- Pour a small amount of opaque white polish onto a palette.
- Dip your long striping brush into the white, ensuring it’s evenly coated but not dripping.
- Starting from one side of the nail, create a fluid, wavy line in one or two smooth motions. Don’t overthink it; the abstract nature is key.
- You can add a second, smaller swirl or leave it as a single line.
- Cure the white swirl design for 60 seconds.
- Apply your chosen top coat (glossy or matte) and cure for a final 60 seconds.
Pro-Tip: If your hand isn’t steady, try this: rest the finger you’re painting on a table to stabilize it. Place the brush on the nail and rotate your finger away from the brush, rather than trying to move the brush itself. This creates a smoother curve.
3. Modernize the Classic French Tip with a V-Cut

Your classic French manicure just got a major upgrade. Pin this!
For those who love a classic look but crave a modern twist, the V-cut French tip is the perfect solution. This elegant white design replaces the traditional curve with a sharp, deep chevron shape. It’s particularly striking on coffin nail designs and almond shapes, as the pointed tip elongates the fingers and adds a sophisticated, edgy vibe to the timeless white tipped nail designs.
Products & Tools Used
- Sheer pink or nude gel polish for the base
- A stark white nail design polish with high opacity
- V-shape nail guides or thin nail striping tape
- A small pair of scissors
- High-gloss gel top coat
Application Steps
- After your base coat, apply two thin coats of your sheer pink or nude polish, curing each layer.
- Once fully cured and dry, place two pieces of striping tape on your nail to form a deep ‘V’ shape, with the point facing your cuticle. Press the edges down firmly to prevent bleeding.
- Carefully paint the tip of your nail above the tape with the opaque white polish. Apply two coats if needed for full coverage, but keep them thin.
- CRITICAL STEP: Remove the striping tape while the white polish is still wet. This creates the sharpest line.
- Once you are happy with the line, cure the white polish for 60 seconds.
- Apply a glossy top coat to smooth everything out and provide that classic shine. Cure for a final 60 seconds.
Pro-Tip: For a softer look, you can create a subtle white and pink ombre effect on the base before adding the V-tip. This adds depth and makes the design even more unique.

4. Embrace Nature with Dainty White Floral Art

A touch of spring for your fingertips. Save this cute floral idea!
Nothing says fresh and feminine quite like white floral nail art. This dainty white art is perfect for beginners because it can be created easily with a simple dotting tool. Tiny daisies on a creamy white nails base create a sweet, cheerful look that’s perfect for spring, a garden party, or even as a delicate white wedding nail idea. It’s a charming design that proves simple white patterns can have a big impact.
Products & Tools Used
- A creamy white or off-white gel polish
- A small dotting tool (with at least two different sized ends)
- Yellow or gold polish for the flower centers
- A glossy top coat
Application Steps
- After your base coat, apply two coats of your creamy white nails polish, curing each layer. This will be the canvas for your art.
- Pour a tiny drop of the same white polish and a drop of yellow polish onto a palette.
- Take the larger end of your dotting tool, dip it into the white polish, and create five dots in a small circle on your nail. These are the petals. Don’t worry about perfection.
- Clean the dotting tool. Use the smaller end to dip into the yellow polish and place a single dot in the center of your five white petals.
- Repeat to create one or two more flowers on the nail. You can do this on every nail or just an accent nail.
- Cure the floral design for 60 seconds.
- Apply a glossy top coat and cure.
Pro-Tip: For a different look, try a sheer white nails with pressed flowers effect. Apply one coat of sheer white, then use tweezers to place a real, tiny pressed flower onto the wet polish before curing and sealing with a top coat.

5. Go Bold with Matte White and Black Geometric Lines

For the bold and the modern. Pin this geometric look now.
For a look that is unapologetically modern and edgy, try matte white nails with black geometric lines. The contrast between the velvety matte white base and the sharp, glossy black lines creates a stunning visual impact. This is one of those bold white designs that feels like wearable art, perfect for showcasing on dramatic stiletto nail art. The key is the matte finish, which elevates the design from simple to high-fashion.
Products & Tools Used
- Opaque white gel polish
- A high-quality matte gel top coat
- A highly pigmented black nail art liner gel
- A long, thin striping brush (if not using a liner bottle)
- Rubbing alcohol and a lint-free wipe
Application Steps
- After your base coat, apply two coats of opaque white polish, curing each.
- Apply the matte top coat and cure fully. This creates a non-slippery canvas for your linework.
- Gently wipe the cured matte nail with rubbing alcohol to remove any residual sticky layer.
- Using your black liner, draw your geometric design. Think sharp angles, parallel lines, or triangles near the cuticle for a negative space effect.
- Cure the black linework.
- IMPORTANT: Do not apply another top coat over the black lines. This preserves the contrast between the matte white background and the glossy or satin finish of the black lines.
Pro-Tip: To ensure your lines are perfectly straight, use thin nail striping tape as a guide. Paint alongside it, cure the line, then peel the tape away. This is a topical authority advanced technique for flawless white negative space linework.

6. Get the Viral White Chrome “Glazed Donut” Finish

The viral trend you need to try. Pin this glazed donut look!
You’ve seen it everywhere, and for good reason. The “glazed donut” or white chrome nail finish is one of the biggest trends to emerge from social media. This look involves rubbing a pearlescent chrome powder over a sheer white base to create an iridescent, shimmering white designs effect. It’s a subtle yet captivating style that looks incredibly chic and is universally flattering.
Products & Tools Used
- A sheer, milky white gel polish (one coat is usually enough)
- A high-quality, no-wipe gel top coat
- White or pearl chrome nail powder
- A small, disposable eyeshadow applicator or silicone tool
- A soft, fluffy brush (like a makeup brush)
Application Steps
- After your base coat, apply one thin coat of milky white gel polish and cure fully.
- Apply a thin layer of the no-wipe top coat. CRITICAL STEP: Cure for only 30-45 seconds, not the full 60. The top coat needs to be firm but slightly warm and receptive.
- Immediately dip your eyeshadow applicator into the chrome powder, getting a small amount.
- Vigorously rub the powder onto the surface of the nail. You will see it transform from a powder to a chrome finish. Cover the entire nail.
- Once the nail is fully chromed, use the soft, fluffy brush to gently dust off all excess powder.
- Apply a final layer of the no-wipe top coat to seal in the chrome powder. Cure for a full 60-90 seconds to ensure it’s protected.
Pro-Tip: The base color changes the final chrome effect. A sheer white gives the classic “glazed” look, but applying the same powder over a stark white base will create a much brighter, metallic pearl white nail art effect.

7. Add Subtle Sparkle with a White Glitter Accent Nail

Simple, elegant, with just the right amount of sparkle. Pin it!
The easiest way to elevate a simple white manicure is with a white glitter accent nail. This look is incredibly simple but adds a touch of glamour and personality. By pairing creamy white nails with a full-coverage white and silver designs glitter on the ring finger, you get a balanced manicure that’s both classic and festive, making it perfect for the holidays or any time you want a little extra sparkle.
Products & Tools Used
- An opaque white polish
- A high-density silver or iridescent white glitter polish
- A small piece of a disposable makeup sponge
- A glossy top coat
Application Steps
- Apply two coats of your opaque white polish to all nails except your chosen accent nail (usually the ring finger), curing each coat.
- On the accent nail, apply one regular coat of the glitter polish and cure. This will act as a sticky base.
- SPONGE METHOD: Paint a generous amount of the glitter polish directly onto a corner of the makeup sponge.
- Dab the polish-soaked sponge directly onto your accent nail. The sponge absorbs the excess clear base, depositing only the dense glitter.
- Repeat dabbing until you have full, opaque glitter coverage. Clean up any glitter on your skin with a small brush and acetone.
- Cure the glitter nail for 60 seconds.
- Apply one or two layers of a glossy top coat to smooth out the rough glitter texture. Cure fully.
Pro-Tip: For a festive white winter snowflake nails look, use this glitter accent nail method and then use a dotting tool to add a simple snowflake design on one of the white nails.

8. Try an Ethereal White Ombre or “Baby Boomer” Manicure

The ultimate elegant nail. Pin this timeless Baby Boomer look.
Often called “Baby Boomer” nails, the white ombre nail effect is the epitome of elegance. This sophisticated white art features a seamless gradient that transitions from a soft, natural pink at the cuticle to a delicate milky white at the tip. It’s a softer, more modern take on the classic French manicure and is an overwhelmingly popular choice for bridal white nails due to its romantic and timeless appeal.
Products & Tools Used
- A soft, natural pink gel polish
- A milky white polish (not stark white, which can be too harsh for a soft blend)
- A disposable makeup wedge sponge
- A flat brush and acetone for cleanup
- A glossy top coat
Application Steps
- After your base coat, apply one or two coats of the soft pink polish over the entire nail and cure.
- On the flat surface of your makeup sponge, paint a stripe of the pink polish and a stripe of the milky white polish right next to it, slightly overlapping them in the middle.
- Gently dab the sponge onto your nail, moving it slightly up and down to blend the colors. The first layer will look sheer; this is normal.
- Let the first layer dry for a moment, then repeat the process: paint the sponge and dab onto the nail, slightly offsetting the position to enhance the blend.
- Once you’re happy with the opacity of the blending ombre gradients, clean up the polish on your skin using a flat brush dipped in acetone.
- Cure the ombre design.
- Apply a glossy top coat and cure.
Pro-Tip: Before dabbing, lightly dampen the makeup sponge with water and squeeze it out completely. A slightly damp sponge absorbs less polish and creates a smoother, more airbrushed-looking gradient.

9. Add Whimsy with White Butterfly Nail Art

Let your style take flight. Pin this beautiful butterfly design!
Delicate and dreamy, white butterfly nail art adds a touch of whimsy to your manicure. A popular trend is to paint a single wing across two adjacent nails, creating a complete butterfly when you hold your fingers together. This design looks especially stunning on a milky white coffin nails with butterfly art base, giving the art a soft, ethereal quality. For an easy DIY, high-quality butterfly stickers can create the same magical effect.
Products & Tools Used
- A milky white or sheer pink base polish
- Opaque white polish for the wings
- Black liner polish for details (optional)
- A fine-tipped nail art brush
- OR: High-quality butterfly nail art stickers/decals
- A glossy top coat
Application Steps
- Apply your sheer base coat to all nails and cure.
- For the hand-painted method: Using a fine brush and opaque white polish, paint the top half of a butterfly wing on one nail (e.g., middle finger) and the bottom half on the adjacent nail (e.g., ring finger).
- Cure the white wings.
- (Optional) Use a black liner to add a thin outline and body details to make the butterfly pop. Cure again.
- For the sticker method: After applying and curing your base color, choose a butterfly sticker. Carefully cut it in half with small scissors.
- Apply one half of the sticker to one nail and the other half to the adjacent nail, pressing them down firmly.
- Seal the design (painted or sticker) with two thin coats of a glossy top coat to ensure it’s fully encapsulated and smooth. Cure each coat.
Pro-Tip: When hand-painting, don’t try to make the wings perfect. Start with two simple teardrop shapes for the top wing and two rounded shapes for the bottom. The beauty is in the delicate, imperfect look.

10. Master the Elegant White Lace Pattern

The perfect bridal nail. Pin this romantic lace design.
For ultimate sophistication, bridal white nails with lace patterns are unmatched. While hand-painting these intricate white details requires an expert’s touch, nail stamping kits make this stunning design accessible to everyone. The fine, delicate lines of a lace pattern over a sheer nude base create a look of pure romance and elegance, making it the top choice for weddings and other formal occasions.
Products & Tools Used
- A sheer nude or pink base polish
- A nail stamping kit that includes a lace-patterned plate, a scraper, and a stamper
- A highly pigmented white stamping polish (this is thicker than regular polish)
- A glossy top coat
Application Steps
- Apply and cure two coats of your sheer nude base polish.
- Apply a small amount of the white stamping polish across the top of the lace design on your metal plate.
- Using the scraper at a 45-degree angle, swiftly scrape the excess polish off the plate. The white polish should now only be in the etched design.
- Immediately press the silicone stamper onto the plate with a rolling motion to pick up the lace design.
- Quickly transfer the design to your nail by pressing and rolling the stamper onto the nail surface.
- Clean up any excess polish on your skin with a brush and acetone. Let the stamped design air dry for a minute.
- Carefully apply a glossy top coat to seal the intricate white details. Be sure to “float” the brush over the nail to avoid smudging the design. Cure.
Pro-Tip: For a white 3D embossed lace look, use a white 3D art gel and a very fine brush to trace over parts of the stamped design. This adds texture and makes the lace look even more realistic.

11. Add Celestial Charm with White Stars and Moons

A touch of magic for your manicure. Pin this celestial design!
Bring a touch of magic to your fingertips with a celestial-themed design. The combination of a stark white nail designs base with tiny gold stars and moons creates a beautiful, high-contrast look that is both whimsical and chic. This celestial art is incredibly easy to achieve using stickers or metal decals, making it a perfect beginner-friendly option for elevating a simple white and gold nails manicure. The stark white base makes it one of the best white nail designs for dark skin, as the contrast is stunning.
Products & Tools Used
- A stark white nail designs polish
- Tiny gold star and moon nail art stickers or thin metal decals
- A pair of fine-tipped tweezers or a wax-tipped jewel picker
- A thick, glossy top coat or nail gem glue
Application Steps
- Apply two coats of your stark white polish to all nails and cure each layer fully.
- If using stickers, simply use tweezers to peel them off the backing and place them onto the cured white nail. Press down firmly.
- If using metal decals, apply a small dot of nail gem glue or a thick top coat where you want to place the charm.
- Use the tweezers or jewel picker to pick up the metal charm and gently press it into the wet glue/top coat.
- Once all charms are placed, cure the nail fully to set them in place.
- Generously apply one or two coats of a glossy top coat over the entire nail, making sure to fully cover and seal the edges of the stickers or charms. Cure for a final 60-90 seconds.
Pro-Tip: To make metal charms last longer, apply the top coat around the charm first, then “float” a thicker layer over the top. This creates a stronger seal without creating a thick bubble over the charm itself.

Key Takeaways: Your Quick Guide to White Nails with Designs
- Versatility is Key: White nails with designs are not just one look. They range from minimalist white nails with simple swirls to elegant white designs like marble and lace, suitable for any occasion.
- Technique Matters: DIY-friendly techniques can create salon-quality results. Using a blooming gel for marble, a sponge for ombre, and a stamper for lace patterns are game-changers.
- The Finish Defines the Vibe: The choice between a matte vs glossy white finish can completely transform a design. Matte offers a modern, edgy look, while glossy provides a classic, clean shine. White chrome nail finish delivers a trendy, pearlescent sheen.
- Embellishments are Easy Upgrades: You don’t need to be an artist. Adding gold foil, glitter, or celestial-themed stickers is a simple way to elevate a basic white manicure.
- Preparation and Protection are Crucial: The longevity of any design depends on good prep (prepping the nail bed) and proper sealing. Always use a quality base coat and seal with a top coat to prevent chipping and yellowing.
FAQs About white nails with designs
How do you keep white nails from turning yellow?
The most effective way to prevent yellowing is to use a high-quality, UV-protective gel top coat. Yellowing is often caused by sun exposure, or contact with chemicals in lotions, makeup, or cleaning products. A good top coat acts as a shield. For regular polish, applying a fresh layer of top coat every 2-3 days can also help maintain white manicure brightness and prevent stains.
Are white nails in style for 2026?
Yes, white nails are a timeless trend that remains firmly in style for 2026 and beyond. While classic stark white nail designs are always popular, the trend for 2026 leans towards variations like milky white nail art, pearlescent “glazed donut” chrome finishes, and minimalist designs with negative space. They are consistently seen on runways and social media, confirming their status as a modern staple.
What is the difference between milky white and stark white nails?
The key difference is opacity and undertone. A stark white is a completely opaque, bright, pure white, similar to correction fluid. It provides a bold, high-contrast look. A milky white is a semi-translucent or sheer white, often with a softer, slightly off-white undertone. It offers a softer, more natural “your-nails-but-better” aesthetic that is very popular in ‘clean girl’ trends.
How do you fix streaky white polish?
To fix streaky white polish, apply thin coats and allow ample drying time between them. Streakiness is usually caused by applying coats that are too thick or not letting the previous layer dry fully. For a flawless finish, apply your first coat as evenly as possible (even if it’s streaky), let it dry completely, then apply a second thin coat, which should even out the coverage. Using a high-quality, self-leveling polish also helps minimize air bubbles in white.
What nail shape looks best with white?
White polish is incredibly versatile and complements almost every nail shape. However, certain shapes enhance specific styles. Almond shape nails and coffin nail designs look particularly elegant with sophisticated styles like ombre and V-tips. Short square nails are perfect for bold, solid white or simple patterns, while stiletto nail art provides a dramatic canvas for bold geometric or chrome designs.
Can you wear white nails in the winter?
Absolutely! The idea that white nails are only for summer is outdated. Winter white is a chic and popular fashion trend. Designs like white holiday nails with silver snowflakes, cozy cable-knit textured nails, or a simple creamy white manicure look incredibly sophisticated during the colder months and stand out beautifully against darker winter wardrobes.
How do you make white nails look good on pale skin?
To make white nails pop on pale skin, choose the right undertone. A very stark, cool-toned white can sometimes wash out pale skin. Instead, opt for a slightly softer, creamy white or a milky white with a hint of a pink or beige undertone. The viral white chrome nail finish is also universally flattering as its pearlescent sheen reflects light and complements all skin tones.
What is the best top coat for white nail designs?
For white gel polish, a no-wipe, non-yellowing gel top coat is essential. It protects the color from UV damage and stains. For intricate art, a thicker top coat can help smooth out textures from glitter or decals. For a modern look, a matte top coat can create a sophisticated, velvety finish that is especially striking on white nails.
Are white nails considered professional for work?
Yes, in most professional settings, simple white nail designs are considered very chic and appropriate. A classic solid white, a subtle ombre, a modern French tip, or minimalist swirls are all excellent choices. They fall into the neutral category, like nude or light pink manicures, and convey a clean, polished, and put-together appearance, aligning with most workplace dress codes.
How do you remove white glitter nail polish?
To easily remove stubborn white glitter polish, use the foil method. Soak a cotton ball piece in acetone, place it on your nail, and wrap your fingertip in a small square of aluminum foil. Let it sit for 10-15 minutes. The foil traps heat and allows the acetone to dissolve the polish and glitter, which should then slide off easily with the cotton ball, preventing harsh scrubbing. This is considered a safe removal technique.
Final Thoughts on Your Perfect White Manicure
You’ve just explored 11 essential trends that prove white nails with designs are one of the most versatile and stylish choices you can make for your manicure in 2026. Whether you’re drawn to the timeless elegance of a white ombre nail effect for a wedding or the modern edge of a matte white geometric pattern, the perfect design is waiting for you. This guide has shown that with the right techniques and a little creativity, you can achieve a salon-quality look at home.
Don’t be afraid to experiment. Try the sponge method for a flawless gradient, play with chrome powders for that viral glazed look, or use simple stickers to create intricate-looking art in minutes. A white manicure is your personal canvas.
Which white nail design are you excited to try first? Share your favorite in the comments below.
Last update on 2026-04-27 / Affiliate links / Images from Amazon Product Advertising API