Are you tired of staring at your solid color and wishing for a vibrant change, but absolutely terrified of destroying your healthy roots with bleach? It is a common struggle, but wanting bold, vivid hair inspiration does not mean you have to sacrifice your entire mane to harsh chemicals.
Hair color ideas ends only, also known as dip dyeing, involves applying color strictly to the bottom section of your hair. This low-maintenance technique creates striking contrast while preserving your natural roots, preventing severe bleach damage and eliminating the need for frequent root touch-ups.
Drawing from comprehensive analysis of current data and proven methodologies, localized chemical processing is the safest way to experiment with high-impact color. In this guide, you will discover seven actionable, damage-free tips for achieving stunning partial hair coloring. Prepare to find your next favorite low-commitment look that completely transforms your style.
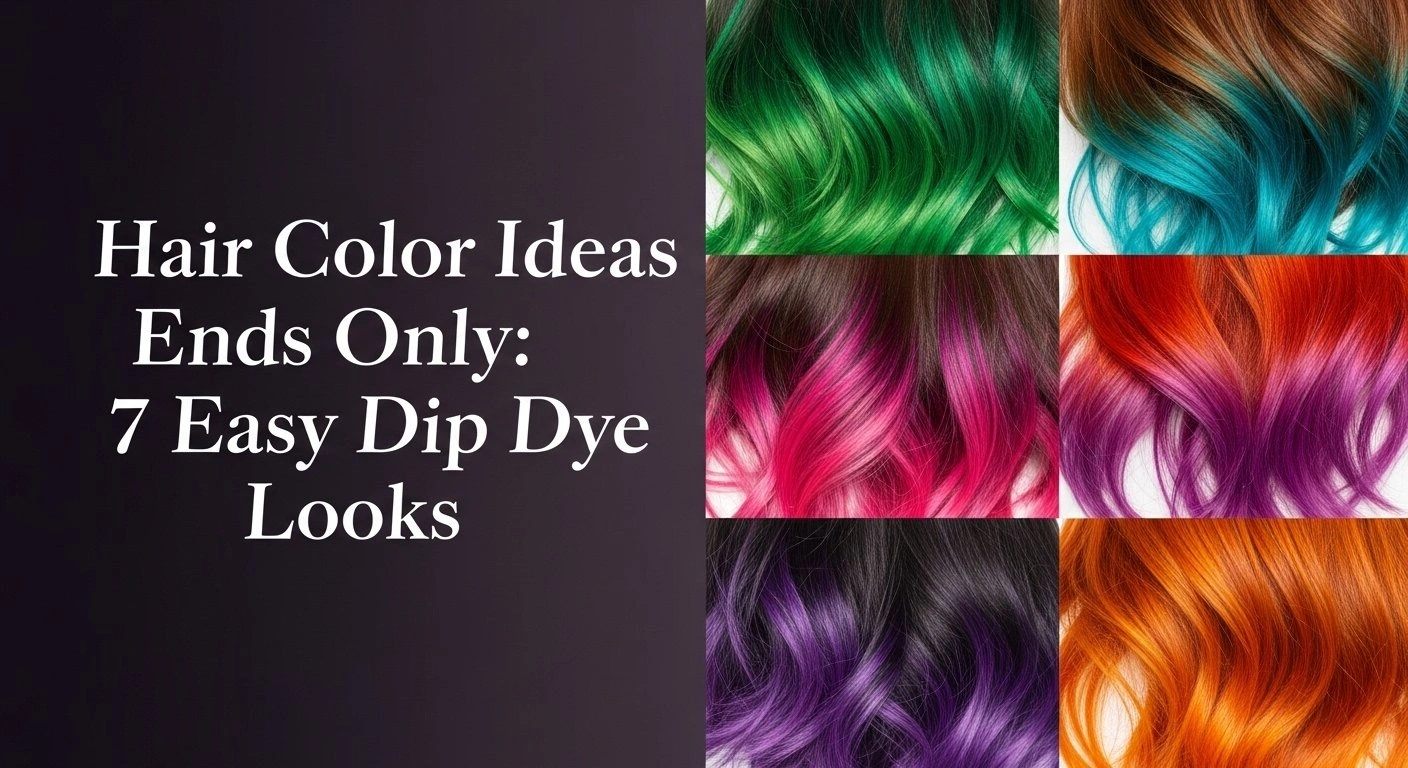
7 Easy Dip Dye Looks for Stunning Hair Color Ideas Ends Only
There are numerous ways to achieve stunning hair color ideas ends only, ranging from vivid neon pinks on dark bases to subtle blonde transitions. By carefully selecting your base-to-tip contrast, you can create a customized look that fits your aesthetic and maintenance preferences.
When coloring the ends of hair, the possibilities for creativity are virtually endless. Whether you are aiming for striking dark hair blonde ends or playful brown hair pink tips, the key to success lies in understanding the relationship between your starting level and your desired result. Dip dye techniques offer a fantastic way to explore hair tips color ideas without the long-term commitment of a full-head application. This approach is particularly beneficial because it focuses the chemical processing on the oldest part of the hair strand, keeping the delicate roots and scalp completely safe.
The beauty of these styles is their versatility. You can opt for a sharp, high-contrast block of color or a soft, melted transition depending on your application method. Before beginning any chemical process, especially if you are lifting dark hair, it is crucial to assess your hair’s health. The ends are often the most porous, meaning they will grab color quickly but may also release it just as fast. Using the right products and techniques will ensure your vibrant new tips remain beautiful and healthy.
1. Vivid Neon Pink Ends on Dark Hair

Save this stunning high-contrast pink dip dye idea to your Hair Inspiration board!
To achieve vivid neon pink ends on dark hair, you must first pre-lighten the tips to a pale yellow before applying a high-pigment semi-permanent dye. This ensures the vibrant color shows up brilliantly against the dark base.
When you have a dark base and want vivid neon ends, bleach is non-negotiable. The dark underlying pigment must be removed so the bright pink can truly pop. This high-contrast look is perfect for those who want a bold statement. Because you are only bleaching the tips, you avoid the severe damage associated with full-head lightening.
Understanding level system coloring is crucial here. Dark hair requires significant lift, often needing a strong developer cream to break through the melanin. However, since the ends are fragile, careful timing and protective treatments are essential to prevent split ends and breakage.
Products & Tools Used
- 30 Volume developer cream and powder bleach for lifting dark pigment
- High-pigment neon pink semi-permanent ends dye (like Arctic Fox Virgin Pink)
- Mixing bowl and brush
- Aluminum foil for clean sectioning
- Color safe conditioner for aftercare
Application Steps
- Sectioning your hair into manageable quadrants, clipping away the top layers.
- Applying the bleach mixture only to the bottom 3-4 inches of the hair ends.
- Wrapping the bleached sections in aluminum foil and processing until pale yellow.
- Rinsing out the bleach thoroughly and drying the ends completely.
- Saturating the lightened tips heavily with the neon pink dye.
- Timing the color for 45 minutes, then rinsing with cold water to seal the cuticle.
Pro-Tip: As a licensed cosmetologist, I recommend applying a pH balancer immediately after bleaching and before applying your vivid pink to ensure the color grips the hair shaft evenly and lasts longer.

2. Subtle Blonde Ombre Ends for Brunettes

Pin this seamless brunette-to-blonde color melt for your next salon visit!
Creating subtle blonde ombre ends for brunettes requires a blending technique, like backcombing, to ensure a seamless transition without harsh lines. This method results in a natural, sun-kissed appearance.
For those seeking subtle blonde hair color ideas for ends only, the ombre technique is ideal. Unlike a blunt dip-dye, ombre hair ends melt softly from the dark base into lighter tips. This creates natural looking ends that are exceptionally low maintenance, as the root growth is imperceptible.
The secret to this look is mastering the transition to avoid brassy ends. Proper tonal neutralizing is required after lightening. By using an ash or pearl-based toner, you counteract the unwanted orange hues that naturally appear when lifting brunette hair, resulting in a sophisticated, blended finish.
Products & Tools Used
- Balayage or highlighting kit designed for dark hair
- Toner for hair (ash or pearl based to neutralize warmth)
- Sectioning clips
- Teasing comb for seamless blending
- Deep hair health mask
Application Steps
- Combing and teasing the hair just above where you want the blonde to start (this prevents a harsh line).
- Painting the lightener onto the ends, feathering the product upward toward the teased section.
- Processing the lightener while frequently checking the lift level.
- Rinsing the lightener out using a clarifying shampoo.
- Toning the wet ends with an ash-based toner for 10-15 minutes to eliminate orange/brassy hues.
- Conditioning deeply to restore moisture to the bleached hair ends.
Pro-Tip: To achieve the ultimate seamless blend, use a “V” shaped painting technique on each section of hair rather than applying lightener straight across.

3. Icy Silver Tips for Black Hair

Save this high-contrast icy silver dip dye to your edgy hair board!
Achieving icy silver tips on black hair demands lifting the ends to a pale platinum before applying a cool-toned silver demi-permanent color. This high-contrast look often requires multiple bleaching sessions to safely remove dark pigment.
Pairing black hair with metallic hair ends creates a striking, high contrast visual. The transition from level 1 black to a level 10 silver is challenging but incredibly rewarding. Similar to achieving black hair blue ends, the underlying warmth must be entirely eradicated.
Because black hair holds so much pigment, over-processing is a significant risk. Lifting too quickly can lead to severe hair breakage. It is vital to prioritize molecular bond repair treatments throughout the process to maintain the integrity of the hair structure.
Products & Tools Used
- High-lift bleach and 30 volume developer
- Icy silver/platinum demi permanent color or toner
- Purple shampoo (to neutralize yellow tones)
- Microfiber towel
- Bond repair treatment (like Olaplex)
Application Steps
- Sectioning the bottom 2 inches of hair.
- Applying the bleach carefully. Note: Black hair may require two separate bleaching sessions a week apart to reach pale yellow safely.
- Neutralizing warmth by washing the lifted ends with a high-quality purple shampoo.
- Toning the ends with the silver/icy demi-permanent dye.
- Processing the silver color according to manufacturer instructions.
- Sealing the look with a heavy molecular bond repair treatment to prevent split ends.
Pro-Tip: When dealing with black hair, never try to lift past a pale yellow in one day. Focus on bond building technology between sessions to maintain the integrity of your capillary tips.

4. Pastel Lavender Dip Dye on Blonde Hair

Pin this dreamy pastel lavender ends idea for your spring hair makeover!
Applying pastel lavender dip dye to naturally blonde hair is a simple, damage-free process using temporary color-depositing conditioners. Since the hair is already light, no harsh bleaching is required.
If you are looking for pastel lavender hair color ideas for blonde ends, you have the easiest path. Because your base is already light, you can enjoy damage free tips by simply using temporary color tips. This allows for frequent experimentation without compromising hair health.
Blonde ends often exhibit higher cuticle hydrophobicity, meaning they absorb pastel pigments readily. The porous nature of lightened or naturally blonde hair acts as a sponge for these gentle conditioning dyes, creating a soft, dreamy transition.
Products & Tools Used
- Pastel lavender semi-permanent ends color (conditioning base)
- Nitrile gloves
- Wide-tooth comb
- Vaseline for skin protection (if applying near the face/neck)
- Color-protecting dry shampoo
Application Steps
- Combing clean, dry blonde hair to remove any tangles.
- Applying the lavender color directly to the bottom 3 inches of the hair using gloved hands.
- Saturating the ends thoroughly, using the wide-tooth comb to pull the color up slightly for a softer fade.
- Timing for 30-45 minutes (conditioning colors can sit longer without damage).
- Rinsing with cool water until the water runs clear.
- Styling with soft waves to highlight the pastel transition.
Pro-Tip: Pastel colors fade incredibly fast. To counteract fading color, mix a dollop of your lavender dye into your regular conditioner to refresh your pastel hair tips every time you wash.
5. Edgy Cherry Red Bottom Layer

Love this peekaboo color? Save it to your alternative hair ideas board!
An edgy cherry red bottom layer is created by coloring only the underneath section of the hair, allowing the vibrant red to peek through the dark canopy. This placement creates a dynamic, hidden effect that shows during movement.
For those interested in vivid red hair color ideas for black hair ends, the underlayer technique is fantastic. This bottom layer hair color approach provides a unique peekaboo ends color that can be subtle or bold depending on how you style it. It protects the top canopy of your hair while still delivering a striking visual impact.
Red dyes are notorious for fading quickly because oxidative dyes with red pigments have large molecules that wash out easily. Proper sealing and maintenance are crucial to keeping the red vibrant and preventing it from bleeding into the darker top layer.
Products & Tools Used
- High-lift red permanent dye (if lifting virgin dark hair without bleach) OR bleach + vivid red direct dye
- Sectioning clips (crucial for separating the top canopy)
- Mixing bowl and brush
- Hair cuticle sealer
- Dark towel (red stains heavily!)
Application Steps
- Sectioning the hair horizontally from ear to ear, securely clipping the top half completely out of the way.
- Applying the color or lightener strictly to the bottom half section, focusing heavily on the ends.
- Processing according to the specific red dye’s instructions.
- Rinsing the bottom layer in the sink separately from the top layer to prevent color bleeding onto the rest of your hair.
- Sealing the red with a low-pH conditioner to lock in the quickly-fading red molecules.
- Drying completely before letting the top layer down to reveal the bottom layer hair color.
Pro-Tip: Red pigment molecules are the largest and fade the fastest. Use a professional grade color-depositing shampoo weekly to prevent your edgy cherry red from turning a washed-out copper.

6. Metallic Rose Gold Hair Extremities

Save this elegant metallic rose gold tip dye to your everyday hair inspiration board!
Metallic rose gold extremities are achieved by carefully balancing pink and golden toners over bleached hair ends. This creates a sophisticated, office-friendly shimmer.
The appeal of metallic hair ends lies in their reflective quality. Rose gold, applied to the hair extremities, is a stunning variation of ombre hair ends that feels modern yet elegant. It is a highly requested salon look that blends beautifully with lighter brown bases.
Formulating true rose gold requires a precise understanding of the complementary color wheel. The delicate balance between warm gold (yellow) and cool rose (pink/red) is what gives the metallic finish its unique dimension, preventing it from looking like a flat pastel.
Products & Tools Used
- Pre-lightening kit (ends must be lifted to a level 8 or 9)
- Rose gold metallic toner or semi-permanent gloss
- Aluminum foil
- Color safe conditioner
- Heat protectant spray (metallics need shine!)
Application Steps
- Bleaching the hair extremities to a light yellow (inside foils for heat retention).
- Rinsing and washing out the bleach with a gentle shampoo.
- Applying the rose gold toner to the damp ends.
- Combing the toner through meticulously to ensure completely even saturation (metallics show patchiness easily).
- Processing for 20 minutes to allow the metallic pigments to grab.
- Styling with a flat iron or curling wand, using a shine serum to enhance the metallic reflection.
Pro-Tip: True rose gold relies on the underlying yellow pigment of bleached hair. Do not over-tone your hair with purple shampoo before applying rose gold, or you will end up with a cool pastel pink instead of a warm metallic hair end.

7. Peekaboo Emerald Green Tips

Pin this gorgeous jewel-toned peekaboo color to your fall hair trends board!
Peekaboo emerald green tips are created by selectively coloring only the lowest nape sections of the hair. This ensures the jewel-toned green only shows when the hair moves or is tied up.
For a unique take on neon green hair color ideas for edgy tips, the peekaboo placement is perfect. This peekaboo ends color subtly incorporates a bold, unnatural hue into a natural brunette base. The colored hair bottom remains hidden under the main canopy, offering a flash of vibrant color.
Applying green dye requires careful color correction awareness. Because green is composed of blue and yellow, improper application or fading can result in muddy or separated tones. Ensuring the hair is lifted cleanly and saturated fully prevents these issues.
Products & Tools Used
- Emerald green vivid hair color (like Manic Panic Enchanted Forest)
- Lightener kit
- Sectioning clips
- Nitrile gloves (green stains terribly!)
- Leave-in treatment
Application Steps
- Sectioning out only the very bottom nape-of-the-neck hairs, clipping the entire rest of the hair up.
- Bleaching just the last 2 inches of this bottom section.
- Rinsing thoroughly and drying.
- Saturating the lightened tips with the emerald green dye, wearing gloves.
- Protecting the rest of your hair by wrapping the green tips in foil while they process.
- Rinsing with ice-cold water until clear, then applying a leave-in treatment to seal.
Pro-Tip: Green dye fades to blue or yellow depending on its base. Use a clarifying shampoo to wash the rest of your head, but keep it away from your colored hair bottom to maintain that rich, jewel-toned emerald.

Key Takeaways: Your Quick Guide to Hair Color Ideas Ends Only
Before embarking on your dip dye journey, reviewing the most critical application and maintenance rules ensures a successful result. These core principles apply whether you are aiming for vivid contrasts or soft blends.
Understanding the foundational elements of a hair color ideas ends only summary is vital for DIY success. While dip dye techniques are generally simpler than full-color applications, they still require respect for the chemical process. A proper partial hair coloring overview highlights that preparation and aftercare are just as important as the dyeing itself. By following professional guidelines, you protect your hair’s integrity while achieving stunning results.
Key Takeaways:
- Protect Your Roots First – The primary benefit of hair color ideas ends only is that it keeps harsh chemicals away from your scalp, preserving your virgin hair growth and preventing severe overall damage.
- Lighten Safely and Slowly – When lifting dark hair to achieve vivid neon ends, multiple gentle bleaching sessions are better than one aggressive session to prevent hair breakage at the fragile tips.
- Blend to Avoid Harsh Lines – If you prefer a natural look over a blunt dip-dye, backcomb (tease) your hair slightly where the bleach starts to create a seamless ombre hair ends transition.
- Cold Water is Your Best Friend – To combat fading color and color bleeding, always wash your vivid colored hair tips in the coldest water you can stand to keep the cuticle sealed.
- Pre-Tone Before Vivids – Always use a purple shampoo or ash toner on your bleached ends to remove yellow tones before applying pastels or cool colors like silver and blue.
- Invest in Bond Repair – Capillary tips are the oldest and most fragile part of your hair; using bond building technology (like Olaplex) is non-negotiable after chemical processing.
FAQs About Hair Color Ideas Ends Only
How to dye hair ends only at home without it looking patchy?
To dye hair ends only at home evenly, thoroughly saturate the tips with dye using your hands and comb it through with a fine-tooth comb to ensure every strand is coated.
Patchiness usually occurs when the hair isn’t fully saturated or the sections are too thick. Take small, manageable sections, apply the dye generously, and massage it into the hair extremities. Wrapping the ends in foil can also help retain heat and moisture, leading to a more even color deposit.
Can I dip dye hair without bleach?
Yes, you can dip dye hair without bleach if you are applying a darker color to lighter hair, or using temporary color-depositing products.
If you have dark brown or black hair and want pastel or bright vivid ends, you absolutely must use bleach to lift your natural pigment first. However, if you are blonde, you can apply almost any semi-permanent ends color directly. Brunettes can also use color-depositing waxes or hair chalks for a one-day, no-bleach look.
How long does dip dye hair last?
Dip dye hair lasts anywhere from 4 to 10 weeks depending on the type of dye used, your hair’s porosity, and your washing routine.
Permanent dyes and dark colors last longer, while pastels and semi-permanent vivids will fade much faster. Because the hair strands ends are usually the most porous part of the hair, they may grab color very intensely at first but release it quicker over time. Washing with cold water and color safe conditioner extends longevity.
How to avoid harsh lines when dyeing ends?
To avoid a harsh, blunt line when dyeing ends, use the teasing (backcombing) method or a vertical painting technique (balayage).
By teasing the hair right above where you want the color to start, the bleach or dye is applied unevenly in a micro-staggered pattern. When you comb it out, it creates a perfectly seamless, diffused gradient hair ends transition rather than a solid horizontal block of color.
Does coloring only ends damage hair?
Coloring only the ends causes localized damage to the tips, particularly if bleach is used, but it protects the scalp and mid-lengths from chemical stress.
The ends are already the oldest and driest part of your hair. Bleaching them can exacerbate split ends and dry tips. However, the major benefit of this style is that if the ends become too damaged, you can simply trim them off without losing a significant amount of your overall hairstyle.
How to prevent hair dye from bleeding onto clothes?
To prevent hair dye from bleeding, rinse the freshly dyed ends with ice-cold water until it runs completely clear, and seal with a low-pH conditioner.
Vivid semi-permanent dyes are notorious for staining. After your initial rinse, avoid wearing white or light-colored shirts while your hair is wet. Sleeping with your hair wrapped in a dark microfiber towel or silk bonnet can also protect your pillowcases from color bleeding.
What are the best colors for dark hair ends?
The best low-maintenance colors for dark hair ends are deep cherry reds, rich magentas, and vivid purples, as they require less intense bleaching.
Lifting dark hair to platinum blonde to achieve pastel colors is highly damaging and difficult. Warm, vivid tones like ruby red, hot pink, and magenta are much easier to achieve because they work with the natural warm, brassy undertones exposed when you bleach dark hair.
How to fix a bad dip dye job?
You can fix a bad dip dye job by applying a slightly darker semi-permanent color over the mistake to blend it, or by simply trimming the ends off.
If the line of demarcation is too harsh, you can use a demi-permanent color that matches your natural root color to create a “shadow root” effect, pulling the darker color slightly down over the transition line to blur it. If the ends are severely damaged from over-processing, a blunt haircut is the healthiest solution.
Can you dip dye curly hair?
Yes, dip dyeing curly hair looks incredible because the curls naturally break up the color line, making harsh transitions less visible.
When coloring the tips of curly hair, it’s best to apply the color curl-by-curl (the “pintura” method) rather than in straight horizontal sections. This enhances the natural texture and ensures the colored hair bottom pops dynamically as the curls move and bounce.
How to use an AI hair color changer to test dip dye looks?
To test dip dye looks virtually, upload a well-lit selfie to a free AI hair color changer app, select the “ombre” or “ends only” feature, and select your desired color.
Using a virtual hair color tool is the best way to see if a specific bold shade complements your skin tone before committing to bleach. Look for apps that allow you to adjust the “fade point” so you can perfectly visualize exactly where the color will transition on your actual hair length.
Final Thoughts on Hair Color Ideas Ends Only
Experimenting with hair color ideas ends only is arguably the most liberating way to transform your look. By isolating the chemical process strictly to the distal hair, you unlock endless creative possibilities—from subtle, sun-kissed ombre to striking, vivid neon tips—without risking the health of your scalp or committing to endless root touch-ups. It is the ultimate low-maintenance, high-impact style choice for modern hair enthusiasts.
Whether you decide to tackle a simple pastel tint at home or visit a professional for a complex metallic color melt, remember that preparation and aftercare are key. Invest in high-quality bond builders, never rush the bleaching process, and always rely on cold water to keep your colored hair tips looking fresh and vibrant for weeks.
Which of these 7 dip dye looks are you most excited to try this season? Are you leaning toward a subtle blend or a bold pop of high-contrast color? Let us know in the comments below, and don’t forget to save your favorite looks to Pinterest for your next color session!
Last update on 2026-04-13 / Affiliate links / Images from Amazon Product Advertising API