Struggling to draw hair that doesn’t look like stiff, lifeless spaghetti? You’ve gathered tons of images, but your characters’ hair still comes out flat, lacking the dynamic flow and volume you see in professional art. This common frustration can make character design feel like an impossible puzzle.
To master a hairstyle ideas art reference, artists must first map the human scalp anatomy, block out the primary hair volumes using the ribbon method, and then render textures by clumping strands together rather than drawing individual hairs. This anatomy-based approach ensures realistic flow, accurate shading, and dynamic movement in character design.
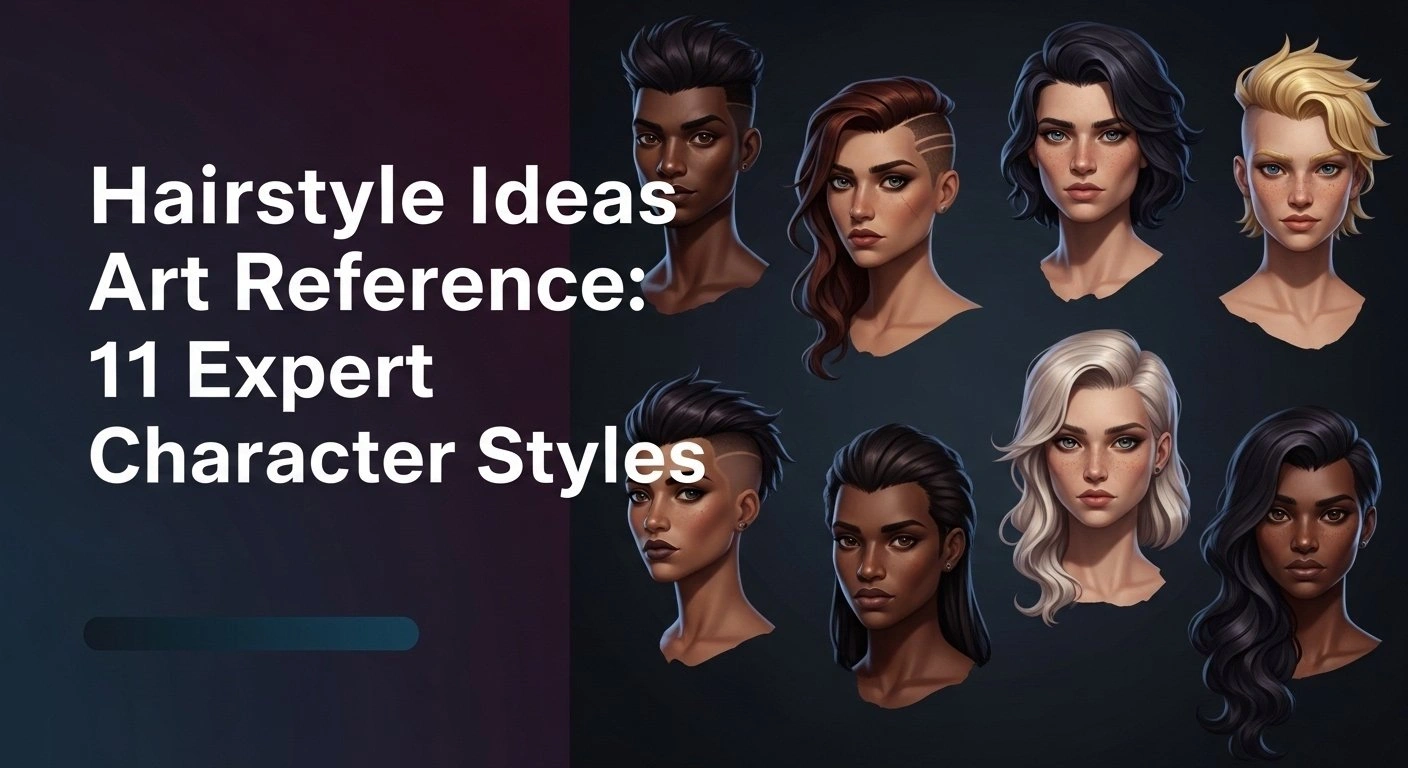
Drawing from established best practices and proven artistic methodologies, this guide is more than just a gallery of images—it’s a masterclass in hair construction. You’ll discover the structural secrets behind 11 expert hairstyles, transforming your visual library from passive inspiration into an actionable manual for creating portfolio-ready character art.
Master Your Hairstyle Ideas Art Reference: How Do You Draw Realistic Volume and Flow?
The single biggest hurdle for artists learning how to draw hair is the disconnect between seeing a hairstyle and understanding its three-dimensional form. A standard hair drawing reference often fails to teach the underlying physics—why hair clumps together, how it reacts to gravity, and the way it grows from the human scalp anatomy. This guide bridges that gap. We will move beyond just looking at styles and dive into an anatomy-based approach, providing you with a foundational hair reference sheet and visual library built on the expert character design principles used by professionals. By mastering the ribbon method and understanding how hair frames the face and defines silhouette, you’ll learn to solve the core problem of fixing flat hair and start creating dynamic, believable characters.
11 Expert Character Styles For Your Visual Library 2026
To build a truly effective hair visual library, you need more than just inspiration; you need a structured breakdown of diverse styles. This section serves as a comprehensive masterclass, providing a curated collection of character hair ideas complete with step-by-step technical guidance. We will explore everything from a curly hair art reference to spiky anime hair, combining aesthetic appeal with actionable instruction. Each of the 11 styles includes professional tips on sketching, rendering texture, and shading hair, transforming your approach from simply copying a reference to truly understanding its form, function, and personality within character design.
1. Sketching Long Flowing Hair References

Pin this flowing hair sketching guide to your ‘Character Art References’ board!
A long flowing hair reference is foundational for any artist focused on portrait drawing basics. The key challenge is to create a sense of weight and movement, ensuring the hair cascades down realistically and reacts to movement rather than appearing stiff. This requires a focus on large, cohesive shapes and understanding how hair clumps together into major masses. The ribbon method is the most effective technique for achieving this, as it forces the artist to think in three dimensions from the very beginning.
Art Supplies
- Premium 2B and 4B graphite pencils for rich shading techniques
- A kneaded eraser for lifting specular highlights without damaging paper
- Blending stumps for softening hard hair edges
- Smooth Bristol board paper for clean line art techniques
Technique Steps
- Map the underlying skull using the Loomis method for heads to ensure the hair has proper volume and doesn’t sit flat on the cranium.
- Block out forms using the ribbon method, establishing the primary masses of the hair as overlapping 3D ribbons rather than individual strands.
- Establish the hair part and sketch directional lines showing how the hair cascades down and reacts to movement.
- Render texture by clustering the hair into distinct groups, darkening the shadows where the hair overlaps with the neck and shoulders.
- Add highlights by lifting graphite with your kneaded eraser at the peak of the curves where the hair reflects light.
Pro-Tip: When drawing long hair, always focus on the rhythm and flow in linework. Utilizing sub-surface scattering in hair principles even in graphite—by keeping the terminator lines soft where light penetrates the hair masses—will instantly elevate the realism of your piece.

2. Rendering 4C Curly Hair Textures

Save these essential tips for painting beautiful textured hair to your digital art board!
Learning how to draw 4C hair texture art reference is a crucial skill for inclusive character design. The most common mistake artists make is attempting to draw every individual coil, which results in a flat, overworked texture. The professional approach is to focus on the overall hair volume art and how the dense curls clump together to form a larger silhouette. This style powerfully indicates personality and defines silhouette, making it a fantastic tool for creating memorable characters.
Art Supplies
- A professional digital drawing tablet with tilt recognition for dynamic digital sculpting
- Textured digital brush packs (chalk or charcoal emulators) for realistic textured hair art
- An ergonomic drawing glove to ensure smooth strokes when rendering texture
- Reference monitor for accurate color theory for hair shading
Technique Steps
- Outline the grand silhouette first. 4C hair defies gravity, so map out the outer boundary of the shape before adding any internal details.
- Paint values using a large, textured brush. Block in the darkest core shadows closest to the human scalp anatomy.
- Clump strands by suggesting volume through macro-shapes rather than drawing micro-coils. Group the hair into larger spherical or cloud-like masses.
- Shade hair using ambient occlusion in hair clumps, pushing the deepest darks where the masses intersect.
- Add highlights sparingly. Unlike straight hair, highly textured hair diffuses light. Use a soft, warm color for a halo effect rather than sharp, glossy streaks.
Pro-Tip: Avoid using a purely black color for the base. By utilizing a deep, rich brown or plum base and applying rim lighting on hair along the silhouette, you emphasize the stunning hair volume art and prevent the illustration from looking like a flat silhouette.

3. Designing Spiky Anime Hair Styles

Pin this guide on drawing sharp, dynamic anime hair to your manga art board!
Mastering how to draw spiky anime hair requires understanding its unique stylization logic. Unlike realistic styles, anime hair is about communicating energy and personality through sharp, dynamic shapes. A proper anime hair reference sheet will always show how large clumps radiate from a single point on the crown. This technique is central to manga character design, where hair often defies gravity and conveys style through its silhouette. The key is to think in terms of large, tapered shapes rather than soft, individual strands.
Art Supplies
- Dual-tip alcohol markers for flawless lineart + flat color blending
- Archival waterproof fineliner pens for crisp inking lineart
- Heavyweight marker paper to prevent bleeding when blending colors
- A white gel pen for striking, sharp anime style hair highlights
Technique Steps
- Locate the crown point or hair whorl on the scalp. In stylized hair ideas, almost all major spiky clumps radiate outward from this single origin point.
- Sketch the hair in three distinct zones: the front bangs, the side hair framing the face, and the back volume.
- Draft large, sweeping banana or shark-fin shapes. Anime hair always tapers at the end into sharp points.
- Ink the outer silhouette with a thicker line weight to make the character pop, using thinner lines for internal strands.
- Apply flat colors, then use your markers to add a hard-edged, cell-shaded shadow beneath overlapping spikes.
Pro-Tip: When utilizing hairstyles for male anime characters reference, master the stylization logic of “Big, Medium, Small.” Never make your hair spikes the exact same size. Varying the width and length of the spikes creates a dynamic, professional anime hair reference sheet aesthetic.

4. Blocking Out the Classic Bob Cut

Save this structural breakdown for drawing the perfect bob cut to your references!
A classic bob cut reference is an excellent exercise in simplifying shapes and understanding how hair interacts with the head’s underlying geometry. This short hair art reference for female characters is all about capturing the clean silhouette + shape. The hair frames the face and curves inward towards the jaw and neck, acting as a structural element that enhances the character’s facial features. The challenge is to make the straight hair drawing look sleek and voluminous rather than like a solid, lifeless helmet.
Art Supplies
- Drawing tablet or iPad for precise digital painting strokes
- Soft blending brushes (digital or physical) to manage soft vs hard hair edges
- A stabilizing glove for pulling long, uninterrupted curves
- High-quality reference photos demonstrating female hair reference front back side view
Technique Steps
- Map the skull carefully; because a bob cut reference relies on thin, straight hair, any errors in cranial proportion will be immediately visible.
- Draw the parting line, then drop a smooth, curved guideline down toward the chin to define how the hair frames the face.
- Block the hair as a solid helmet-like shape initially, then carve into it. Ensure the bottom edge curves gently inward toward the neck due to gravitational effects on hair.
- Separate the front fringe (bangs) from the side locks, paying attention to the distinct corner where they meet.
- Render a horizontal band of light (a halo) around the widest part of the head to emphasize the glossy straight hair drawing texture.
Pro-Tip: The secret to an expert short hair art reference for female characters is understanding anisotropic highlights. Because straight hair strands run parallel, the highlight will stretch perpendicular to the strands, creating that signature sleek, horizontal band of shine.

5. Constructing Complex Braided Hair

Don’t let braids intimidate you—pin this step-by-step breakdown to your sketchbook ideas!
Learning how to draw braided hair step by step is often intimidating for artists due to the visual complexity. The key is simplifying complex braids into a repeatable geometric pattern. Instead of getting lost in the individual strands, you should focus on the interlocking structure. Each section interlocks with the next, creating a rhythm of overlapping shapes. A successful braided hair drawing communicates this structure clearly, showing how the form tapers at the end and has tangible volume.
Art Supplies
- 0.3mm mechanical pencil for intricate, precise line art techniques
- A mono zero eraser pen for creating tiny, sharp highlights within the braids
- Smooth, bleed-proof marker paper for clean rendering
- Reference images contrasting braids vs twists art
Technique Steps
- Draw a single, curved centerline down the back or shoulder to establish the overall movement and weight of the braid.
- Sketch zig-zag lines down this center axis, which will serve as the intersecting points for your hair sections.
- Build the braid by drawing continuous interlocking “Y” shapes or interlocking hearts down the guideline, ensuring the sections get smaller as the braid tapers at the end.
- Round out the edges of your geometric shapes to give the braided hair drawing volume and a soft, organic feel.
- Shade deeply in the crevices where the strands tuck under one another, utilizing strong ambient occlusion in hair clumps to make the braid pop.
Pro-Tip: When simplifying complex braids, avoid drawing straight lines inside the braid sections. Instead, draw curved lines that follow the contour of the individual hair clump. This implies spherical volume and prevents the braid from looking like a flat tire track.

6. Illustrating Messy Bedhead Styles

Master the art of controlled chaos! Save this messy hair drawing guide for your OC designs.
The main challenge in learning how to draw messy hair without it looking bad is achieving “controlled chaos.” A successful messy hair reference isn’t just a scribble; it’s a structurally sound hairstyle with deliberately broken silhouettes and flyaways. It’s an exercise in understanding rhythm and flow in linework, where strands overlap with each other in an organic yet visually pleasing way. This is a powerful tool for injecting character + personality into your designs.
Art Supplies
- 4B or 6B soft graphite pencils for loose, expressive sketching
- A kneaded eraser to gently lift out stray strands
- Two-finger artist drawing glove to prevent smudging while establishing hair flow drawing
- Reference photos highlighting aesthetic hairstyles art
Technique Steps
- Block out the basic, neat hairstyle first. You must know what the hair looks like structurally before you can effectively mess it up.
- Disrupt the silhouette by breaking the main masses into smaller, uneven clumps that jut out at unexpected angles.
- Draw crossing layers. In a neat style, hair flows parallel; in a messy hair reference, clumps frequently overlap with and cross over each other.
- Detail flyaways by using quick, flicking motions with a sharp pencil or fine digital brush, extending thin strands outside the main silhouette.
- Soften the roots and internal shadows to maintain a fluffy, low-density appearance.
Pro-Tip: When figuring out how to draw messy hair without it looking bad, the secret is the 80/20 rule. Keep 80% of the hair mass cohesive and structurally sound, and use the remaining 20% for chaotic flyaways and broken silhouettes. Too much chaos destroys the hair mass distribution.

7. Shading the Modern Undercut

Nail the perfect skin fade! Save this undercut reference for your male character designs.
An undercut hairstyle art reference is an excellent study in contrasting textures. It combines the challenge of how to draw a buzz cut art reference on the sides with rendering voluminous hair on top. This popular male hairstyle reference requires a solid grasp of cranial anatomy, as the faded sides directly reveal the shape of the head. Understanding the difference between male vs female hairlines is crucial for an authentic look, as the style exposes the scalp and temples.
Art Supplies
- A range of graphite pencils (2H to 4B) to build the skin fade gradient
- High-quality blending stumps (tortillons) for seamless shading techniques
- A fine detail eraser for cutting in sharp edge-ups along the hairline
- Reference material showing modern male hair art reference photos
Technique Steps
- Map the exact hairline, paying close attention to the temples and the curve behind the ear. Accuracy here is critical for an authentic male hairstyle reference.
- Establish the weight line (the disconnect where the shaved side meets the long top hair).
- Stipple or shade the sides using a 2H pencil, creating a smooth gradient that goes from completely bald at the neck to a light shadow near the weight line. Use blending stumps for a seamless fade.
- Block the long top hair using dynamic, sweeping strokes that flow backward or to one side.
- Render the top volume, ensuring it heavily overlaps the shaved undercut to create strong visual contrast.
Pro-Tip: When learning how to draw a buzz cut art reference or the faded sides of an undercut, treat the hair like a texture applied directly to the skull. Any lumps in your shading will make the character’s head look deformed. Master fixing unnatural hairlines by studying the natural recession angles of the male temple.

8. Creating Dynamic Ponytail Movement

Give your action poses life! Pin this dynamic ponytail drawing tutorial.
A ponytail drawing reference is less about the style itself and more about mastering flow + movement. It’s the perfect subject for understanding the difference between static vs dynamic poses. The hair attaches to a single anchor point, creating tension on the scalp, while the tail reacts to movement in a whiplike motion. This concept is so fundamental that it’s a core principle in character animation, known as secondary motion in animation, where hair follows the primary action of the body.
Art Supplies
- A Japanese Fude brush pen for sweeping, variable-width line art techniques
- Smooth marker or Bristol paper to prevent the brush from fraying
- White ink or gouache for adding high-contrast specular highlights
- Reference sheets detailing how to draw hair flow and movement
Technique Steps
- Define the anchor point (the hair tie). All hair on the scalp must converge tightly toward this single point.
- Draw tension lines on the scalp. These lines should be straight and taut, showing the physical pull of the ponytail drawing reference.
- Establish the line of action for the ponytail itself based on the character’s movement (e.g., if the character falls down, the ponytail flies up).
- Sketch the tail using an ‘S’ curve or ribbon shape. The base near the tie should be compressed, expanding and widening as it flows outward.
- Add stray flyaways breaking away from the main mass to emphasize the dynamic + static hair contrast and wind velocity.
Pro-Tip: When studying how to draw hair under wind influence, always apply the animation principle of secondary motion in animation. The hair is a secondary element; its movement is a delayed reaction to the character’s primary body movement. It should drag behind the action and continue moving slightly after the character stops.

9. Designing Fantasy Elf Hairstyles

Creating a D&D character? Save these fantasy hair design tips to your reference board!
Designing fantasy hairstyles is an exercise in creative concept + design. A fantasy elf hairstyle art reference often blends natural hair flow with elements from costume design references, like beads, vines, or metallic threads. The hair becomes an extension of the character’s identity, where it integrates with clothing and complements features like pointed ears. These elegant hairstyles art styles push the boundaries of realism, allowing for exaggerated silhouettes and gravity-defying shapes.
Art Supplies
- Professional watercolor pencils for soft, ethereal blending colors
- A water brush pen for activating the pigment seamlessly
- Heavyweight watercolor paper (hot press for smoother line art techniques)
- Reference boards for scifi character hair design reference and high fantasy motifs
Technique Steps
- Design the silhouette with extreme, exaggerated flow. Fantasy hairstyles often ignore gravity to emphasize a magical or ethereal aesthetic.
- Integrate the ears early. Elven ears dramatically alter the hairline and the way side-locks drape down the face.
- Weave in accessories. Draw the beads, crowns, or vines first, then draw the hair wrapping over and under them to ensure they feel embedded, not pasted on.
- Mix textures. Combine a foundation of smooth, flowing elegant hairstyles art with intricate micro-braids or twists for visual interest.
- Render with soft, luminescent lighting, keeping the shadows lighter to maintain a dreamy, high-fantasy atmosphere.
Pro-Tip: When using a fantasy elf hairstyle art reference, treat the hair as an extension of the character’s costume design references. If they are a woodland elf, use rhythm and flow in linework that mimics vines and water; if they are a royal high elf, use rigid, perfectly symmetrical architectural shapes.

10. Painting Wet Hair Effects

Struggling with water effects? Pin this wet hair rendering technique to your digital painting boards!
Learning how to draw wet hair reference is a fantastic study of material properties and lighting + texture. When wet, hair becomes heavier, darker, and more reflective. It clumps into sharp, stringy sections and often exposes the scalp more than dry hair does. The core challenges are fixing hair transparency where it sticks to the skin and mastering the sharp, glossy highlights that make it look convincingly wet. This requires high-contrast specular highlights rendering.
Art Supplies
- An opaque white gel pen or digital hard brush for crisp, sharp specular highlights rendering
- Deep, high-contrast inks or dark digital multipliers for rendering wet, darkened values
- A blending tool for smoothing the transition where hair sticks to the skin
- References showcasing lighting + texture interactions on wet surfaces
Technique Steps
- Flatten the volume. Water makes hair incredibly heavy. Reduce the overall hair volume art by pulling the silhouette tightly against the skull.
- Clump aggressively. Wet hair merges into thick, heavy ribbons that taper into sharp, needle-like points due to surface tension.
- Draw skin transparency. Where the wet hair lies against the forehead or neck, lower the opacity to show the skin color bleeding through the thin strands.
- Darken the overall value. Wet materials absorb more light, so drop the base color of the hair one or two shades darker than its dry state.
- Apply sharp highlights. Contrast the dark base with extremely bright, hard-edged specular highlights to mimic the reflective properties of water.
Pro-Tip: The key to drawing wet hair effects is mastering fixing hair transparency. Use a soft airbrush on a low opacity to paint the character’s skin tone directly over the edges of the wet hair where it clings to the face. This instantly sells the illusion of dampness and weight.

11. Rendering the Vintage Pompadour

Build incredible volume! Save this vintage pompadour reference for your classic characters.
The pompadour is a masterclass in structural volume and form. A good vintage hairstyle reference shows how this style defies gravity, relying on a solid, wave-like structure that is heavily styled. The primary challenge is correcting hair volume to make it look intentionally large and sculptural without appearing like a solid helmet. This requires strong head construction methods to ensure the massive volume is properly anchored to the skull and frames the face in a way that conveys style.
Art Supplies
- Sepia or warm-toned drawing pencils for a classic vintage hairstyle reference aesthetic
- A sharp detail eraser for pulling precise, glossy highlights
- Smooth drawing paper to allow for heavy, slick shading techniques
- Reference photos emphasizing volume and structure
Technique Steps
- Map the hairline precisely, particularly the sharp widow’s peak or squared temples typical of the era.
- Construct the primary shape as a solid, overlapping wave. Use your head construction methods to ensure the massive front roll curves back toward the crown of the head.
- Block the sides, which are traditionally slicked tightly against the skull, creating a stark silhouette contrast with the voluminous top.
- Draw directional comb lines. Pompadours are heavily styled, so the clumps + strands should follow perfectly parallel, sweeping paths.
- Render the shine. Pomade creates a highly reflective surface. Use sharp, high-contrast highlights across the widest curve of the front roll to simulate grease.
Pro-Tip: When correcting hair volume for a pompadour, ensure the center of gravity of the hair mass aligns with the skull. If the front roll extends too far forward past the forehead without a structural anchor, the illustration will lose its anatomy-based approach and look unbalanced.

Key Takeaways: Your Quick Guide to Hairstyle Ideas Art Reference
- Map the Cranium First – You cannot build accurate hair volume art without first defining the human scalp anatomy. The skull provides the structural foundation that dictates how hair drapes and falls.
- Apply the Ribbon Method – When sketching hair, avoid drawing individual “spaghetti” strings. Instead, block the hair out as overlapping, three-dimensional ribbons to establish mass and form.
- Respect the Origin Point – Whether it’s a neat parting, a crown whorl, or an anime cowlick, always determine where the hair grows from. All lines must naturally radiate from this anchor.
- Master Ambient Occlusion – To solve the issue of fixing flat hair, push your darkest darks deep into the crevices where large clumps overlap with one another, utilizing ambient occlusion in hair clumps.
- Adapt to the Texture – Shading + highlights behave differently depending on the surface. Use anisotropic highlights for sleek, straight styles, and soft, diffused rim lighting for dense, coily 4C textures.
- Implement the 80/20 Rule – To achieve an aesthetic hairstyles art look, keep 80% of your hair structurally sound and grouped, using the remaining 20% for detailing flyaways to add life and movement.
People Also Ask About Hairstyle Ideas Art Reference
How to draw realistic hair for beginners?
Beginners should start by drawing realistic hair as large, simplified 3D shapes rather than focusing on individual strands. According to professional artist tips, you must first construct the underlying skull. Once the head shape is accurate, use the ribbon method to block in the major volumes of hair. Only after shading these large, overarching clumps should you begin rendering texture and adding fine flyaways. Drawing strand-by-strand from the beginning guarantees flat, unnatural results.
What is the ribbon method for drawing hair?
The ribbon method is an industry-standard technique where artists conceptualize and draw locks of hair as twisting, three-dimensional ribbons rather than flat shapes. By treating a lock of hair like a folded strip of paper, you force yourself to understand its thickness, how it catches light on the outward curves, and how it casts shadows underneath itself. This anatomy-based approach is essential for simplifying complex forms and achieving believable hair volume art.
How to simplify hair for character design?
To simplify hair for character design, break the hairstyle down into a distinct primary silhouette, secondary clumps, and tertiary flyaways. Professional manga character design relies heavily on this hierarchy. Start by drawing the overarching ‘helmet’ or outer boundary of the style. Then, carve out medium-sized chunks that define the style (like bangs or a ponytail). Finally, add just a few small, broken strands for texture. Over-detailing ruins the stylization logic.
Where to find good hairstyle references for art?
The best resources for hairstyle references include curated Pinterest art boards, ArtStation galleries, and high-definition photography sites focused on salon portfolios. While using an artist-curated library is excellent for studying stylized interpretations, you should always supplement your learning by studying real human models. Looking at barber shop diagrams and editorial fashion photography helps you understand how different textures actually react to lighting before you attempt to stylize them.
How to draw hair from different angles?
Drawing hair from different angles requires a solid understanding of the skull’s geometry and maintaining consistent hair volume across the cranium. When shifting from a front view hair reference to a side or back view, track the specific anchor points—such as the part line or the cowlick. The hair must wrap around the spherical shape of the head. Practicing character turnarounds will help you visualize how the masses overlap differently as the head rotates.
How to draw curly hair art reference?
To draw curly hair accurately, focus on painting the overall volume and outer silhouette first, rather than drawing tight, individual spirals. For looser curls, practice drawing interlocking ‘S’ curves and cylindrical springs. For tighter 4C textured hair art, block out cloud-like masses and focus on deep ambient occlusion in hair clumps. Curly hair diffuses light, so avoid harsh, glossy highlights and instead use soft, warm rim lighting to emphasize the texture.
How to draw hair flow and movement?
Capturing hair flow requires establishing a strong line of action that dictates the direction of the wind or the character’s movement. Hair is subject to the rules of secondary motion in animation; it reacts to the body’s movement with a slight delay. Establish the anchor point on the scalp, then draw sweeping ‘S’ curves that taper at the ends. Add stray strands that break away from the main mass to emphasize the kinetic energy.
What are common mistakes when drawing hair?
The most common mistake is drawing individual strands of “spaghetti hair” instead of grouping hair into structured masses. Other frequent issues include ignoring the human scalp anatomy (resulting in flat hair that lacks volume), placing the hairline too low or too high, and using harsh, stringy highlights instead of rendering light based on the hair’s overall 3D form. Mastering head construction methods easily solves most of these problems.
How does hair attach to the scalp drawing?
Hair attaches to the scalp at specific angles depending on the follicle direction, typically radiating outward from a central crown point or parting line. When mapping the scalp, remember that hair doesn’t stick straight up like needles. It emerges at a slight angle and immediately succumbs to gravity. Pay special attention to the natural hairline framing the forehead and temples, ensuring the transition between skin and hair isn’t drawn as a harsh, solid black line.
How to draw hair shine and highlights?
Draw hair shine by placing highlights strictly on the peaks of the hair curves where the form bends outward toward the light source. The type of highlight depends on the texture. For a sleek bob cut reference, use anisotropic highlights—a horizontal band of light perpendicular to the strands. For messy hair reference or matte textures, use softer, scattered highlights. Never use pure white for highlights unless you are specifically drawing wet hair effects.
Final Thoughts on Hairstyle Ideas Art Reference
Building a reliable hairstyle ideas art reference library is about far more than just hoarding pretty pictures on a Pinterest board; it is about fundamentally changing how you observe and deconstruct forms. By shifting your mindset away from drawing thousands of individual strands and instead focusing on the human scalp anatomy, the ribbon method, and macro-volumes, you instantly elevate your character design to a professional level.
Whether you are sketching a sleek, modern undercut, rendering texture on beautiful 4C curls, or trying to capture the kinetic energy of an anime protagonist’s spiky hair, the underlying physics remain exactly the same. Hair has weight, hair reacts to gravity, and hair interacts dynamically with light. When you respect these industry standard practices, you eliminate the frustration of stiff, lifeless drawings.
Treat this guide as your living manual for hair drawing. Bookmark these 11 essential styles, reference the anatomical breakdowns before you put pen to paper (or stylus to tablet), and focus on mastering the structural basics before getting lost in the details.
Now it’s time to put this theory into practice. Grab your sketchbook or fire up your drawing tablet. Which of these 11 expert hairstyles are you going to tackle for your next original character design? Let me know in the comments below, and keep drawing
Last update on 2026-04-27 / Affiliate links / Images from Amazon Product Advertising API