You spend hours perfecting your look in the mirror, only to see it fall entirely flat on camera. Finding the right hairstyle ideas photoshoot look can feel incredibly frustrating when beautiful real-life volume disappears instantly on film. The disconnect between everyday hair and camera-ready texture leaves many feeling entirely unphotogenic.
The best hairstyle ideas for a photoshoot feature enhanced volume, deep texture, and controlled flyaways. Because camera flashes and natural lighting aggressively wash out flat hair, professional stylists strongly recommend dimensional styles like Hollywood waves, textured updos, and half-up looks that create beautiful silhouettes and movement on film. This critical approach prevents your hair from looking lifeless in high-resolution photography.
Drawing from comprehensive analysis of current editorial data and proven on-set styling methodologies, we know exactly how lenses interact with hair texture. In this guide, you will discover the exact structural frameworks needed to combat lighting washout and maintain perfect hold. Master these eleven stunning, camera-ready styles to guarantee you look flawless in every single frame.
Is Your Hair Camera-Ready? Mastering the Hairstyle Ideas Photoshoot Equation
Camera-ready hair requires significantly more exaggerated volume and structural hold than everyday styling. When you step in front of a professional lens, the combination of brilliant strobes, intense natural light, and distance naturally compresses dimension. This phenomenon, known as lighting washout, instantly erases subtle textures and leaves perfectly fine hair looking completely lifeless in photographs. To master your photoshoot hair prep, you must understand the technical relationship between professional photography lighting and hair reflection.
Editorial stylists rely on specific styling products to provide structural anchors, anti-frizz barriers, and necessary hold to counteract this washout effect. By implementing strategic frameworks for dimension and silhouette, you transform flat roots into photogenic masterpieces. Whether you are shooting indoors under harsh flash photography or outdoors battling the wind, mastering this equation ensures your locks remain dynamic and expressive throughout the entire session.
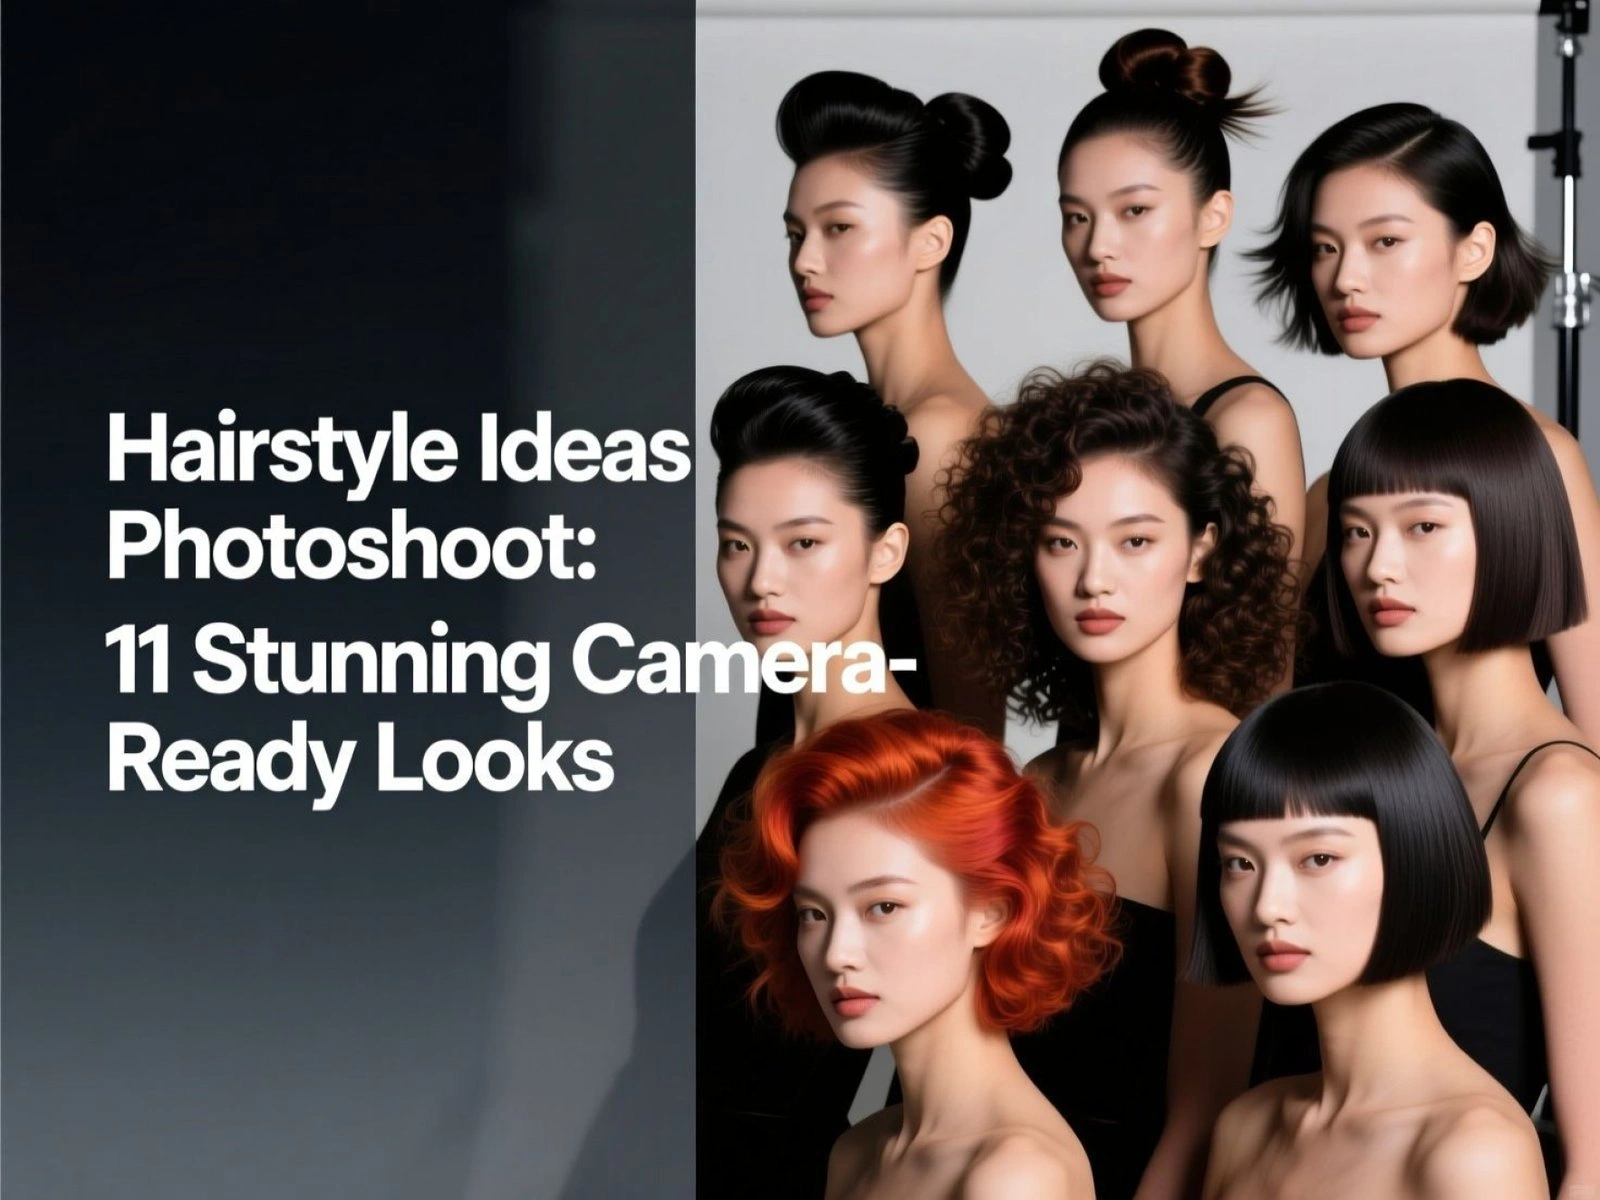
Hairstyle Ideas Photoshoot: 11 Stunning Camera-Ready Looks
The most effective stunning camera-ready looks rely on targeted product application and specific foundational techniques. Browsing through endless inspiration galleries rarely helps if you do not understand exactly how to recreate those photogenic hairstyles at home. Different shoot settings dictate the optimal hairstyle and the exact hair styling steps required to lock it in place.
This comprehensive guide moves beyond generic pictures to provide the exact product checklists and step-by-step routines needed to achieve incredible results. By utilizing advanced styling terminology and professional-grade approaches, you can confidently instruct a stylist or master these looks yourself. Prepare to explore a diverse range of updos, sleek straight styles, and textured waves designed to withstand the duration of any long photoshoot without falling flat.
1. Create Voluminous Hollywood Waves

- Pin this timeless glam look to your ‘Photoshoot Prep’ board!
Voluminous Hollywood waves are achieved through consistent, uniform thermal setting and precise brushing techniques. This classic glamorous photoshoot hair is the ultimate choice for formal or engagement shoots, delivering deep, cascading S-pattern ridges that reflect light beautifully. To create these voluminous cascading curls, you must master the crucial cool down phase, which amateurs frequently skip. Understanding professional styling principles and thermal setting memory ensures your long hair photoshoot styles remain incredibly polished.
Products & Tools Used
- 1.25-inch gold or ceramic curling iron (essential for consistent, large uniform wave patterns)
- Lightweight thermal heat protectant spray
- Metal duckbill sectioning clips (for setting the curls as they cool)
- Boar bristle dressing brush (crucial for blending the curls into a single wave)
- Flexible hold, high-shine hairspray
Styling Steps
- Prep and Section: Spray dry hair with heat protectant and create a deep side part. Section hair horizontally from the nape of the neck upward.
- Curl in One Direction: Wrap 1-inch sections of hair around the barrel, rolling toward the face on both sides. Hold for 8-10 seconds.
- Pin and Cool: Slide the curl off the barrel and immediately pin it to your scalp with a duckbill clip. Allow the entire head to cool completely for 15 minutes to lock in thermal memory.
- Unpin and Brush: Remove all clips. Taking your boar bristle brush, firmly brush through the curls from root to tip. The individual curls will seamlessly blend into a continuous S-wave.
- Detail and Spray: Use a comb to push the ridges of the waves upward, spraying flexible hold hairspray into the bends to freeze the dimension in place.
Pro-Tip: In my experience styling for editorial shoots, applying a shine serum only to the ridges of the wave (not the valleys) creates a highlighted contrast that pops dramatically on camera.

2. Secure a Textured Low Chignon

- Save this romantic updo for your engagement photo inspiration!
A textured low chignon combines secure nape placement with carefully teased volume to create a wind-proof, romantic silhouette. This messy bun for pictures is perfect for engagement photo updos because it remains elegant and visible from multiple photography angles. To execute this romantic photoshoot hair properly, you must build a strong foundation so the intentionally messy look does not actually fall apart during an active outdoor shoot.
Products & Tools Used
- Dry texturizing spray (crucial for adding grip to clean hair)
- Clear elastic hair ties
- U-shaped hair pins and standard matte bobby pins
- Teasing comb
- Strong-hold finishing spray
Styling Steps
- Build the Foundation: Generously apply dry texturizing spray from roots to mid-shafts. Pull out two 1-inch sections around your face to leave loose for softness.
- Create the Base Ponytail: Gather the rest of your hair into a loose, low ponytail at the nape of your neck and secure with a clear elastic.
- Tease for Volume: Gently push the hair at the crown upward before tightening the elastic to create a beautiful, slightly undone profile silhouette.
- Twist and Pin: Split the ponytail into two sections. Loosely twist them around each other, then wrap the twisted section around the elastic base to form a bun.
- Secure and Pancake: Use U-shaped pins to anchor the edges of the bun to your head. Gently tug (pancake) the edges of the twists outward to make the chignon appear fuller and more effortless.
- Detail the Tendrils: Lightly curl the face-framing pieces away from your face with a wand.
Pro-Tip: For outdoor photoshoots, a low chignon is your best defense against wind. Always use matte bobby pins; shiny pins will catch the camera flash and distract from the hairstyle.

3. Smooth Sleek and Straight Glass Hair

- Pin this incredibly sleek glass hair look for your professional headshots!
Sleek glass hair utilizes intense tension and heat to seal the cuticle, creating an aggressively smooth, highly reflective straight style. When executing straight hair headshots, addressing the common pitfall of hair looking stringy on camera is paramount. This modern photoshoot hair idea relies on heavy anti-frizz prep and the professional chase method to ensure bone-straight results that read as powerful and sophisticated without any heat damage.
Products & Tools Used
- Titanium flat iron (titanium plates provide the intensely smooth finish needed for glass hair)
- Anti-humidity smoothing blowout cream
- Fine-tooth carbon comb (heat resistant)
- Weightless silicone-based shine serum
- Clean mascara wand or toothbrush (for taming final flyaways)
Styling Steps
- Prep Wet Hair: Apply the anti-humidity blowout cream to damp hair and blow-dry completely straight, pointing the dryer nozzle down to flatten the hair cuticle.
- Part and Section: Create a razor-sharp middle or deep side part. Clip hair into micro-thin, 1-inch horizontal sections starting at the neck.
- Execute the Chase Method: Take a section of hair, insert the fine-tooth comb at the root, and place the flat iron immediately behind it. Slowly glide both down the hair shaft simultaneously. The comb detangles and creates tension, resulting in a flawless, single-pass straighten.
- Seal the Cuticle: Once all hair is flat-ironed, rub 2-3 drops of shine serum vigorously between your palms to warm it, then glaze your hands over the lengths of your hair.
- Lock Down Flyaways: Spray hairspray directly onto a clean mascara wand and gently paint down any broken hairs or flyaways at the root.
Pro-Tip: When shooting straight hair, camera flashes will highlight every single flyaway. The hairspray-on-a-toothbrush trick is an industry standard for achieving that retouched, flawless finish in-camera.

4. Style a Face-Framing Half-Up Half-Down

- Save this versatile half-up style for a flattering, movement-filled photoshoot!
A face-framing half-up style strategically pulls hair back to slim the face while retaining maximum length for dramatic movement in photos. This versatile photo hair solution is the ultimate safe but stunning option for dynamic shoots where the model will be moving around extensively, such as maternity shoot hair ideas. By securing the sides with an elegant clip, you completely eliminate harsh facial shadows caused by overhead lighting, making it one of the most flattering face-framing hairstyles for pictures.
Products & Tools Used
- Volumizing root powder
- Elegant metal claw clip or barrette (adds a jewelry-like element to the back of the head)
- 1-inch curling wand
- Tail comb (for precise parting)
- Medium-hold hairspray
Styling Steps
- Create Base Texture: Curl your entire head of hair with a 1-inch wand, leaving the last inch of the ends straight for a modern, slightly undone feel.
- Separate Face-Framing Pieces: Use the tail comb to section out a triangle of hair at the front of your hairline (about 1-2 inches deep). Clip this out of the way.
- Powder the Crown: Tap a small amount of volumizing root powder into the crown of your head and massage it in with your fingertips to create instant, grippy lift.
- Gather and Secure: Sweep the hair from above your ears backward, maintaining the volume at the crown. Twist the gathered section once and secure it flat against your head using the metal claw clip or barrette.
- Style the Front: Unclip the front pieces. Curl them gently away from your face, lightly spraying them so they hold their swooping shape without falling flat into your eyes.
Pro-Tip: In portrait photography, hair falling directly across the cheeks creates dark, unflattering shadows under the eyes. The half-up style physically pulls the hair back to let the photographer’s lighting illuminate your cheekbones perfectly.

5. Master the Bouncy 90s Supermodel Blowout

- Pin this ultimate 90s blowout routine for major volume on camera!
The bouncy 90s blowout leverages the combination of thermal round brushing and the cooling tension of velcro rollers to create massive, touchable volume. If you want huge volume hair for pictures, this 90s blowout tutorial focuses entirely on the mechanics of building heat and letting hair cool in a curled state. Over-directing the roots is a fundamental cosmetology technique that ensures this voluminous supermodel hair remains incredibly dynamic and bouncy throughout motion-heavy lifestyle or branding photoshoots.
Products & Tools Used
- Volumizing mousse (applied to damp hair)
- Large ceramic round brush (retains heat to smooth the hair shaft)
- Jumbo velcro rollers (2-inch to 3-inch diameter depending on hair length)
- Blow dryer with a concentrator nozzle
- Lightweight setting spray
Styling Steps
- Apply Mousse and Rough Dry: Work a golf-ball-sized amount of mousse through damp roots. Flip your head upside down and rough dry until 80% dry.
- Over-Direct the Roots: Working in 2-inch sections, use the round brush to pull the hair straight UP toward the ceiling (over-directing) while blasting the roots with heat. Roll the brush down to the ends, rounding them inward.
- Set with Velcro Rollers: While the section is still piping hot, roll the hair tightly into a jumbo velcro roller, rolling downward toward the scalp. Secure with a metal clip.
- Cool Completely: Repeat across the entire head, paying special attention to rolling the top mohawk section backward away from the face. Leave the rollers in for at least 20 minutes until completely cold.
- Unroll and Shake: Unroll (do not pull) the rollers carefully. Flip your head over, massage the roots with your fingertips, and flip back for massive, bouncy volume.
Pro-Tip: If your photoshoot involves walking or wind, the 90s blowout is ideal. The heavy volume ensures that even when the wind blows, your hair looks intentionally cinematic rather than flat and messy.

6. Braid a Romantic Messy Crown

- Save this beautiful crown braid for your outdoor or maternity shoot!
A messy crown braid utilizes the Dutch braiding technique and aggressive pancaking to create a thick, highly detailed halo effect. This boho photoshoot hairstyle is the ultimate 360-degree look, ensuring that photographers capture visually interesting, artistic details from every single camera angle. By following this messy crown braid tutorial, you secure a fully-up outdoor photoshoot hair option that prevents layers from poking out, resulting in a flawless halo braid for pictures.
Products & Tools Used
- Texturizing hair paste or pomade (to give the hair grip and prevent layers from poking out)
- Clear mini elastics
- Bobby pins
- Flexible hold hairspray
Styling Steps
- Prep the Hair: Rub a dime-sized amount of texturizing paste between your fingertips and run it through your hair. Part your hair deeply to one side.
- Begin the Dutch Braid: Starting at the heavy side of the part, take three sections of hair. Begin a Dutch braid (crossing the strands under the middle, not over) tracing along your hairline toward your ear.
- Wrap the Crown: Continue the Dutch braid around the nape of your neck and up the opposite side of your head, pulling in new hair as you go, until you have created a complete halo.
- Finish and Pin: Braid the remaining tail normally, secure with a clear elastic, and pin the tail flat against the head, hiding it beneath the start of the braid.
- Pancake for Volume: Starting from the front, gently tug on the outer edges of each braid loop. Pulling them horizontally makes the braid look massive and beautifully messy on camera.
Pro-Tip: A crown braid is a 360-degree hairstyle, meaning there is absolutely no flat side to your head. This gives your photographer ultimate freedom to walk entirely around you to find the best background and lighting.

7. Construct a Polished High Editorial Ponytail

- Pin this snatched high ponytail for an edgy, powerful editorial look!
An editorial high ponytail relies on a professional hair bungee to provide the intense tension required to prevent sagging during a rigorous fashion shoot. This snatched ponytail tutorial introduces the exact tools consumers rarely know about, yet they remain the secret to every high-fashion ponytail on Instagram. Mastering this high ponytail photoshoot look involves edge control and precise crown placement to achieve a tight, bump-free finish that reads powerfully on camera.
Products & Tools Used
- Boar bristle smoothing brush (essential for gathering hair without creating bumps)
- Hair bungee with hooks (the secret to a tight, non-sagging ponytail)
- Strong hold edge control gel
- Bobby pins
- Shine spray
Styling Steps
- Apply Gel and Gather: Apply edge control gel generously around your entire hairline. Tip your head slightly back and use the boar bristle brush to gather all hair tightly to the highest point of your crown.
- Secure with a Bungee: Instead of trying to pull all your hair through a traditional hair tie, hold the ponytail firmly in one hand. Hook one end of the hair bungee into the base of the gathered hair, wrap the elastic tightly around the base 3-4 times, and hook the other end to secure it.
- Wrap the Base: Take a half-inch section of hair from the underside of the ponytail. Wrap it tightly around the bungee to hide the elastic. Secure the end underneath with a bobby pin.
- Smooth the Tail: Flat iron the tail of the ponytail for a glassy, swinging finish, and mist generously with shine spray.
Pro-Tip: If you have thick or heavy hair, a traditional hair tie will stretch and cause your high ponytail to sag within 20 minutes. A hair hook bungee allows you to dictate the exact tension, keeping the style snatched and lifted for hours.

8. Fake Effortless Surfer Beach Waves

- Pin these perfect piecey beach waves for your casual outdoor photoshoot!
Effortless surfer beach waves are created by alternating curl directions and utilizing sea salt sprays for a grippy, matte texture. Faking this effortles wavy hair for pictures requires deconstructing the myth of “woke up like this” hair by showing the specific wand technique required to look good on camera without appearing frizzy. This beach waves tutorial for short hair emphasizes straight ends to ensure these casual photo hair ideas look modern rather than overly manicured or pageant-like.
Products & Tools Used
- Sea salt texturizing spray (crucial for creating that gritty, matte finish)
- 1-inch straight curling wand (clip-less)
- Wide-tooth comb
- Lightweight matte pomade
Styling Steps
- Prep with Salt Spray: Mist dry hair generously with sea salt spray and rough-dry it in with a blow dryer to create a grippy, textured base.
- Wand in Alternating Directions: Take random, uneven 1-inch sections of hair. Wrap the hair around the wand, alternating directions (one piece toward the face, the next piece away).
- Leave the Ends Out: Crucial step: Always leave the last 1.5 inches of the hair off the heat wand. Straight ends are the defining feature of a modern beach wave.
- Comb and Separate: Once the whole head is cooled, run a wide-tooth comb (not a brush) through the waves to break them apart.
- Piece it Out: Rub a tiny amount of matte pomade between your fingers and pinch the ends of the waves to create definition and separation.
Pro-Tip: The camera captures texture beautifully, but high-shine sprays can make beach waves look like a prom updo. Always stick to matte, salt-based styling products to maintain the surfer aesthetic under a camera lens.

9. Weave a Detailed Fishtail Braid

- Pin this incredibly detailed fishtail braid to your photoshoot mood board!
A detailed fishtail braid captures light far better than a standard three-strand braid due to its tiny two-strand woven sections and massive volume expansion. This side braid for pictures adds incredible visual interest to the side profile without overwhelming the face. By following this fishtail braid tutorial, you learn the exact grip powder application and hand-placement techniques required to keep this intricate braided photoshoot hair from twisting or collapsing under heavy styling.
Products & Tools Used
- Volumizing texturizing powder
- Clear, snag-free mini elastics
- Lightweight leave-in conditioner spray (to reduce static while weaving)
Styling Steps
- Side Sweep: Gather all your hair over to your preferred side and secure it into a low side-ponytail with a clear elastic (you will cut this elastic out later).
- Split into Two: Divide the ponytail evenly into two main sections.
- The Fishtail Weave: Take a tiny, 1/4-inch piece of hair from the outer edge of the right section. Cross it over and join it to the inside of the left section. Then, take a tiny piece from the outer edge of the left section, cross it over, and join it to the right.
- Repeat and Secure: Repeat this process tightly all the way down to the ends of the hair, securing with a clear elastic.
- Pancake and Release: Carefully take a pair of scissors and snip the top elastic at the base of your neck. Generously tap volumizing powder down the braid, then use your thumbs and index fingers to pull the braid apart horizontally, making it look incredibly wide and flat.
Pro-Tip: The smaller the sections you cross over, the more intricate and woven the fishtail will look on camera. Chunky sections will just look like a messy standard braid.

10. Perfect the Pinned-Back Old Money Bob

- Pin this incredibly chic, old-money aesthetic style for short hair!
The pinned-back old money bob uses a deep asymmetric part and metallic statement clips to give short hair the necessary visual interest and dimension for photography. This sophisticated bob hairstyle for pictures provides a high-impact solution for short-haired readers who cannot execute heavy braids or updos. By smoothing the cuticle inward, you create a beautiful vintage editorial silhouette, making it one of the absolute best short hair photoshoot ideas available.
Products & Tools Used
- Small ceramic round brush (1-inch to 1.5-inch diameter)
- Blow dryer with concentrator nozzle
- Statement hair clips (pearl, tortoiseshell, or gold)
- Smoothing cream
- Light hold hairspray
Styling Steps
- Prep and Part: Apply smoothing cream to damp hair. Create a precise, deep side part directly above the arch of your eyebrow.
- Blow Dry Inward: Using the small round brush, blow dry the hair section by section, heavily rolling the brush inward under the chin to create a sleek, face-hugging bell shape.
- Smooth the Heavy Side: Take the hair on the heavy side of the part and brush it completely flat against your forehead and swoop it elegantly over your ear.
- Clip and Secure: Place 1-2 statement clips flat against the side of your head above the ear to lock the sweep in place.
- Tuck the Light Side: Tuck the lighter side of the part tightly behind your other ear, spraying it down with hairspray to ensure the silhouette remains sharp.
Pro-Tip: Short haircuts can sometimes look like a helmet in photos if they lack dimension. Adding a deep asymmetric part and a metallic or pearl clip instantly introduces light reflection and focal points to the portrait.

11. Throw Up a Tousled Top Knot with Tendrils

- Save this effortlessly cute top knot for your cozy lifestyle or branding shoot!
A photogenic tousled top knot requires a highly structured silk scrunchie base disguised with intentionally pulled-out tendrils to soften the back-profile. This messy top knot tutorial solves the universal problem of casual updos looking like unkempt gym hair on camera. Vertical volume naturally elongates the neck in photos, making this high bun for pictures the ultimate lifestyle photoshoot hair choice for conveying cozy approachability.
Products & Tools Used
- Silk or satin scrunchie (to provide volume at the base of the bun)
- Bobby pins
- 1-inch curling iron
- Lightweight pomade stick (for taming baby hairs without freezing them)
Styling Steps
- Gather High: Flip your head upside down and gather your hair to the very highest point of your head. Secure loosely into a ponytail with a silk scrunchie.
- Pull the Tendrils: Before moving forward, use your fingers to pull down delicate pieces of hair around your temples, in front of your ears, and two small pieces at the nape of your neck.
- Wrap and Pin: Loosely wrap the ponytail hair around the scrunchie base. Do not twist too tightly. Secure the ends and the sides of the bun to your head using bobby pins, allowing some ends to purposefully stick out.
- Curl the Details: Take your 1-inch curling iron and gently curl the tendrils you pulled out, directing the curls away from your face.
- Tame the Frizz: Lightly glide the pomade stick over the sides of your head to flatten any static or frizz without losing the messy aesthetic of the bun itself.
Pro-Tip: A true messy bun rarely photographs well; it just looks unkempt. The secret to a photogenic top knot is creating a highly structured base, and then intentionally pulling pieces out to simulate a messy look.

Key Takeaways: Your Quick Guide to Hairstyle Ideas Photoshoot Prep
Proper preparation and targeted product usage directly result in long-lasting, camera-ready styles. If you are short on time before shoot day, reviewing the core technical advice woven throughout this guide is crucial. This summary synthesizes the absolute most important rules of styling hair for a camera, ensuring you don’t make rookie mistakes that result in flat, unphotogenic results.
- Exaggerate Everything for the Camera – The combination of distance, lighting, and camera sensors naturally flattens dimension. Whatever volume or texture you think looks good in the mirror, make it 20% bigger for the camera.
- Prioritize Matte Over Shine Products – Heavy serums and high-shine sprays can reflect camera flashes poorly, making hair look greasy rather than glossy. Rely on matte texturizing sprays or salt sprays for grip.
- Build Hidden Structural Anchors – A photoshoot can last hours in various weather conditions. Use hair bungees, dry shampoo texturizers, and pancaking techniques to build a foundation that won’t sag.
- Control Facial Shadows – Face-framing pieces (tendrils or half-up styles) are essential because they prevent heavy blocks of hair from casting dark, unflattering shadows under your cheekbones and eyes.
- Think in 360 Degrees – Photographers rarely shoot you straight-on the entire time. Styles like the crown braid, low chignon, or deep-parted bob ensure your hair has visual interest from the side and back profiles.
- The “Messy” Look Must Be Engineered – True messy hair translates as frizzy and unkempt on film. “Effortless” photoshoot hair is actually highly structured with intentionally pulled-out pieces.
People Also Ask About Hairstyle Ideas Photoshoot
Understanding the logistics behind photoshoot hair preparation is just as important as mastering the styling techniques themselves. Many clients suffer from common misunderstandings regarding when to wash their hair or what to wear to the salon. Addressing these highly specific questions about camera interaction, prep timing, and weather management will ensure a flawless, stress-free shoot day.
Should I wash my hair right before a photoshoot?
No, professional stylists universally recommend washing your hair the night before your photoshoot, not the day of.
Freshly washed hair is incredibly soft, slippery, and lacks the natural oils required to hold volume, curls, or bobby pins. Washing it 12 to 24 hours prior gives the cuticle time to settle and allows a slight buildup of natural grit, which acts as an anchor for styling products and heat tools.
Do curls or straight hair look better in professional pictures?
Curls and waves generally look better in professional pictures because they create dimensional shadows and highlights that the camera loves.
Straight hair can often look flat, stringy, or lack movement in static imagery unless it is perfectly styled “glass hair” shot in a studio. The texture of curls reflects light from multiple angles, making the hair look significantly thicker and healthier on film.
How do I prevent my hair from getting frizzy during an outdoor photoshoot?
To prevent frizz during an outdoor shoot, prep your hair with an anti-humidity sealant spray before styling and finish with a strong-hold aerosol hairspray.
Avoid silicone-based serums right before stepping outside, as humidity can still penetrate them. Instead, use a designated humidity-blocking blowout spray while the hair is damp. Once styled, a flexible-hold hairspray creates a micro-barrier against moisture in the air.
What should I wear while getting my photoshoot hair styled?
Always wear a button-down shirt or a robe while getting your photoshoot hair styled to avoid ruining the look when changing.
If you wear a tight t-shirt or a sweater, pulling it over your head will instantly introduce static, frizz, and potentially destroy the structure of updos or volume you just spent an hour creating.
How do I fix flat hair halfway through a photoshoot?
To revive flat hair mid-shoot, flip your head upside down, massage your roots vigorously with your fingertips, and apply a targeted blast of dry texturizing spray.
Keep a travel-sized dry texturizing spray (not dry shampoo, which can leave a white cast under camera flash) in your touch-up bag. The friction from your fingertips reawakens the root volume without requiring heat.
Are hair extensions a good idea for photoshoots?
Yes, clip-in hair extensions are highly recommended for photoshoots to add both length and necessary density to your styles.
Because the camera naturally compresses imagery, hair often looks thinner on camera than it does in real life. Even if you don’t need length, adding a few tracks of extensions matching your hair color will provide the massive volume needed for cinematic blowouts or thick braids.
How much hairspray is too much for a photoshoot?
You have used too much hairspray if your hair appears “crispy,” completely immobile, or reflects a white, flaky cast under the camera flash.
Modern photoshoot styling favors movement. You should layer lightweight, flexible-hold hairsprays rather than soaking the hair in a single heavy coat of freeze-hold spray, which will look stiff and unnatural in lifestyle or wind-blown portraits.
Does a middle part or side part photograph better?
A side part universally photographs better for most face shapes because it creates asymmetry, which adds flattering dimension and visual interest to a 2D photograph.
While middle parts are incredibly trendy, they require perfect facial symmetry and can occasionally look harsh or flat under bright strobes. A deep side part naturally lifts the roots and softens the angles of the jawline on camera.
Should I get a haircut before a photoshoot?
You should get a trim 1 to 2 weeks before a photoshoot, but avoid major haircuts or drastic color changes right before the shoot.
Freshly cut hair can sometimes look blunt and takes a few washes to settle into its natural fall. Trimming dead ends is crucial (split ends show up vividly in high-resolution photography), but leave a buffer week so you have time to learn how to style the new shape.
What is the best hairstyle for a windy outdoor shoot?
The best hairstyles for windy conditions are structured updos like a low chignon, a tightly woven fishtail braid, or a sleek high ponytail.
Wearing your hair completely down in heavy wind will result in the photographer throwing away dozens of photos because hair was blowing across your face. If you must wear it down, opt for a secure half-up style to keep the front pieces anchored.
Final Thoughts on Your Camera-Ready Hairstyle
Camera-ready hair is ultimately an engineered illusion that requires different rules than your everyday styling routine. When it comes to executing the perfect hairstyle ideas photoshoot look, the biggest secret in the editorial industry is simple: what looks slightly exaggerated in the bathroom mirror looks absolutely perfect on camera. The camera lens, bright strobes, and outdoor lighting have a unique way of flattening dimension and washing out texture.
By strategically choosing one of these 11 camera-ready looks, you are actively combating that washout effect. Whether you decide to weave an intricate, pancaked fishtail braid to catch the golden hour light, or rely on a hair bungee to keep an editorial ponytail snatched under studio strobes, you now have the blueprint for styles that will last from the first click of the shutter to the final frame. Even professional supermodels rely on these specific structural techniques to achieve their effortless appearance.
Remember to prioritize your structural prep—using your volumizing powders, texturizing sprays, and matte grips—over heavy, high-shine products that can ruin a shot with unwanted glare. Hair that photographs beautifully is a carefully constructed masterpiece, and with these techniques, you can confidently step in front of the lens knowing your hair will translate flawlessly.
Which of these camera-ready hairstyles are you planning to recreate for your next shoot? Pin your favorite look to your mood board, or let us know your shoot plans in the comments below!
Last update on 2026-04-27 / Affiliate links / Images from Amazon Product Advertising API