Have you ever spent hours searching for the perfect personalized gift, only to find generic drinkware that lacks character and soul? The frustration of settling for mass-produced items when you crave something unique and heartfelt is a common struggle for creative gift-givers and home decor enthusiasts looking for painted mugs cherry designs.
Creating your own painted mugs with charming cherry designs is an accessible and rewarding DIY project that allows for personalized, durable drinkware. This guide provides 11 essential ideas and techniques to ensure your hand painted cherry mug designs are beautiful, dishwasher safe, and last for years using food-safe paint and proper curing methods.
Drawing from comprehensive analysis of current crafting data and proven ceramic methodologies, we have compiled a definitive resource for safe and stylish mug painting. A painted cherry mug is more than just a vessel for coffee; it is a canvas for ceramic art that combines functionality with artisan craftsmanship. In this post, you will discover professional techniques to transform plain ceramic into unique hand painted masterpieces that rival high-end boutique finds.
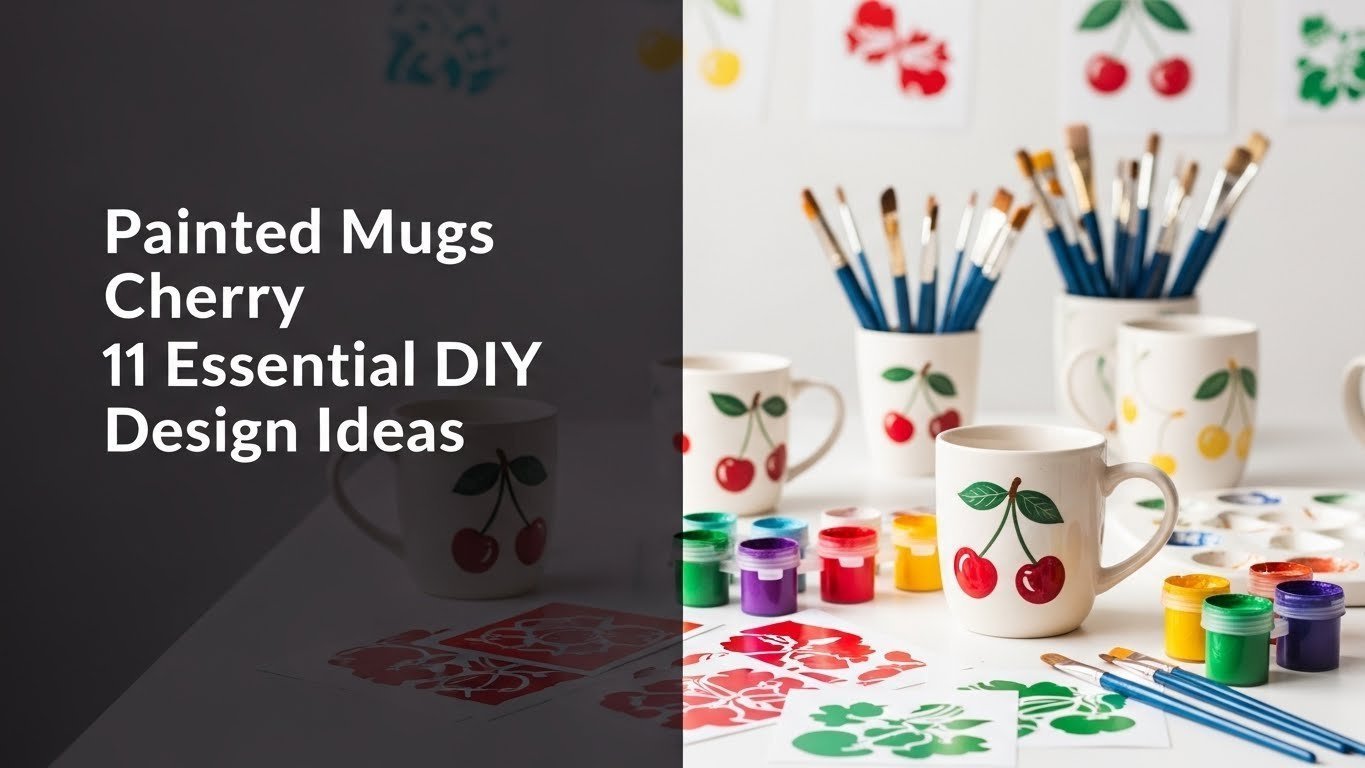
Master the Art of Painted Mugs Cherry: 11 Essential DIY Designs for 2026
Embracing the art of creating painted mugs cherry designs transforms a simple ceramic mug into a cherished piece of hand painted decor. Whether you are looking to create a thoughtful personalized mug gift or simply want to elevate your own morning coffee routine, the process of painting ceramics offers endless creative freedom. However, achieving a professional and lasting finish requires more than just artistic flair; it demands an understanding of the right materials and techniques.
One of the biggest concerns for DIY enthusiasts is durability—specifically, avoiding chipping paint on mugs after a few washes. By selecting the correct food-safe paint and following rigorous cleaning and curing protocols, you can create dishwasher safe and microwave safe designs that stand the test of time. This section explores a variety of aesthetic approaches, from minimalist lines to hyper-realistic botanical art, ensuring there is a technique here to match every skill level and style preference.
11 Essential DIY Design Ideas for Your Painted Mugs Cherry in 2026
Ready to paint cherry mugs that look professionally kiln-fired? We have curated eleven distinct design concepts that range from beginner-friendly patterns to advanced artistic techniques. Each idea is paired with specific material recommendations to ensure your custom painted finish adheres perfectly to the ceramic mug surface.
We will explore how different tools, such as fine-tip brushes versus ceramic paint pens, can drastically alter the final look of your unique cherry design. Whether you prefer a modern aesthetic or a rustic farmhouse look, these step-by-step guides will help you create painted mugs that are safe, durable, and visually stunning.
1. Paint a Classic Red Cherry Cluster Design

Pin this vibrant cherry design to your ‘DIY Mug Ideas’ board!
The classic cherry design mug is a timeless choice that immediately adds a pop of color to any kitchen. This design focuses on the core attributes of the fruit: vibrant red cherries paired with rich green stems, utilizing the smooth surface of the ceramic mug to make the colors sing. The goal is to hand paint ceramic in a way that feels traditional yet fresh, ensuring the paint adheres to ceramic properly for a long-lasting finish.
Supplies Needed
- Clean ceramic mug (white or cream suggested for contrast)
- Food-safe ceramic paint in vibrant red, forest green, and white (e.g., Pebeo Porcelaine 150)
- Fine-tip paint brushes (round #0, #2)
- Small mixing palette or plate
- Rubbing alcohol and cotton ball (for surface prep)
- Oven (for curing)
- Clear glossy finish ceramic glaze (optional, for extra protection)
Step-by-Step Directions
- Prepare your ceramic mug by wiping it thoroughly with rubbing alcohol to remove any oils or dust. This is critical for adhesion.
- Sketch light pencil outlines for two or three cherry circles, slightly overlapping, and their stems.
- Apply the vibrant red paint for the main cherry bodies, using a round brush. Allow the first coat to dry to touch.
- Add a second coat of red for opacity, then immediately (while wet) use a tiny dot of white paint to create a highlight on each cherry for gloss.
- Paint thin green stems extending from the cherries using the forest green paint and a fine brush.
- Cure the painted mug according to your chosen ceramic paint’s instructions, typically by baking in an oven.
- Optionally, apply a layer of clear glossy finish ceramic glaze for added durability and shine, then cure again.
Pro-Tip: For truly durable painted mug designs, ensure your chosen ceramic paints are specifically formulated for oven-baking to achieve a permanent, dishwasher safe finish. Always follow the manufacturer’s detailed care instructions for curing to avoid peeling.

2. Design a Modern Minimalist Cherry Outline Mug

Save this chic minimalist idea for your next cherry painted mug project!
If your style leans towards the contemporary, a minimalist cherry outline offers a sophisticated alternative to fully filled shapes. This approach uses negative space and fine lines to create modern cherry mugs that fit perfectly in a Scandinavian or industrial kitchen. The beauty of this custom painted design lies in its restraint; by stripping the fruit back to its essential geometry, the design enhances mug aesthetics without overwhelming them.
Supplies Needed
- Clean ceramic mug (matte black or white for contrast)
- Fine-tip ceramic paint pens (black, white, or red)
- Rubbing alcohol and cotton ball
- Oven (for curing)
- Clear ceramic sealant spray (optional, for extra durable painted mug)
Step-by-Step Directions
- Clean the ceramic mug surface thoroughly with rubbing alcohol.
- Sketch a simple cherry outline (single cherry or a pair) onto the mug using a pencil. Keep lines light and clean.
- Trace over the pencil sketch with your chosen ceramic paint pen, ensuring smooth, unbroken lines.
- Allow the paint to dry completely (check pen instructions for specific drying times).
- Cure the painted mug in the oven according to the paint pen manufacturer’s instructions to make it dishwasher safe.
- Optionally, for enhanced durability, apply a clear ceramic sealant spray and let it dry/cure as per product guidelines.
Pro-Tip: For perfectly crisp lines when you design cherry mugs, ceramic paint pens offer superior control over brushes, especially for minimalist cherry outline styles. Ensure the pen is shaken well before use for consistent paint flow to avoid inconsistent mug designs.

3. Create a Whimsical Cartoon-Style Cherry Painted Mug

Add a playful touch to your kitchen with this whimsical cherry painted mug!
For those who want to decorate coffee cups with personality, whimsical cherry designs on mugs are the perfect solution. This style borrows from pop art and illustration, utilizing bold black outlines and exaggerated features to create cute cherry pattern hand painted mugs. It allows for high contrast and vibrant color usage, making the artistic cherry mug a standout piece in any collection.
Supplies Needed
- Clean ceramic mug (brightly colored or white)
- Food-safe ceramic paint in bright red, black, and green
- Medium-tip paint brush (flat #6)
- Fine-tip ceramic paint pen (black for outlines)
- Rubbing alcohol
- Oven
Step-by-Step Directions
- Clean the mug with rubbing alcohol.
- Sketch cartoon cherry shapes (large, round) and thick stems with leaves using a pencil.
- Fill in the cherry shapes with bright red paint, ensuring full coverage. Let dry completely.
- Fill in the leaf shapes with green paint. Let dry.
- Outline all painted shapes with the black ceramic paint pen, creating bold, cartoon-like borders.
- Add small details like white highlights on the cherries or expressive features with the paint pen.
- Cure the painted mug in the oven according to paint instructions.
Pro-Tip: Don’t be afraid to customize patterns and exaggerate features for a truly unique whimsical hand painted cherry design. For painted mugs cherry, cartoon styles are forgiving for beginners, as slight imperfections add to the handmade charm.

4. Apply a Delicate Cherry Blossom Branch Motif

Find tranquility with this beautiful cherry blossom painted mug design!
Transitioning from bold cartoons to nature-inspired elegance, elegant hand painted cherry blossom mugs utilize delicate leaf design and soft color gradients. This technique requires a lighter touch to create painted mugs that feel airy and sophisticated. The artistic cherry mugs resulting from this method represent the cherry entity in its floral state, symbolizing spring and renewal.
Supplies Needed
- Clean porcelain mug (white is ideal)
- Food-safe ceramic paint in brown, soft pinks, white, and light green
- Very fine-tip brushes (#00, #0)
- Small mixing palette
- Rubbing alcohol
- Oven
Step-by-Step Directions
- Clean the mug surface thoroughly with rubbing alcohol.
- Lightly sketch a curving branch line around the mug with a pencil.
- Paint the branch using brown paint and a fine brush. Let dry.
- Dab soft pink and white paints to create cherry blossoms along the branch, varying the size and overlap of petals. Add tiny yellow dots to the centers.
- Add tiny light green leaves along the branch for a natural touch.
- Allow all paint layers to dry completely.
- Cure the painted mug in the oven following the paint manufacturer’s instructions for durability.
Pro-Tip: Achieving the translucent quality of cherry blossoms requires thin layers of paint. Mix a tiny bit of white with your pinks for varying shades, and use a damp brush to glaze painted mugs for a softer look if your paint allows it. This utilizes professional artist techniques for depth.

5. Personalize a Monogrammed Mug with a Cherry Accent

Make it yours: a monogrammed cherry painted mug for a truly personal touch!
Combining typography with botanical art creates personalized cherry mugs that are perfect for gifting. This design bridges the gap between a standard custom painted cherry mug and a meaningful keepsake. By using ceramic allows customization principles, you can integrate a unique hand painted initial with a playful fruit accent, solving custom gift challenges with style.
Supplies Needed
- Clean ceramic mug
- Food-safe ceramic paint in black or gold, and red and green for the cherry
- Fine-tip paint brush or ceramic paint pen
- Alphabet stencils or temporary tattoo paper (for initial)
- Rubbing alcohol
- Oven
Step-by-Step Directions
- Clean the mug with rubbing alcohol.
- Apply your chosen initial to the mug. If using a stencil, secure it firmly and paint carefully. If using temporary tattoo paper, follow its instructions.
- Allow the initial to dry completely.
- Sketch a small, simple cherry cluster near or slightly overlapping the initial.
- Paint the cherry accent with red and green paint (or a paint pen) as desired.
- Allow all paint to dry.
- Cure the painted mug in the oven according to paint instructions to ensure durable painted mug and dishwasher safe properties.
Pro-Tip: For a truly personalized mug gift, consider the recipient’s favorite colors or font styles when choosing your initial and cherry accent. Gold or silver ceramic paint pens can add an elegant cherry mugs touch.

6. Paint Realistic, Detailed Cherry Sprigs

Bring nature indoors with these lifelike cherry painted mugs!
For the ambitious artist, creating detailed cherry mugs offers a chance to explore shading and depth. This technique involves layering multiple shades of red and green to hand paint ceramic with a level of realism that mimics botanical illustrations. The resulting artistic cherry mugs are exquisite, showing how hand painting provides detail that decals simply cannot replicate.
Supplies Needed
- Clean, subtly textured stoneware mug
- Food-safe ceramic paint in multiple shades of red (e.g., scarlet, burgundy), green (e.g., lime, forest), and brown
- Very fine-tip paint brushes (#000, #00)
- Small mixing palette
- Rubbing alcohol
- Oven
Step-by-Step Directions
- Clean the mug surface thoroughly.
- Lightly sketch the outline of cherry sprigs, including stems, leaves, and cherry placement.
- Paint the stems and leaf veins with brown paint.
- Fill in the leaves with lighter green, then add darker green for shading and depth.
- Apply a base coat of a medium red to the cherries. Let dry.
- Layer darker red paint in shadowed areas of the cherries and add tiny highlights with a lighter red or white for realism.
- Allow all paint to dry completely between layers.
- Cure the painted mug in the oven as per paint instructions to ensure fade-proof design.
Pro-Tip: For truly detailed cherry mugs, mix a tiny drop of brown with your reds to create deeper, more realistic cherry tones. Blending subtle highlights while the paint is still wet can mimic the natural sheen of ripe cherries, a technique known to experienced ceramic artists.

7. Hand Paint a Stenciled Cherry Border

Achieve perfect patterns with a stenciled cherry painted mug border!
If freehand painting feels daunting, using a stencil for mugs ensures a uniform cherry design. This method is perfect for creating consistent borders around the rim or base, where the design enhances mug symmetry. It overcomes the difficulty painting mugs by providing a reliable guide for your brush, allowing you to decorate coffee cups with professional precision.
Supplies Needed
- Clean ceramic mug
- Cherry or fruit-themed stencil
- Food-safe ceramic paint in red and green
- Small sponge brush or dabber
- Repositionable spray adhesive (optional, for stencil)
- Rubbing alcohol
- Oven
Step-by-Step Directions
- Clean the mug with rubbing alcohol.
- Position the stencil around the rim or base of the mug, securing it with tape or repositionable spray adhesive.
- Dab red paint onto the cherry parts of the stencil using a sponge brush.
- Clean your dabber or use a new one, then dab green paint onto the leaf/stem parts.
- Carefully remove the stencil while the paint is still slightly wet to avoid crisp edges.
- Allow the paint to dry completely.
- Repeat the process around the mug if creating a continuous border, ensuring alignment.
- Cure the painted mug in the oven as recommended by paint instructions.
Pro-Tip: To avoid chipping paint on mugs or bleeding under the stencil, use minimal paint on your dabber and apply in light, even layers. This technique is beginner ceramic painting friendly for achieving uniform cherry design on your painted mugs cherry.

8. Try a Stylized Cherry Pattern Wrap

Wrap your mug in style: A vibrant cherry pattern painted mug for every sip!
Moving from borders to full coverage, a stylistic cherry ware design transforms the entire surface of the vessel. By creating a repeating cherry design mug pattern, you treat the ceramic mug as a textile, wrapping it in cute cherry pattern hand painted mugs motifs. This comprehensive approach ensures that the design enhances mug aesthetics from every angle, creating a true statement piece.
Supplies Needed
- Clean ceramic mug
- Food-safe ceramic paint in red, green, and optional outline color
- Fine-tip paint brush or ceramic paint pen
- Pencil or ceramic marker for initial design
- Optional: Transfer paper or a repeating stencil
- Rubbing alcohol
- Oven
Step-by-Step Directions
- Clean the mug surface thoroughly.
- Sketch a repeating cherry pattern directly onto the mug or transfer a design using transfer paper. Ensure the pattern connects seamlessly around the mug.
- Fill in the cherry shapes with red paint and leaves with green. Allow each color to dry before applying the next to prevent bleeding.
- Optionally, outline the cherry and leaf shapes with a black or contrasting ceramic paint pen for a defined look.
- Continue the pattern until the desired area of the mug is covered.
- Allow all paint to dry completely.
- Cure the painted mug in the oven according to paint instructions, making it a durable painted mug.
Pro-Tip: For a flawless cherry pattern wrap, consider marking subtle grid lines on your mug with a ruler and pencil before you design cherry mugs. This helps maintain consistent spacing and size for your repeating elements, preventing paint damage from misaligned patterns.

9. Craft a Textured Cherry Silhouette Mug

Discover depth: A textured cherry painted mug silhouette for unique charm!
Texture adds a new dimension to painted mugs cherry, moving beyond visual appeal to tactile interaction. Using specialized mediums to create a textured cherry silhouette, this design offers a rustic look and a bold cherry pattern. The raised effect proves that ceramic allows customization not just in color, but in feel, resulting in a custom painted design that feels richer in the hand.
Supplies Needed
- Clean, matte ceramic mug
- Food-safe ceramic texture paint or ceramic paint mixed with a texture medium (red or black)
- Small palette knife or stiff-bristled brush
- Cherry-shaped stencil (optional, for perfect shape)
- Rubbing alcohol
- Oven
Step-by-Step Directions
- Clean the mug surface thoroughly.
- Sketch or use a stencil to outline your desired cherry silhouettes on the mug.
- Apply the ceramic texture paint (or paint mixed with medium) within the outlines using a palette knife or stiff brush. Build up the paint in small layers to create a raised effect.
- Allow each layer to dry partially before adding the next to prevent sagging.
- Gently shape the edges while the paint is still wet, if needed, for crispness.
- Allow the paint to dry completely (may take longer due to thickness).
- Cure the painted mug in the oven according to the specific texture paint’s instructions.
Pro-Tip: When crafting textured cherry silhouette designs for your painted mugs cherry, work in thin layers to prevent cracking during the curing process. This creates a chip-resistant mug with a unique tactile element, improving mug longevity.

10. Incorporate Gold or Silver Accents with Cherry Motifs

Elevate your sips: Painted mugs cherry with luxurious gold accents!
For those seeking sophisticated cherry mugs for special occasions, integrating metallic paints adds undeniable luxury. By combining organic fruit shapes with elegant gold or silver metallic accents, you create elegant cherry mugs where design reflects style. This artistic flair transforms a standard vessel into a piece of hand painted cherry mug jewelry.
Supplies Needed
- Clean ceramic mug
- Food-safe ceramic paint in red, green, and metallic gold or silver
- Fine-tip paint brushes or metallic ceramic paint pens
- Rubbing alcohol
- Oven
Step-by-Step Directions
- Clean the mug thoroughly.
- Paint your base cherry design (clusters, outlines, etc.) using red and green paints. Allow to dry completely.
- Apply gold or silver metallic paint as accents. This could be a thin line around the rim, subtle veins on the leaves, small dots around the cherries, or a delicate metallic stem.
- Use a fine-tip brush or ceramic paint pen for precision with metallic details.
- Allow all paints to dry completely.
- Cure the painted mug in the oven according to paint instructions. Note: Some metallic paints may not be microwave safe even after curing.
Pro-Tip: Always check if your chosen metallic ceramic paint is labeled microwave safe mug after curing if you plan to use it daily. For elegant cherry mugs with metallic accents, a little goes a long way – subtle details often provide the most impact.

11. Explore a Negative Space Cherry Design

Clever and chic: A negative space cherry painted mug for a modern twist!
The final technique employs a clever inversion: the negative space cherry design. Instead of painting the fruit, you paint the background, leaving the ceramic mug color to define the unique cherry design. This advanced method results in modern cherry mugs that feel incredibly high-end and deliberate, showcasing how custom painted finish techniques can redefine artistic cherry mugs.
Supplies Needed
- Clean ceramic mug (plain white or a solid base color)
- Food-safe ceramic paint in a contrasting solid color (e.g., red if mug is white, or white if mug is red)
- Detail paint brush
- Craft knife or stencil cutter
- Adhesive vinyl or low-tack painter’s tape
- Rubbing alcohol
- Oven
Step-by-Step Directions
- Clean the mug thoroughly with rubbing alcohol.
- Cut out cherry shapes (cherries, stems, leaves) from adhesive vinyl or painter’s tape.
- Carefully apply these cut-out shapes to the mug where you want the “unpainted” cherries to appear. Press down firmly to seal the edges completely.
- Paint the entire mug surface around the applied shapes with your contrasting food-safe ceramic paint. Apply in thin, even coats.
- Allow the paint to dry to a tacky stage, but not fully dry.
- Carefully peel off the vinyl or tape stencils to reveal the negative space cherry design.
- Allow the remaining painted areas to dry completely.
- Cure the painted mug in the oven according to the paint instructions to ensure a fade-proof design and dishwasher safe mug.
Pro-Tip: The key to a clean negative space cherry design for your painted mugs cherry is to ensure the vinyl or tape is perfectly adhered, especially along the edges. Using a small burnishing tool to seal the edges can prevent paint damage from bleeding.

Key Takeaways: Your Quick Guide to Painted Mugs Cherry
Before you start your creative journey with painted mugs cherry, here is a quick summary of the essential points to ensure your DIY painted mugs are both beautiful and long-lasting. Whether you are crafting a hand painted cherry mug for yourself or as a gift, these core principles are your roadmap to success.
- Always use food-safe, oven-bake ceramic paints for painted mugs cherry to ensure durability and safety. This is crucial for creating dishwasher safe mug and microwave safe mug designs that last.
- Preparation is key for lasting designs; clean your ceramic mug thoroughly with alcohol before painting. This prevents paint peeling off mugs and ensures optimal adhesion.
- Experiment with various cherry design mug styles from classic clusters to modern negative space for unique results. Each technique offers a distinct custom painted finish and aesthetic.
- Curing your hand painted cherry mug in the oven according to paint instructions is essential for fade-proof design and long-term use. Proper curing prevents chipping paint on mugs.
- Personalize your painted mugs cherry with monograms, quotes, or unique color palettes to create thoughtful, personalized mug gift items. This transforms them into truly unique cherry mugs.
- Consider texture paints or metallic accents to add an artistic flair and sophisticated touch to your painted drinkware. Always verify microwave safe status with metallic paints.
People Also Ask About Painted Mugs Cherry
When diving into the world of painted mugs cherry, several questions often arise regarding safety, durability, and technique. To help you navigate these common concerns, we have compiled authoritative answers to the most frequently asked questions about hand painted cherry mugs and ceramic customization.
What kind of paint should I use for painted mugs cherry?
For painted mugs cherry, you must use food-safe, oven-bake ceramic or porcelain paints that are specifically designed for glassware and ceramics. These paints, often labeled as non-toxic paint, adhere permanently to the mug’s surface when cured in a conventional oven, making your hand painted cherry mug durable and safe for contact with food and beverages. Brands like Pebeo Porcelaine 150 or FolkArt Enamel are popular choices recommended by experienced ceramic artists.
Are painted mugs cherry dishwasher and microwave safe?
Many painted mugs cherry made with oven-bake ceramic paints can be dishwasher safe mug and microwave safe mug after proper curing, but always check the specific paint manufacturer’s instructions. Some metallic paints or glazes may still not be microwave safe, even if cured. Hand-washing is generally recommended for handmade cherry mugs to extend their mug longevity and prevent paint damage.
How do you make painted mugs cherry designs permanent?
To make painted mugs cherry designs permanent, they must be properly cured by baking in a conventional oven after the paint has dried completely. The heat from the oven sets the ceramic paint, creating a durable painted mug finish that resists chipping and fading, ensuring a fade-proof design. Follow the paint product’s detailed care instructions precisely for recommended temperatures and baking times.
What type of ceramic mug is best for painting?
Smooth, clean, and unglazed ceramic mug blanks are best for painting painted mugs cherry as they provide an ideal surface for paint adhesion. While any ceramic can technically be painted, choosing a high-end ceramic mug ensures a better foundation. Avoid mugs with existing glazes that might repel the paint or textured surfaces that make detail work difficult.
How long does ceramic paint take to dry on mugs?
The drying time for ceramic paint on painted mugs cherry typically ranges from 1 to 24 hours, depending on the specific paint brand, thickness of application, and humidity. It’s crucial to allow each layer of paint to dry thoroughly before adding more or curing the hand painted ceramic mug to prevent smudging or chipping paint on mugs issues. Always consult the paint manufacturer’s drying recommendations.
Can I use regular acrylic paint to paint cherry mugs?
No, you should not use regular acrylic paint to paint painted mugs cherry intended for use, as it is not food-safe or durable enough for regular washing. Regular acrylics will wash off and are not safe to drink from. Always opt for food-safe ceramic paint or enamel paint specifically formulated for ceramics that can be oven-cured for a durable painted mug finish.
How do I correct mistakes when painting cherry designs on mugs?
To correct mistakes when painting cherry design mugs, immediately wipe away wet paint with a damp cloth or cotton swab. If the paint has dried, you can gently scratch it off with a craft knife or use rubbing alcohol on a cotton swab. Prompt correction helps avoid inconsistent mug designs and ensures a clean custom painted design.
What materials do I need to start painting my own cherry mugs?
To start painting your own painted mugs cherry, you’ll need clean ceramic mug blanks, food-safe ceramic paint in red and green, fine-tip paint brushes or ceramic paint pens, rubbing alcohol for cleaning, and a conventional oven for curing. Optional supplies include stencils, masking tape, and a clear ceramic glaze for added protection and glossy finish.
How can I ensure the cherry designs don’t fade over time?
To ensure your painted mugs cherry designs don’t fade over time, proper curing in the oven is paramount. Additionally, using high quality materials, such as reputable food-safe paint brands, and hand-washing your hand painted cherry mug instead of using the dishwasher will significantly contribute to its mug longevity.
What are some common problems when DIY painting mugs cherry and how to avoid them?
Common problems when DIY painted mugs include chipping paint on mugs, fading mug designs, paint not adhering to ceramic, and inconsistent mug designs. Avoid these by thoroughly cleaning the mug before you apply paint to ceramic, using only tested for durability and food-safe ceramic paint designed for oven curing, and allowing adequate drying time between coats and before baking.
Final Thoughts on Painted Mugs Cherry
Creating your own painted mugs cherry designs is a profoundly rewarding and accessible way to infuse personal style into your daily routine or craft truly memorable personalized mug gift items. From classic red clusters to chic minimalist outlines and advanced textured silhouettes, the eleven DIY design ideas presented here offer a spectrum of creativity for every skill level. We’ve equipped you with the knowledge to select the right food-safe ceramic paint, master essential techniques for hand paint ceramic, and ensure your handmade cherry mugs are not only beautiful but also dishwasher safe mug and durable for years to come.
Embracing the journey of paint cherry mugs allows you to transform ordinary ceramic into unique hand painted works of art, addressing common challenges like chipping paint on mugs with expert guidance on proper curing and material selection. Remember, patience with drying times and attention to detail during application are key to achieving vibrant red cherries and lasting designs. With each brushstroke, you’re not just decorating a mug; you’re crafting an experience and a piece of artistic cherry ware that reflects your unique vision.
So, gather your supplies and let your creativity blossom. Which of these painted mugs cherry design ideas will you try first to add a touch of custom painted design to your kitchen or surprise a loved one with a bespoke gift?
Last update on 2026-04-27 / Affiliate links / Images from Amazon Product Advertising API