Tired of bold colors and high-maintenance manicures? There’s a reason why so many are turning to the timeless elegance of short nude nails. This simple choice delivers a powerful statement of sophistication and ease.
Short nude nails are a timeless manicure choice known for their chic, understated elegance and versatility. They are popular because they elongate the fingers, match any outfit, and provide a polished, professional look suitable for any occasion, embodying the popular ‘clean girl’ and ‘quiet luxury’ aesthetics. This style is low-maintenance and always looks sophisticated.
Drawing from established best practices and current beauty trends, this guide will show you how to achieve the perfect nude manicure. We’ll explore seven classy designs, from the ultimate classic to subtle nail art. Get ready to discover your new favorite go-to look.
Why Are Short Nude Nails the Ultimate Symbol of Chic Sophistication?
In a world of fleeting trends, short nude nails stand out as a symbol of enduring elegance and practicality. Their popularity is deeply connected to the rise of overarching lifestyle aesthetics like the clean girl aesthetic and the quiet luxury nails movement. These trends champion a minimalist, put-together look that values quality and subtlety over loud statements. A nude manicure short fits this philosophy perfectly, offering a polished and professional appearance that enhances your natural beauty without demanding constant attention. The key to mastering this look lies in understanding color theory. Finding the perfect nude polish for short nails that truly complements a skin tone is the foundational step, transforming a simple manicure into a bespoke statement of class. Before diving into designs, take a moment to look at the veins on your wrist. If they appear more blue, you likely have cool undertones, while greener veins suggest warm undertones. This simple trick will be your guide to finding your perfect shade.
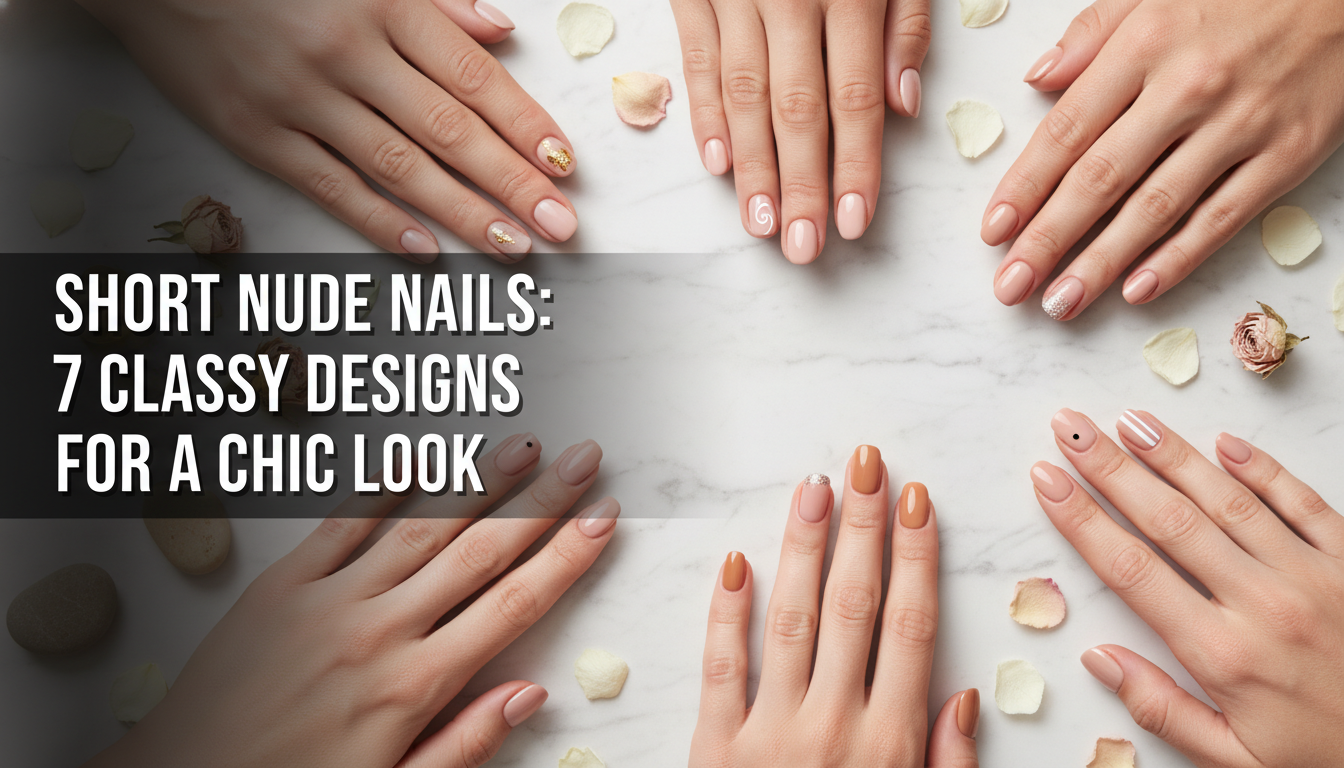
7 Classy Short Nude Nail Designs for a Chic 2026 Look
Ready to find your signature style? Exploring different nude short nail designs is the perfect way to personalize this classic look. Whether you’re a minimalist at heart or love a touch of glamour, there’s a design that will feel uniquely you. This list covers everything from the foundational classic manicure style to easy, elegant nail art you can request at your next appointment or even try at home. We will break down each design with the tools you need and a step-by-step guide to achieving a flawless finish, proving that minimalist short nails are anything but boring.
1. Achieve the Perfect Classic Sheer Nude

Pin this timeless look to your ‘Nail Goals’ board!
This is the quintessential clean nude nails look—effortless, elegant, and eternally chic. It’s the perfect choice for anyone wanting a ‘your-nails-but-better’ finish that looks pristine and professional. The secret to achieving this natural short nails style is selecting a translucent polish and applying it with care to avoid streaks, resulting in a flawless, glossy finish that provides a clean look.
Products & Tools Used
- Nail Cleanser (Isopropyl Alcohol)
- Lint-Free Wipes
- pH Bonder / Dehydrator
- A high-quality, self-leveling base coat
- Translucent Nude Gel Polish (e.g., a sheer pink or beige that complements your skin tone)
- High-Shine, No-Wipe Top Coat
- UV/LED lamp
- Cuticle Oil
Application/Styling Steps
- Prep: Shape your nails and gently push back cuticles. Cleanse the nail plate with cleanser on a lint-free wipe to remove oils.
- Apply Dehydrator: Brush on a layer of pH bonder or dehydrator to the natural nail.
- Base Coat: Apply a thin, even layer of base coat, making sure to seal the free edge. Cure under your UV/LED lamp for the recommended time (usually 30-60 seconds).
- First Nude Layer: Apply your first layer of sheer nude polish. Keep it very thin to avoid pooling. Cure completely.
- Second Nude Layer: Apply a second thin layer to even out the color for that perfect natural nail look. Cure again.
- Finish: Seal the manicure with a high-shine top coat, again capping the free edge. Cure for the final time.
- Moisturize: Finish by applying cuticle oil to nourish the skin around your nails.
Pro-Tip: For a flawless, hyper-realistic look, avoid opaque, chalky nudes. A polish with a slightly jelly or translucent quality will always look more natural and be more forgiving of minor application imperfections, preventing a streaky application.

2. Modernize with a Nude Micro French Tip

Save this chic Micro French idea for your next salon visit!
The Micro French is the modern, subtle answer to the classic nude french tip. Perfect for short square nails, this minimalist nude nail art features a razor-thin white line that offers a chic, barely-there detail. It’s a design that enhances natural beauty with a contemporary twist, proving that even the most delicate details can make a significant impact.
Products & Tools Used
- Your preferred nude base color (sheer or opaque)
- A highly pigmented, pure white gel polish
- An extra-long, ultra-thin nail art liner brush (5mm or 7mm is ideal)
- A small palette or piece of foil
- All other items from the Classic Sheer Nude list (base, top coat, etc.)
Application/Styling Steps
- Prep & Base: Follow steps 1-4 from the first design to prep your nails and apply and cure your nude base color.
- Dispense White Polish: Place a small drop of the white gel polish onto your palette.
- Load the Brush: Dip just the very tip of your liner brush into the white polish. You need very little product.
- Paint the Tip: Brace your hand on a table for stability. Start from one side of the nail’s free edge and gently drag the brush across to the other side in one smooth motion. Don’t press down; let the brush do the work. The goal is a line that is barely there.
- Cure: Once you are happy with the thin line, cure under your UV/LED lamp.
- Seal & Finish: Apply your top coat over the entire nail to seal the design, and cure. Finish with cuticle oil.
Pro-Tip: The key to a professional manicurist-level Micro French is control. Instead of moving the brush, try holding the brush steady and rolling your finger against the bristles. This E-file technique-inspired motion can create a more consistent and perfectly straight line.

3. Create a Seamless Nude Ombre Fade

Pin this dreamy ombre design for a soft, elegant look!
For a soft, sophisticated gradient effect, a seamless nude ombre nails short length design is a perfect choice. This style, especially beautiful on short almond nails, creates a gentle fade from a lighter tip to your nude base, a technique that visually elongates fingers. The key is to blend the colors patiently for a smooth, seamless transition.
Products & Tools Used
- A natural, fleshy nude gel polish for the base
- A lighter, milky white or pale pink gel polish for the tip
- A small, disposable makeup sponge
- A palette or piece of foil
- Liquid latex (optional, for cleanup)
- All other items from the Classic Sheer Nude list
Application/Styling Steps
- Prep & Base: Prep the nail and apply and cure one coat of your primary nude base color over the entire nail.
- Apply Polish to Sponge: On your palette, paint a stripe of the nude base color and a stripe of the lighter color right next to it, slightly overlapping.
- Load the Sponge: Dab the makeup sponge directly down onto the polish stripes a few times to blend the colors at the seam.
- Apply to Nail: Gently dab the sponge onto your nail. The lighter color should be at the tip, and the nude should be at the cuticle. The first layer will look sheer; this is normal.
- Cure: Clean up any polish on your skin. Cure the thin ombre layer.
- Repeat & Finish: Repeat steps 3-5 for a second (and maybe third) layer until the gradient is smooth and opaque enough for your liking. Apply your top coat to smooth everything out, cure, and finish with cuticle oil.
Pro-Tip: After your final cured ombre layer but before your top coat, you might notice a slightly bumpy texture. To solve this, gently go over the nail with a fine-grit buffer to smooth the surface, then wipe with cleanser. This salon-grade trick ensures your final top coat is glassy and perfect.

4. Embrace Understated Cool with a Modern Matte Finish

Need a cool-girl update? Pin this matte nude nail idea!
Switching your top coat is the easiest way to transform your manicure. Matte short nude nails offer a modern, velvety alternative to the traditional high-shine look. This finish is particularly striking with an opaque nude on short round nails, creating an edgy yet sophisticated vibe that suits all seasons and elevates any look.
Products & Tools Used
- An opaque nude gel polish in your preferred shade (beige, tan, taupe)
- A high-quality velvet or matte gel top coat
- All other items from the Classic Sheer Nude list
Application/Styling Steps
- Prep & Base Color: Prep your nails and apply two coats of your chosen opaque nude color, curing after each layer as usual.
- Crucial Step – Wipe the Color: Before applying the matte top coat, take a lint-free wipe with a bit of nail cleanser and wipe the cured color layer. This removes the sticky inhibition layer and prevents the matte top coat from looking uneven.
- Apply Matte Top Coat: Apply a thin, even layer of your matte top coat. Be meticulous, ensuring you cover the entire nail surface and cap the free edge.
- Final Cure: Cure the matte top coat for the recommended time (sometimes matte top coats require a longer cure, like 60-90 seconds).
- Check the Finish: Once cured, the nail should be completely non-sticky and have a velvety, non-reflective finish. Finish with cuticle oil, being careful to only apply it to the skin, not the nail itself.
Pro-Tip: Matte nails can sometimes pick up oils from lotions or makeup, losing their flat finish. To refresh them, simply wipe the nail with a lint-free wipe and a bit of isopropyl alcohol. This will instantly remove the shine and restore the original matte look, addressing the long-lasting finish problem.

5. Add a Single, Chic Dot Accent

The easiest nail art ever! Pin this minimalist dot design.
This is the peak of minimalist nude nail art for short nails. A single, perfectly placed dot is one of the most easy nail designs you can do, yet it looks incredibly intentional and chic. It’s a simple way to spice up basic nude nails without committing to a complex design, proving that sometimes the most subtle details have the biggest impact.
Products & Tools Used
- Your favorite opaque nude gel polish
- A contrasting color for the dot (black, white, gold, or even a neon)
- A dotting tool (or the end of a bobby pin/toothpick in a pinch)
- A palette or piece of foil
- All other items from the Classic Sheer Nude list
Application/Styling Steps
- Prep & Base: Prep the nail and apply and cure two coats of your nude base color.
- Dispense Dot Color: Place a tiny drop of your contrasting polish color onto your palette.
- Load the Tool: Dip the end of your dotting tool straight down into the polish.
- Place the Dot: Decide on your placement. For a modern look, place the dot centered near the cuticle line. Gently touch the tool to the nail, holding it perpendicular for a perfect circle. Do not press or drag.
- Cure: Immediately cure the nail to prevent the dot from spreading.
- Seal & Finish: Apply your top coat over the entire nail, cure, and finish with cuticle oil.
Pro-Tip: The size of your dot matters. A smaller dot placed near the cuticle reads as more delicate and chic, while a larger dot in the center of the nail can feel more playful. Use a dotting tool set with multiple sizes to experiment and find your favorite understated look.

6. Add a Touch of Glam with Gold Foil Accents

Perfect for a special occasion! Pin this nude + gold foil idea.
For a touch of effortless glamour, short nude nails with gold accents are unmatched. This look is perfect for elevating a simple nude manicure for special events, making it a popular choice for classy short nude nails for weddings. Using foil flakes adds a beautiful, textured, and elegant element that catches the light in the most sophisticated way.
Products & Tools Used
- Your preferred nude gel polish
- Gold (or rose gold) nail foil flakes
- A pair of fine-point tweezers or a wax-tipped pen
- Base Coat & Top Coat
- All other items from the Classic Sheer Nude list
Application/Styling Steps
- Prep & Base: Prep your nails and apply and cure two coats of your nude base color. Do NOT wipe the sticky layer after the final color coat.
- Pick Up Foil: Use your tweezers to pick up small, individual flakes of the gold foil. Less is more.
- Place the Foil: Gently place the foil flakes onto the sticky layer of the cured polish. You can cluster them near the cuticle, scatter them, or create a cascade down one side.
- Pat Down: Use a clean finger or a silicone tool to gently pat the foil down so it lays as flat as possible against the nail.
- Cure (Optional): You can do a quick 10-second flash cure to lock the flakes in place.
- Seal & Finish: This is the most important step. Apply a layer of base coat over the foil to encapsulate it and fill in any gaps. Cure it fully. Then, finish with your final layer of high-shine top coat, cure, and apply cuticle oil.
Pro-Tip: The secret to a perfectly smooth foil manicure is the double-seal. Encapsulating the flakes with a layer of base coat before your top coat is a non-negotiable professional manicurist tip. It creates a level surface and prevents the edges of the foil from ever snagging or peeling.

7. Try a Dainty Abstract Swirl

Unleash your inner artist! Pin this abstract swirl nail art.
For those who appreciate an artistic touch, a short nude nails with white swirl design is both unique and beautiful. This style of nude nail art short celebrates freeform, organic lines, providing a personalized touch to a classic manicure style. The beauty of the abstract swirl is its imperfection; each nail can be different, creating a custom set of aesthetic nails that is truly one-of-a-kind.
Products & Tools Used
- Your favorite nude gel polish
- A contrasting color for the swirl (classic white is a great choice)
- A long, thin nail art liner brush
- A palette or piece of foil
- All other items from the Classic Sheer Nude list
Application/Styling Steps
- Prep & Base: Prep your nails and apply and cure two coats of your nude base color.
- Wipe the Base: Gently wipe the cured nude color with a cleanser-soaked wipe. This creates a smooth, non-sticky surface to draw on, giving you more control.
- Create the Swirl: Load your liner brush with the white polish. Start at one side of the nail and paint a single, flowing “S” curve across the nail. Don’t overthink it; the movement should be fluid and organic.
- Vary the Line: Allow the line to vary in thickness. You can gently press the brush down slightly in the middle of a curve to make it wider, then lift up for a thinner line at the ends.
- Cure: Once you are happy with your abstract swirl, cure it fully.
- Seal & Finish: Apply your top coat to seal in the art, cure for the final time, and finish with cuticle oil.
Pro-Tip: Not all polishes are created equal for line work. Look for a polish specifically labeled “painting gel” or “art gel.” These have higher viscosity levels and pigment concentration, meaning they won’t run or bleed, allowing you to create crisp, clean lines with ease.

Key Takeaways
Here’s a quick recap of the most important points to remember for achieving the perfect short nude nails.
- Find Your Undertone First: The secret to classy short nude nails is finding a shade that complements your skin tone. Look for pinky-nudes for cool undertones, peachy-beiges for warm undertones, and versatile taupes for neutral undertones.
- Sheer is Chic, But Prep is Key: For that clean nude nails look, a translucent polish is timeless. The key is applying very thin coats to prevent streaking and ensuring a perfectly prepped and dehydrated nail bed.
- Matte Requires a Special Top Coat: To achieve a true, velvety matte finish, you must use a dedicated matte gel top coat. Remember to wipe the nail with alcohol to refresh the finish if it gets shiny.
- Nail Art Can Be Minimalist: You don’t need complex skills to create nude nail art. A single dot near the cuticle or a delicate, imperfect swirl offers a sophisticated look with minimal effort.
- The Secret to Smooth Accents is a Double Seal: When working with chunky glitter or foil, always encapsulate the accent with a layer of base coat before your final top coat. This professional manicurist tip guarantees a smooth, bump-free finish.
FAQs About Short Nude Nails
What is the best nude nail polish for my skin tone?
The best nude polish complements your skin’s undertones. For cool undertones (blueish veins, skin burns easily), choose nudes with pink or blue bases. For warm undertones (greenish veins, skin tans easily), opt for nudes with peach, yellow, or golden bases. Neutral undertones can wear most shades, but taupe and beige are especially flattering.
What nail shape is best for short nude nails?
A soft square or “squoval” shape is universally flattering for short nude nails. This shape provides a clean, modern look without making fingers appear stumpy. Short round or almond shapes can also work well to create the illusion of length, making them a great choice for those with a very short nail bed.
Are short nude nails professional for work?
Yes, short nude nails are the gold standard for a professional work environment. Their understated, clean, and polished appearance is never distracting and conveys a sense of put-together sophistication. They match any professional attire and are suitable for even the most conservative corporate settings.
Do nude nails make fingers look longer?
Yes, choosing a nude polish close to your skin tone can make your fingers appear longer and more slender. This is because the polish creates an unbroken visual line from your finger to the tip of your nail, an effect that elongates fingers. A sheer or semi-opaque finish often enhances this illusion.
How do I prevent my nude polish from looking streaky?
To prevent a streaky application, apply very thin coats of polish and allow each coat to cure fully. This is especially important for sheer or light-colored polishes. Using a high-quality, self-leveling polish and ensuring your nail plate is properly cleansed and dehydrated before you start also makes a significant difference.
Should I choose a sheer or opaque nude polish?
Choose sheer for a natural, ‘your-nails-but-better’ look and opaque for a more modern, polished statement. A sheer nude is very forgiving and provides a clean look. An opaque nude offers a trendy, ‘mannequin hands’ effect and can make more of a chic, intentional style statement.
How can I spice up my short nude nails?
You can easily elevate short nude nails with minimalist nail art. Try a Micro French tip, a single dot accent, a delicate abstract swirl, or a touch of gold foil. Using a matte vs glossy nude top coat on an accent nail is another subtle way to add texture and interest.
Are matte or glossy nude nails better?
This is a matter of personal style, as both are chic. Glossy nude nails are classic, timeless, and reflect light, which can help elongate fingers. Matte nude nails offer a modern, edgy, and velvety finish that feels very contemporary and aligns with the quiet luxury trend.
Can you have short nude acrylics?
Absolutely. Short nude acrylics are a fantastic option for a durable, perfectly shaped manicure. A technician can create a flawless C-curve architecture and apex placement even on short nails, providing strength and a perfect canvas. This is a great choice if you have brittle nails or want a look that lasts for weeks.
Are short nude nails in style for 2026?
Yes, short nude nails are perpetually in style and remain a top trend for 2026. They are the epitome of the clean girl aesthetic and quiet luxury movements, which prioritize timeless, low-maintenance, and sophisticated beauty. Their versatility ensures they will always be a go-to choice.
Final Thoughts on Your Chic Nude Manicure
Ultimately, short nude nails represent the pinnacle of modern elegance: they are versatile, sophisticated, and endlessly customizable. Whether you opt for a simple, sheer coat that showcases your natural nail look or experiment with minimalist nail art, the foundation remains the same. It’s all about finding the perfect shade that feels like an extension of you and mastering the prep work for a polished, long-lasting finish. This classic manicure style isn’t just a trend; it’s a timeless accessory that empowers you to look and feel put-together every single day. Which of these chic designs will you try first?
Last update on 2026-04-11 / Affiliate links / Images from Amazon Product Advertising API